Home » Food » Page 2

Category: Food

Food. Eaten. Made. Discussed. All gluten-free.

Peanut Butter & Jelly Brownies (Gluten-Free)

Every year, my friend Andi asks for a PB&J themed birthday treat…and one year, I’m terrified that I am going to run out of ideas and have to repeat. Or I’m going to end up making her a peanut butter & jelly sandwich. I threatened her with that option this year and she laughed and told me I’d figure it out…or I could always bring back a winner from the past. (So far we’ve done gluten-free peanut butter & jelly cupcakes and gluten-free peanut butter & jelly whoopie pies.) And you know repeating isn’t an option. I’ve got to keep trying new things.

peanut butter jelly time!

I got lucky this year. A surprise gift from Mammacakes of Jamie Oliver’s Comfort Food gave me a recipe to solve this year’s birthday treat dilemma. Peanut Butter & Jelly Brownies.

Now, I’ve made peanut butter swirl brownies and I’ve made brownies filled with a jelly center. Why I didn’t consider combining the two before Jamie Oliver told me it was not only possible but a good idea, I don’t know. I mean, peanut butter, jelly and chocolate. All amazingly delicious things.

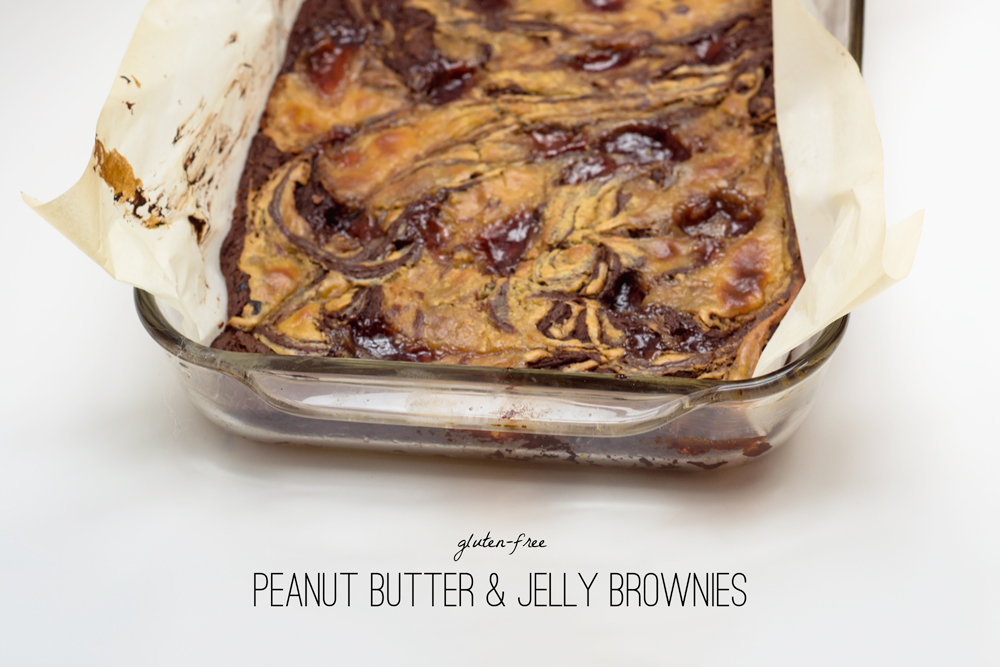
glutenfreepbjbrownies

I mean, look at these babies. Ooey gooey. Rich, dark chocolate decadence. Blobs of jelly popping up.

Oh yes, we have a winner.

Peanut Butter & Jelly Brownies (Gluten-Free)
Recipe Type: Dessert
Author: Jamie Oliver
Prep time: 30 mins
Cook time: 25 mins
Total time: 55 mins
Serves: 12-15
Brownies are one of the easiest items to translate from gluten-full to gluten-free. Simply using your favorite all-purpose blend will get you great results from most conventional recipes. This recipe, adapted from Jamie Oliver’s Comfort Food, is decadent in all the right ways.
Ingredients
  • For the custard
  • 1 cup milk*
  • 1 teaspoon vanilla bean paste
  • 2 large egg yolks
  • 1/4 cup (50 grams) sugar
  • 1 1/2 tablespoons softened butter
  • 1 heaping tablespoon tapioca starch
  • 2 heaping tablespoons peanut butter
  • For the brownies
  • 1 cup (2 sticks) unsalted butter
  • 8 ounces (225 grams) high quality dark chocolate (about 70% cocoa)
  • 1 cup plus 2 tablespoons (225 grams) sugar
  • 4 large eggs
  • 1 cup gluten-free all-purpose flour blend**
  • 1/8-1/4 cup jelly (you don’t have to be super precise about this – you just dot small bits around the top)
  • optional handful of fresh strawberries or raspberries (to match your jelly flavor)
Instructions
Make the custard
  1. In a sauce pan over low heat, combine the milk and the vanilla bean paste. Meanwhile, whisk together your egg yolks and 1/4 cup of sugar with the softened butter and tapioca starch. Once the milk is hot, add it to the egg mixture slowly while continuing to whisk. Pour the whole thing back into the sauce pan and return to the stove. Cook this over low-medium heat for 3-4 minutes – until the custard starts to thicken. Stir in the peanut butter and remove from the heat.
Make the brownie batter
  1. Preheat the oven to 350 degrees. Line with parchment and grease an 8×12″ baking dish. Over medium heat, melt the chocolate and butter together. Make sure you keep stirring slowly and gently until everything is melted. Remove from the heat and stir in the sugar. Next, add the eggs one at a time making sure you fully incorporate one egg before you add the next. Sift in your flour in 2 parts, slowly stirring until it is all combined. You never want to stir to fast or hard because brownies are supposed to be dense and fudgy – over stirring will change the texture.
  2. Pour the brownie batter into your prepared pan. pour the custard over the batter in blobs and swirl the two together. Next, drop small spoonfuls of your jam all around the top. (You can slightly warm your jelly first to make it possible to swirl it if you like.)
  3. These are best made the night before – they fall apart a little when they are too warm.
Notes
*This recipe might not work with non-dairy milk.[br]**I use Cup4Cup gluten-free AP flour, but you can use your favorite blend (as long as it has xantham gum, expandex or other binder already mixed in and isn’t a baking/pancake mix).
3.2.2807


Kitchen Strategies for Cooking for One

Eating and cooking for one is hard work. (I mean, this whole adulting thing is hard – I had broccoli and a protein bar for dinner last night because I just couldn’t bring myself to cook when I got home after dance class).

Food at comes in package sizes designed for people cooking for families – a can of beans is way too much for a one-lady bean salad. Packages of chicken sausage come with 6 sausages. I don’t know about you, but I am never in the mood to eat 6 of the same sausage in a week. Recipes are designed often times to create 4 or more servings. And again, I hate eating the same meal over and over until I run out. Maybe it’s the curse of loving to cook.

1. Reinvent your leftovers

This is one of my favorite things to do. Roast a chicken on Sunday, turn the meat into tacos on Tuesday and curry on Wednesday. Save the carcas and make some bone broth. Make a little extra rice for your curry and make fried rice on Thursday and maybe even a little rice pudding.

I used leftover rotisserie chicken to make a butternut squash and chicken curry.

2. Go to the meat counter

Buy one steak or 1-2 sausages. It’s ok to get just 1/4 of ground meat to make yourself a perfect burger rather than burgers for a crowd. They will even do things like break down a chicken for you or split a pork chop so the cooking time is less.

3. Frozen produce is your friend

It costs less than fresh and lasts much longer. It makes popping together a dinner easy (no prep! always better when you are cooking for one.) Now, I still buy fresh when I can buy 1 pepper or 1 mango, but that 2 pound bag of fresh cherries is probably not a good (economical) purchase, but the bag of frozen ones still make a perfect cherry pie. This is also how I buy the fruit for most of my breakfast smoothies (although, I do make smoothies nearly every day with the help of The Blender Girl’s Smoothie book & app).

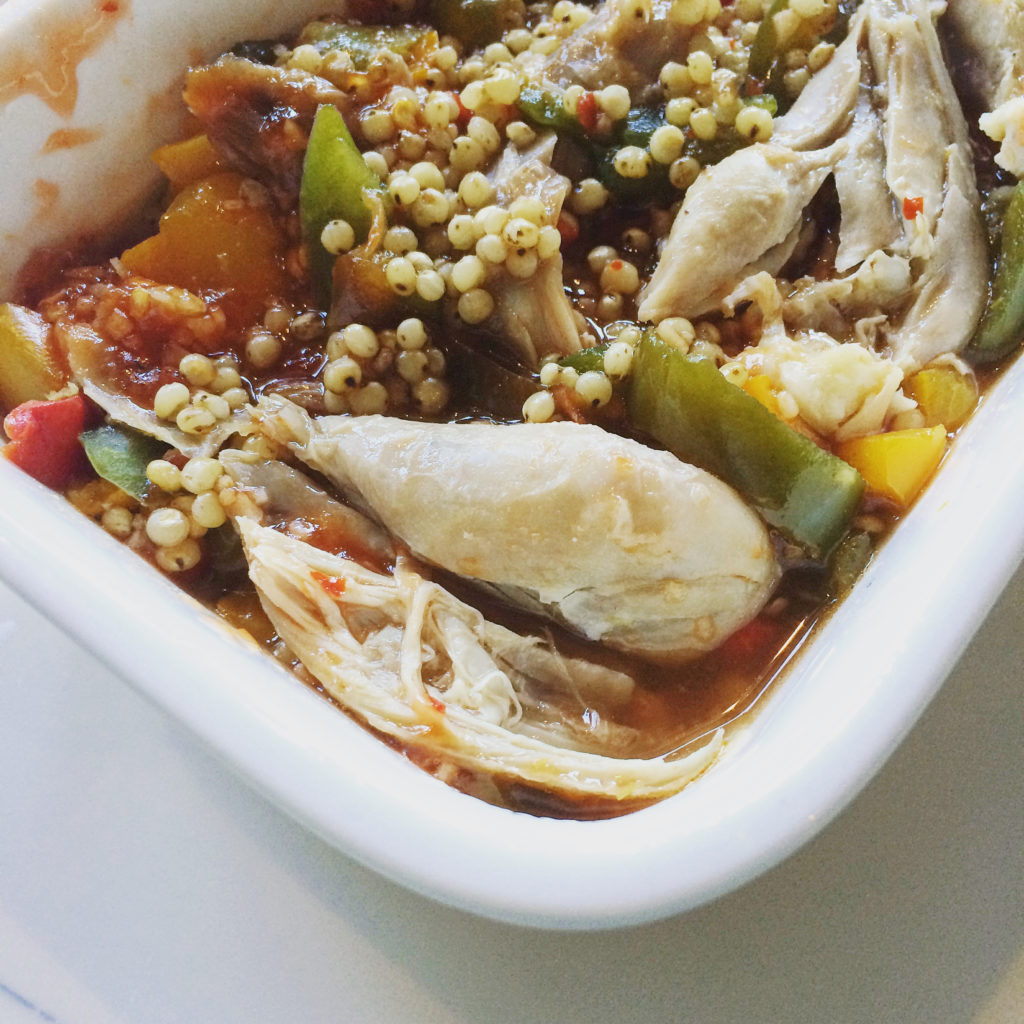
Rotisserie chicken, leftover sorghum, frozen peppers, chili garlic marinade/sauce

You can even use frozen produce to help you reinvent your leftovers into buddah bowls. Toss the leftover grains and proteins in a container, add some frozen veggies and some sauce. By lunch, the vegetables will have thawed and released enough moisture to rehydrate the grains and leave your sauce saucy when you give it a minute or two in the microwave.


4. Pick recipes that use the same ingredients in different ways (and don’t be afraid to halve a recipe)

This is one way that you can make sure that you don’t end up with half a can of chickpeas hanging out in your fridge. This is a reason I love cookbooks so much – they have ways to use ingredients that I might not have thought of before. (It also keeps my phone/iPad out of the kitchen and a safe distance from a hot stove). I’m also not afraid to halve a recipe. Why make 4 serverings when you can make 2? It just requires a little math. Or, you need cannelini beans for a salad but have half a can of chickpeas? Use those instead. Recipes are just guidelines. Feel free to be adventurous!

5. Make and freeze batches of food in single-serve portions

Not going to lie, there is very often a backlog of pancakes in my freezer. I love popping them in the toaster on days I want more than just a smoothie for breakfast or when breakfast for dinner cravings hit.

This strategy can be used for things like meatloaf or quiche- you can bake it in muffin tins rather than loaf pans for easy portioning and freezing (or you can make a full-size version, slice and wrap each slice individually). You’ll have some fast, grab & go meals ready at hand. If you’re less confident with swapping ingredients or shrinking a recipe, this is a great way to make use of your cookbook library or even just use a full can of beans and not wonder how to halve an egg.

cookbooks i'm loving - august 2015

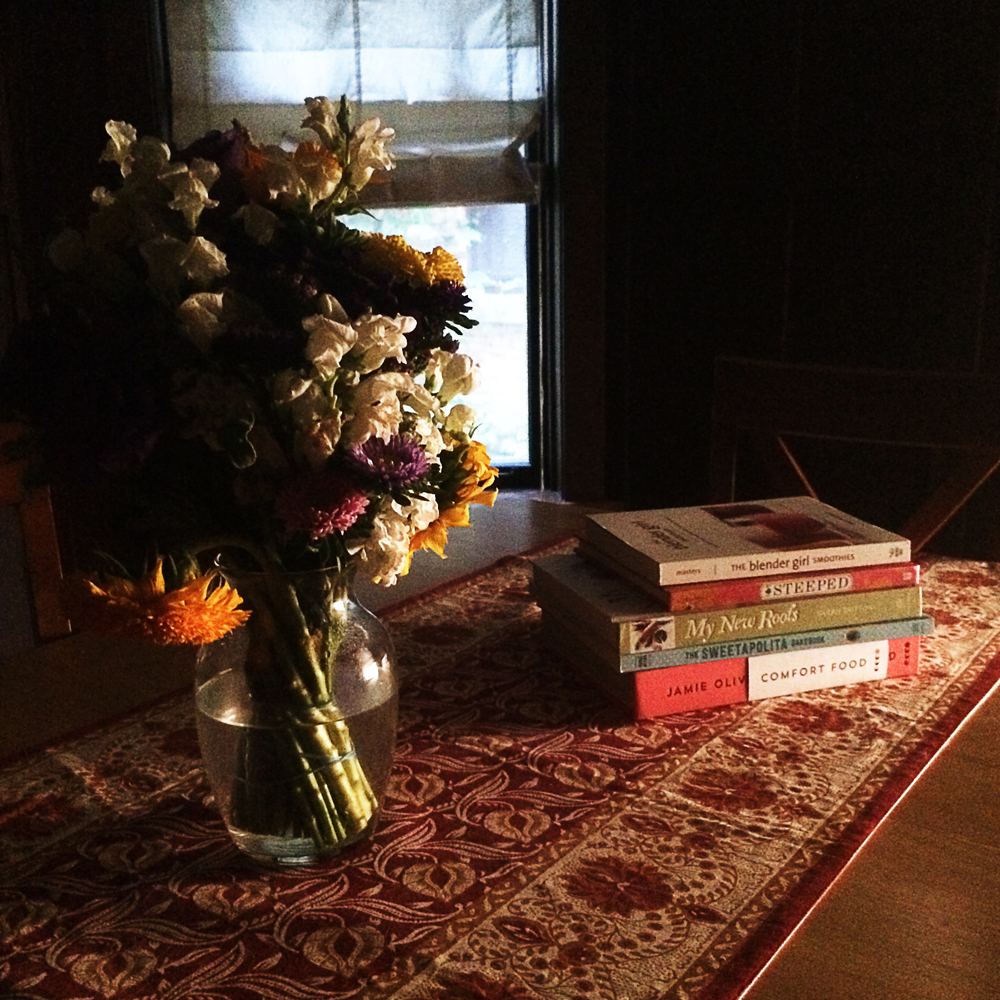
5 Cookbooks I’m loving Right Now

I have a cookbook problem habit. I read them the way so many people read novels and magazines. I mean, have you seen my cookbook shelf?

You know you are a designer when this system of cookbook organization made the most sense.

A photo posted by Mary Fran Wiley (@frannycakes) on May 25, 2014 at 7:44pm PDT

This summer, I have few new cookbooks hanging out that I really am loving. (Even Cecelia the Cat is loving them!)

#ceceliathecat is reading cookbooks today. She particularly approves of @theblendergirl and @anneliesz’s new books

A photo posted by Mary Fran Wiley (@frannycakes) on Jul 19, 2015 at 7:16pm PDT

The Blender Girl Smoothies

by Tess Masters

Tess is a dear friend of mine, and I loved her first book and her app, so I had pretty high expectations for this book. In the few short months it has been out, it has become indispensable in my kitchen. (I make smoothies nearly every morning for breakfast and I need clever ideas to keep me smoothies from getting boring).

Steeped: Recipes Infused with Tea

by Annelies Zijderveld

This book is just beautiful. The photos are beautiful. The words are beautiful. The recipes are delightful. Each recipe infuses the flavor of tea in creative ways. A perfect book for any tea lover, any baker or really, any food lover.

Jamie Oliver’s Comfort Food

by Jamie Oliver

Ok, so it’s been out for almost a year, but Mammacakes bought this book for me a couple weeks ago. It’s pages are filled with recipes that are a bit more involved and not quite suitable for single lady week night dinners, but I can’t wait for an excuse to dive into these recipes. The photos are gorgeous (as expected) and every recipe is begging to be made. (This is not a gluten-free cookbook, so there are some adjustments that need to be made to many – but not all- recipes). The peanut butter & jelly brownies are on my to-bake list.

Sweet Apolita Bakebook

by Rosie Alyea

Another gluten-filled book, this one requires some confidence in baking gluten-free to adapt from (or a bag of Cup4Cup and a mild sense of adventure). But the cakes are just stunning. Most of the recipes are built from a library of items such as cakes, buttercreams and sauces leading to beautiful results.

My New Roots

by Sarah Britton

This stunner is gluten-free and a delight. It is a celebration of fresh, healthy ingredients – but those items look just as good as every single one in the celebration of butter and sugar above. This book inspires (and resembles) the way I cook each and every night for myself. Get it & be inspired to eat better without sacrifice.

cookbooks i'm loving - august 2015

What cookbooks are you loving at the moment? (because you know my collection needs more!)

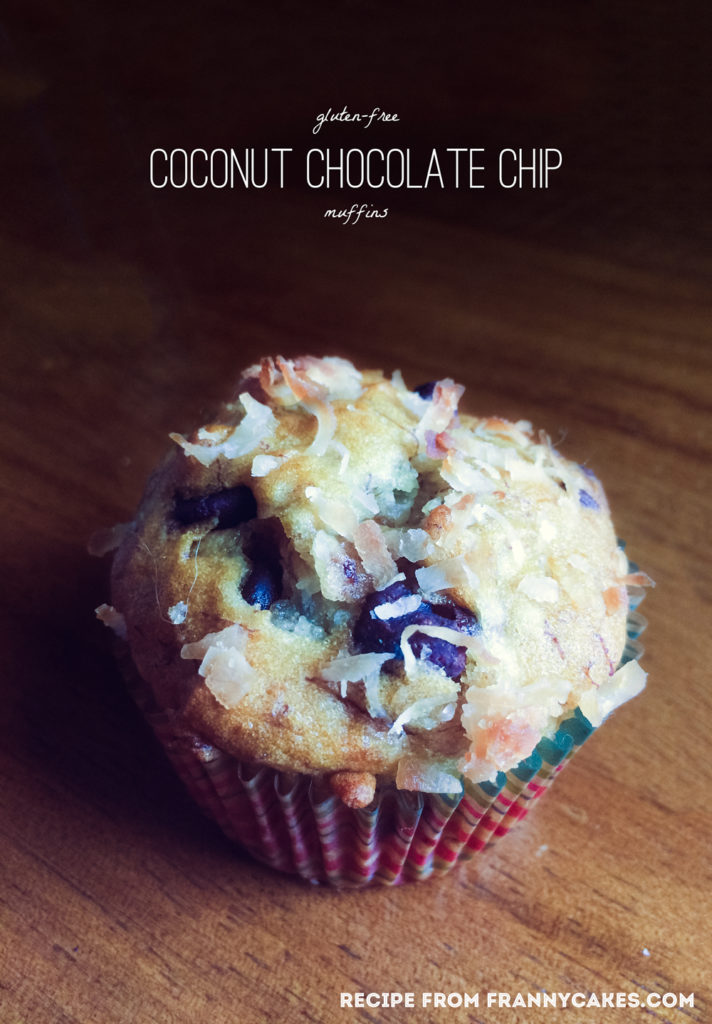
a recipe for gluten-free coconut chocolate chip muffins | from Mary Fran Wiley

Banana Coconut Chocolate Chip Muffins

My kitchen and I have been at odds lately. A place that has been a sanctuary my entire life suddenly started to fill me with dread. I let my brain fill itself with a healthy dose of imposter syndrome and I let the prospect of a pile of dishes convince me it wasn’t worth the effort.

But then Mammacakes had summer break and she started texting me pictures of all the things she was baking for my dad. Muffins. Pies. Cakes. More pies. Quick breads. All the things she taught me how to make. The things we used to bake together from the time I was old enough to stand on a chair and peer into a mixer.

The longing to be back to the whir of Old Faithful and the desire to fill my apartment with the scent of fresh-baked goodness crashed over me like a wave. (Having a nearly too-ripe bunch of bananas was also a bit of an incentive…)

I thought I’d end my baking hiatus with some muffins. Decadent, tasty muffins. Dessert for breakfast.

do you know the muffin man?

Muffins. Simple food. Easy to bake, no mixer required. Infinite possibilities.

the muffin man? - gif from Shrek

They really are a blank slate – ok, and an excuse to make a dessert-like breakfast. (From what I remember of regular, gluten-full muffins, even bran muffins were a sweet treat…although that was 10 years ago…).

gluten-free banana muffins in tray

Scrounging around my kitchen (as one does at 9pm when they decide to bake), I gathered up bananas, coconut flakes and chocolate chips. I was well on my way to some epic cupcakes gluten-free muffins. Except, I was out of sugar. And butter.

I needed muffins. I needed to bake. I had to figure it out and you know they say necessity is the mother of invention. Another perusal of my pantry led me to honey and canola oil. These muffins would not have been such a success had I used the butter and granulated sugar. Can we call it fate? I think so.

Experimenting with coconut banana chocolate chip muffins. Dairy & refined sugar free. #bakefaster

A photo posted by Mary Fran Wiley (@frannycakes) on Jun 14, 2015 at 5:19pm PDT

The unofficial muffin taster gave these muffins high praise (both in person and on the insta).

The recipe makes a dozen muffins and they freeze well, so you can wrap them individually and defrost them any time you need a perfectly decadent breakfast or a breakfast on the run.

a recipe for gluten-free coconut chocolate chip muffins | from Mary Fran Wiley

Gluten-Free Banana Coconut Chocolate Chip Muffins
Recipe Type: Breakfast
Author: Mary Fran Wiley
Feel free to swap out the mix-ins or add to them, but you want to keep the volume about the same. too many more ingredients can cause the muffins to fall apart.
Ingredients
  • 280 grams (2 cups) gluten-free all-purpose flour*
  • 1 teaspoon baking soda
  • 1 teaspoon vanilla extract
  • ½ teaspoon salt
  • ½ teaspoon cinnamon
  • ⅓ cup (80ml) canola oil or melted coconut oil
  • ½ cup (120ml) honey
  • 2 eggs, preferably at room temperature**
  • 1 cup packed mashed ripe bananas (about 3 bananas)
  • ¼ cup unsweetened almond milk***
  • 30 grams (⅓ cup) sweetened coconut flakes, plus some to sprinkle on top
  • 45-55 grams (¼-⅓ cup) chocolate chips****
Instructions
  1. Preheat oven to 325 degrees Fahrenheit (165 degrees Celsius). Line on 12-muffin or 2 6-muffin tins with papers or grease the pans. (I always use papers – they make cleaning up easier)
  2. In a medium sized bowl, whisk together the flour, baking soda, salt and cinnamon.
  3. In a separate large bowl, whisk together the oil, honey and eggs. Make sure you beat it well. Mix in the mashed bananas, milk and vanilla extract.
  4. Add the flour mixture to the wet ingredients and mix with a large spoon until just combined. Stir in your coconut, chocolate chips and any other mix-ins you are using.
  5. Divide the batter evenly between all the muffin cups, filling each cup about two-thirds full (I like using a squeezable ice cream scoop to keep things even and clean). Sprinkle the tops of the muffins with a little spare coconut. Bake muffins for 23 to 25 minutes, or until a toothpick inserted into a muffin comes out clean.
  6. When the muffins are done baking, set the pan on a wire rack and let them cool for 15 minutes. Remove them from the pan and allow to finish cooling on the rack (or eat a few warm…) These will keep for several days in a sealed container or up to 6 weeks in the freezer.
Notes
*I use Cup4Cup gluten-free flour for nearly all my home baking. These muffins will work with the original flour or up to a 50/50 blend of their original flour and wholesome flour blend. If your blend does not include Xanthan gum, add half a teaspoon xanthan gum and half a teaspoon of ground flax.[br]**If you want to make this recipe vegan, a flax or chia egg should work. The result will be a denser muffin that would benefit from letting the batter rest an hour before baking.[br]***I only keep unsweetened almond milk on hand, but any unsweetened non-dairy milk or regular 2% or skim milk will work.[br]****Double check your chocolate chips as not all brands are gluten-free. I always use Enjoy Life chocolate chips to be certain what I am making is safe.
3.2.2807


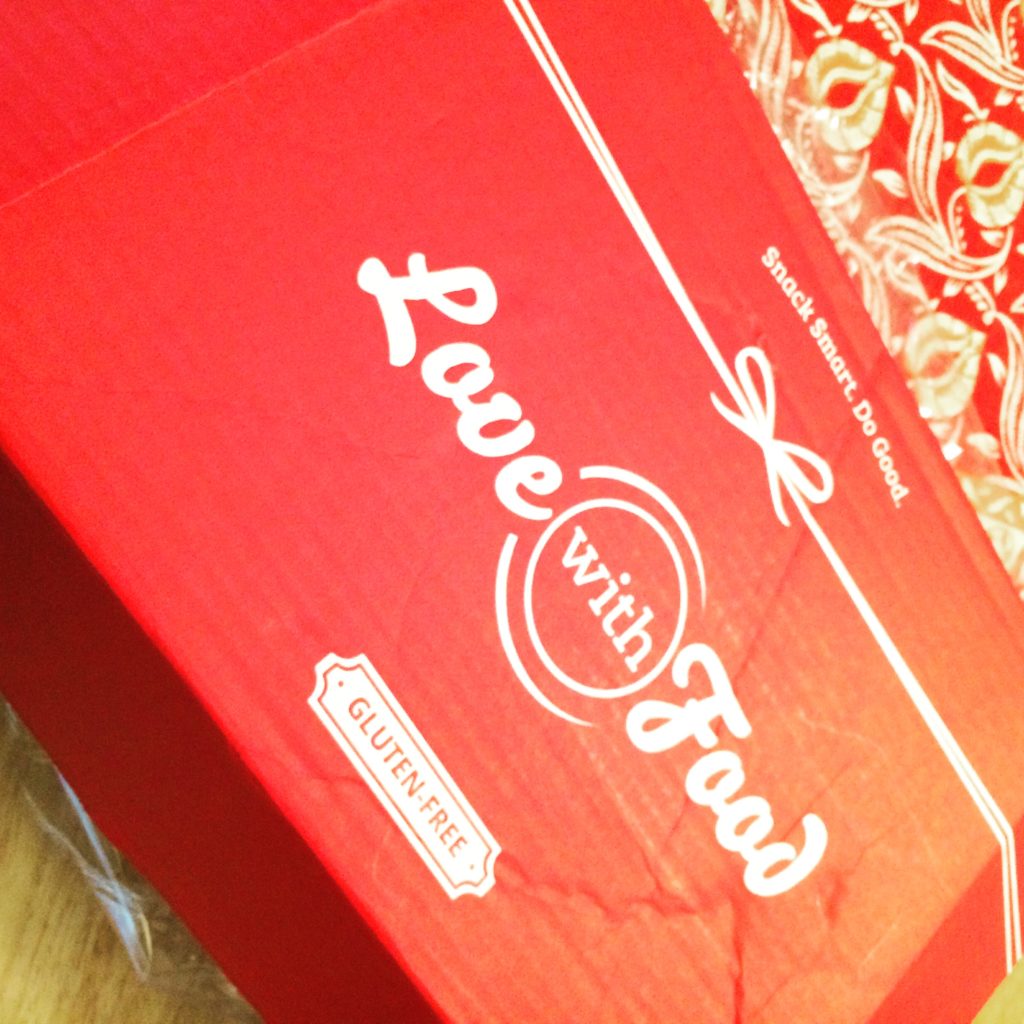
Love with Food Gluten-Free Box

Thinking inside the box: A giveaway from Love with Food (Sponsored Post)

! I was provided a box for free for both myself and as a giveaway. KC from G-Free Foodie / Love With Food also happens to be a dear friend – however, I would not post and share about it if I did not fully support her and think these boxes are awesome. There are also referral links in this post – all those are marked with an asterisk!

I love surprises. I have a subscription box addiction. And I love delicious food. So naturally, I would love a box with gourmet treats finding its way to me every month.

Subscription boxes have really started to take off – I get makeup, workout gear*, razors and even shoes* delivered monthly. And I have wanted a food box in the worst way. My friends get these snazzy boxes of gourmet treats from a variety of sources. Packages of snack food, global treats and gourmet ingredients. For way too long, I had no (or few) options for a truly safe gourmet box.

June Box from Love with Food

Sure, you can get TasteGuru or Send Me Gluten Free if you need safe options. Those are great services that I wish existed when I went gluten-free nearly 10 years ago. These days, those boxes don’t fit what I’m looking for. Those are full of snacks and cooking mixes that would have saved me money on thrown away food. Introduced me to snacks I might never have bought. But the food in them is always safe.  They are a great way to sample all those foods. But that’s what they are. I found them to be filled with foods I knew about or had tried and nothing that embraced my love of cooking.

That’s where the Gluten-Free Box from Love With Food comes in. KC Pomering of G-Free Foodie started a subscription box to fill this need – gluten-free boxes filled with artisanal / gourmet treats. It was a thoroughly awesome box when it started, but now that the box comes from Love With Food, it is even better. I get the same awesome box curated by KC and a meal gets donated. I’d say that’s a win.

Cecelia the Cat is jealous of my Love with Food box!

What comes in the boxes?

I’ve received everything from spice blends and fancy pants tomato paste to spice rubs, pasta and gourmet push pops. I’ve started keeping the tomato and umami paste in my kitchen all the time and using an alcohol free vanilla in my smoothies.

Oh, and you can win a box!

Just leave a comment below and I will pick a winner on June 30,2015 at 11am central time. (You do have to live in the US to win).

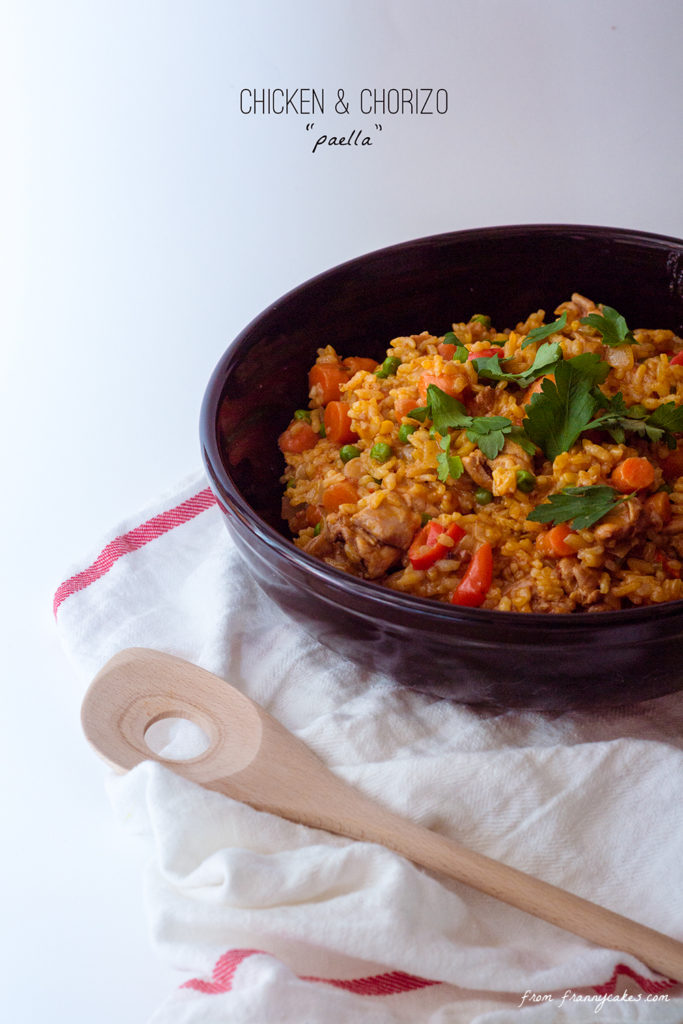
gluten-free chicken chorizo "paella"

Chicken & Chorizo “Paella”

Somehow, adulting* is taking all of my time these days. There seems to be something to do every night. Ballet. Yoga sculpt. Barre. Dance Cardio. Tap. French conversation group. Coffee dates with best friends. Museum dates with mom. Doctors appointments. Lots of doctor’s appointments. Being responsible and doing things like paying bills and negotiating better rates. Fitting in a day job.

*adulting: the tasks and duties of being a grown-up.

These days, there’s not always a whole lot of time to cook special dinners every night. Pasta and jarred sauce or boxed mac & cheese aren’t meals that I should keep as fixtures on my dinner rotation and lunches out add up pretty quickly. So what’s a girl on a budget with high food standards and a crazy schedule to do?

Hint, the answer isn’t decide chocolate is a food group and eat it for dinner. (I keep trying to make it happen, but I fear that its fate is the same as “fetch”…never going to happen).

stop trying to make fetch happen | mean girls

Answer: Maximize cooking productivity

It takes almost the same amount of time to cook a 2 serving batch of a dish like this as it does to cook a 6 serving batch. (It can also be a help for budget cooking – you aren’t wasting half used bunches of herbs). I’m not saying go all once a month cooking crazy (there’s not enough room in a shared apartment freezer for that to be possible), just make a couple extra servings.

Big batch cooking takes the pressure off of busy week nights and even frees you up for impromptu plans because you have backup meals in the freezer. (As a single lady, a big batch of meals to me is a normal-sized batch for a family).

The worst part of big batch cooking is if you eat the same dish for lunch and dinner 3 days in a row. If you can pay attention to your meal inventory, you can make sure that you never run out of options in the freezer and could have 2 or 3 different dishes tucked away at any one time.

“Paella” with chicken & chorizo and not a single creature from the sea. #singleladysupper #foodallergies

A photo posted by Mary Fran Wiley (@frannycakes) on Feb 4, 2015 at 8:40pm PST

One of the meals I keep coming back to (I probably make a big batch every 6 weeks) is a chicken & chorizo paella that I have adapted from Save with Jamie. Now, all that’s “paella” about it is the method and possibly the pan, but it is still darn delicious. The chorizo and paprika give a spicy depth to the dish while the peppers and carrots round out the flavors with a little inherent sweetness. Parsley and a squeeze of lemon brighten the dish.

ingredients in gluten-free chicken & chorizo paella

The dish is pretty fluid and adaptable. Don’t have carrots? Add more peppers. Only 2 chicken thighs? I hear shrimp is good (it isn’t in my version of this dish due to my shellfish allergy).Want more veggies? Double the peas or serve it on a bed of a spicy green like arugula. No arborio rice? Short grain brown rice can be used as well. No parsley? Use chives or scallions in place of the stalks and skip the leaves.

gluten-free chicken chorizo "paella"

I could even see experimenting with different flavor profiles within the framework of this dish. You could easily swap out the chorizo for a different kind of fresh/uncooked sausage (the new Whole Foods in my neighborhood has a variety of fresh sausages) and changing the seasoning and veggies to match.

Chicken & Chorizo “Paella”
Recipe Type: Entree
Author: Mary Fran Wiley
Prep time: 10 mins
Cook time: 30 mins
Total time: 40 mins
Serves: 4-6 servings
This dish is great for making a big ol’ batch and portioning it in the freezer for easy grab & go meals or an excellent (and affordable) dish to be the centerpiece of a laid back potluck with friends. Adapted from one of my favorite chefs, Jamie Oliver.
Ingredients
  • 2 cloves of garlic
  • 1 onion
  • 1 large carrot or a handful of baby carrots
  • 15 g f(4-5 stalks worth) fresh flat-leaf parsley
  • 70 g (2.5 ounces) raw chorizo (or 1/4 of a package of Mexican chorizo
  • 4 skinless, boneless chicken thighs (about a pound or 450 grams)
  • olive oil
  • 1 teaspoon sweet smoked paprika
  • 3 1/4 cups (750 ml) water
  • 1 large red bell pepper or sweet red pepper. You can also use 6-8 mini sweet peppers
  • 1 tablespoon tomato paste*
  • 1 cube chicken stock
  • 300 g (1 1/2 cups) arborio rice
  • 100 g frozen peas (optional)
  • 1 lemon
Instructions
  1. Prepare a mise en place (Gather up and measure out each ingredient, set up your cutting board, knives and pans).
  2. Peel and mince the garlic. Next, peel and roughly chop the onion and carrot.
  3. Remove the leaves from the parsley and set aside. Finely chop the parsley stalks.
  4. Roughly chop the chorizo (you still need to break up the chorizo a little bit if it is the raw mexican kind so that it disperses evenly into the dish) and chicken thighs.
  5. Put a lug of oil into a large lidded shallow casserole or paella pan on a medium heat. Now, add in the garlic, onion, carrot, parsley stalks, chorizo, chicken and paprika. Cook all this for around 5 minutes, stirring regularly.
  6. In a tea kettle or pot over high heat, boil your water.
  7. While it is cooking, deseed and chop the pepper, then add to the pan and cook for an additional 5 minutes.
  8. Stir in the tomato paste and crumble in the stock cube over everything.
  9. Then add the rice and stir for a couple of minutes -this will help all those flavors permeate the rice.
  10. Pour in your boiling water and add a pinch of salt and pepper.
  11. Pop the lid on and cook until it starts to boil, then reduce the heat so your liquid is at a simmer for 15 minutes, stirring regularly. (If it looks like it is about to dry up before the rice is cooked, you can add a splash more water.
  12. If you like peas (or happen to have some hanging out in the freezer from the last time you made mushy peas and need a reason to use them), stir them through (from frozen is fine). Cook for about 5 minutes more – you just want ever
  13. Season to perfection, then chop the parsley leaves, scatter them over the paella, and serve with lemon wedges on the side for squeezing over.
3.2.2807
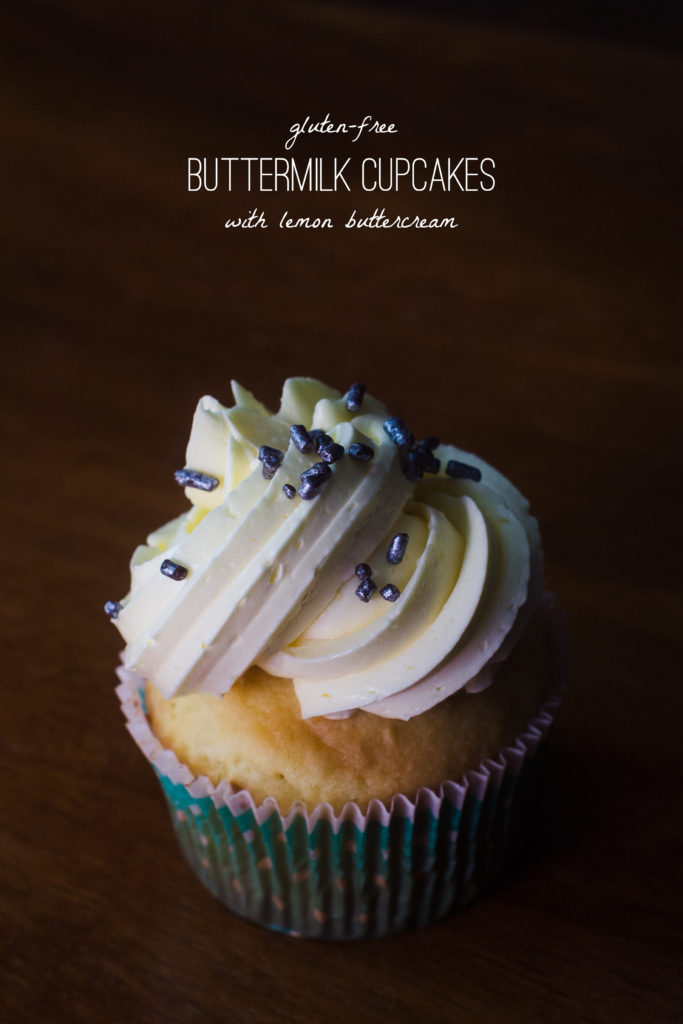
a recipe for gluten-free buttermilk cupcakes

Gluten-free Lemon Buttermilk Cupcakes

Have you missed me? I’ve missed you.

I’ve been busy galavanting around, hiding from my roommate, writing magazine articles and taking ballet. You know, important life stuffs.

(Seriously, go grab a copy of the Spring 2015 issue of Allergic Living, I’ll wait.)

But even more than missing you, I’ve been missing baking. The sweet magic that happens when I spend some time with “Old Faithful” in the kitchen.

I might have a little bit of a love of cupcakes. Delicious, little, personal treats. (I even made a tshirt about it, which you should order).

Frannycakes <3's cupcakes

(Or, sometimes giant ones).

But these cupcakes.

Oh, these cupcakes.

gluten free lemon buttermilk cupcakes

Tender buttermilk cakes. Tangy lemon buttercream clouds. A burst of intense lemon curd at the center. Dainty little bites of sunshine.

That’s a tall order for any cupcake…much less a gluten-free one, but I assure you that these are amazing. So amazing your gluten-eating friends won’t notice that you left it out and your gluten-free comrades will be singing your praises for the best cupcake they have had in ages.

a recipe for gluten-free buttermilk cupcakes

Gluten-free Lemon Buttermilk Cupcakes
Recipe Type: Dessert
Author: Mary Fran Wiley
Prep time: 1 hour
Cook time: 20 mins
Total time: 1 hour 20 mins
Serves: 24
The cake part of this recipe is adapted from Homemade Decadence by Joy Wilson of Joy the Baker.
Ingredients
  • For the cake
  • 560 grams (4 cups) gluten-free flour*
  • 1/2 teaspoon xantham gum*
  • 2 teaspoons baking powder
  • 1 1/2 teaspoons baking soda
  • 1 teaspoon salt
  • 2 sticks butter, softened
  • 400 grams sugar
  • 1 tablespoon vanilla extract
  • 4 large eggs, room temperature
  • 2 cups buttermilk
  • For the Lemon Swiss Merengue Buttercream
  • 8 large egg whites (30g each–total 225g, or 1 cup)**
  • 400 grams (2 cups) granulated sugar
  • The peel of 1 lemon
  • 560 grams (5 sticks) of unsalted butter, softened but cool, cut into cubes
  • 1½ teaspoons pure vanilla extract
  • 2 tablespoons lemon curd
  • ¼ tsp salt
  • Optional
  • Lemon curd to use as filling
  • Sprinkles or lemon zest to decorate
Instructions
Make the cakes
  1. Preheat oven to 350 degrees Fahrenheit. Line cupcake tins with papers. (This recipe makes 24 cupcakes)
  2. In a medium bowl, whisk together your gluten-free flour, xantham gum (if using), baking powder, baking soda and salt.
  3. In the bowl of a stand mixer, beat butter and sugar until light and fluffy (it will take 3-4 mins with softened butter)
  4. Add your eggs one at a time, beating on medium until combined and scraping the bowl after each addition.
  5. Next add half of your flour mixture and mix at medium speed until just combined.
  6. With the mixer on low, add the buttermilk in a slow, steady stream. Raise your speed to medium once all your buttermilk is in and beat for 30 seconds. Scrape down the sides of your bowl.
  7. Add your remaining flour mixture and mix on medium until just combined. You don’t want to overbeat your eggs (it will toughen your cakes).
  8. Fill cupcake pan wells 2/3 full and bake for 16-20 minutes. Cakes are done when the top springs back after a gentle tap.
Make the buttercream
  1. Combine the egg whites, sugar and lemon peel in a small pot until they reach 140 degrees fahrenheit.
  2. Transfer this mixture to the bowl of a stand mixer.
  3. Using the whisk attachment, beat until light and fluffy (soft peaks) and the temperature is neutral – the bowl should not be warm to the touch.
  4. Switch to the paddle attachment and add the butter one chunk at a time until it is all combined.
  5. It might look like it is starting to curdle, don’t panic! It should all smooth out by the time you add the last bit of butter. If it is getting too loose, you can pop it in the fridge for 5 minutes to help it set up.
Assemble
  1. You can use a cupcake corer or a paring knife to cut out a small amount of the center of the cakes, preserving the top of what you take out.
  2. Fill the wells with lemon curd (if using), and replace the tops on the filled holes.
  3. Use a large decorating tip for simple, beautiful swirls. Top with your favorite gluten-free sprinkles or even a bit of lemon zest.
Notes
*I like working with Cup4Cup Gluten-Free All Purpose flour but you can use your favorite blend, as long as it is an all-purpose blend (not bean-based and not a baking or pancake mix). If your blend contains xantham gum, you should omit it.[br]**You can use cartons of egg whites (I do it all the time) but your merengue might not be quite as fluffy because these are pasteurized.
3.2.2807

I don’t accept advertising on FrannyCakes and rarely accept product from brands, so if you enjoy my recipes, please consider supporting FrannyCakes by purchasing a “Cupcakes are my therapy” tshirt.

5 gluten-free/food magazines I’m loving right now

I have a problem. Well, maybe it isn’t so much a problem as it is a deep love. You see, to me, words on a printed page are special. They’re not fleeting like the words on a screen – words that are quickly replaced by newer, shinier versions of themselves. Magazines are for perusing, without the heft of a book and with the promise of even more content on the way. (Oh yeah, and each new issue feels like a little surprise.

Right now, I am falling in love with the artisan/luxe feeling food magazines where the designs of the page are as important as the words and images.

Jamie Magazine ($9.95/issue or $122/year, iPad version available)

jamiemagazine

Jamie Oliver’s magazine has been a favorite of mine since I discovered it on a shelf at a Barnes & Nobel several years ago and was one of the first magazines I ever bought where the pages were a higher quality paper rather than the flimsy glossy pages of most other magazines. And while the content in this magazine isn’t gluten-free specific, the majority of the recipes are usually gluten-free or easily adaptable. As a bonus, this magazine is from the UK, so there are weight measurements for all the recipes which makes conversions and adaptations of baked goods to be gluten-free easy. The best part of this magazine, however are the ideas for simple weeknight meals. Even though I love to cook, during the week life makes spending an hour making dinner feel like an onerous undertaking and the ideas for quick, simple & delicious meals are always appreciated.

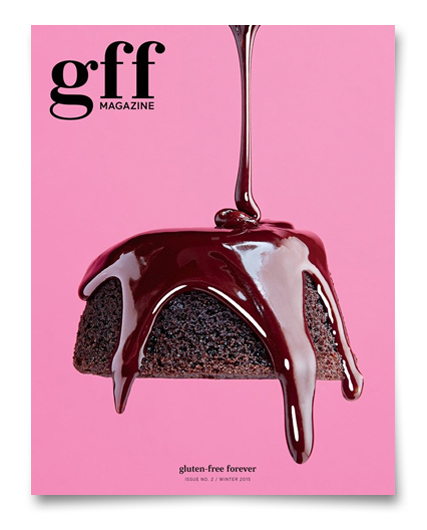
GFF Magazine, $15/issue or $50/year (plus shipping, digital versions available)

gffmagazine

This magazine is brand new on the scene with only 2 issues under its belt, but it is quickly becoming a favorite read each month. The aesthetics of the magazine are those of a high-end food publication and all the food just happens to be gluten-free. Fans of magazines like Kinfolk, Sweet Paul and Lucky Peach will find this magazine feels like a member of that high-end food club with content that just happens to be gluten-free. There’s not a single recipe that wouldn’t be a hit with a gluten-full crowd. I love that this magazine is just about the food, in the crowded gluten-free magazine space that makes this magazine stand out. The subscriber version of the latest magazine looks so good on my coffee table, I am seriously considering buying a print of it to go in my kitchen. Plus, it is a small business run by a couple of uber talented women. What’s not to love?

Cherry Bombe, $20/issue or $38/year

cherrybombe

Another high-end magazine I am currently loving- this one is about women in food. Again, the magazine is printed on high-end paper and almost feels like a book. It is published twice a year and the pages are filled with women doing amazing things in food. I don’t remember quite when I discovered this, but it was after the second issue came out. Because it is published twice a year, the magazine is the longest on the list (which more than justifies its premium price tag). This magazine hits all the right notes when talking about women in food and is significantly less blogger-centric than “Where Women Cook”.

Allergic Living, 19.99/year

allergicliving

Ok, before I go any farther, I have a vested interest in this magazine succeeding because they are the first publication to publish my writing since high school. My article on food allergies & dating is going to be in their spring 2015 issue, so go on and subscribe. Now that that is out of the way, we can get on to the goods. This magazine covers a whole spectrum of food allergy concerns, which I appreciate as a food allergy sufferer. There are articles on treatments, issues and advocacy as well as recipes. There is a little more family-oriented content here, but I learn something new from each issue I read.

Gluten-Free & More (formerly Living Without), $8/issue or $23/year

glutenfreeandmore

This was the first magazine I read when I went gluten-free and has been a staple in my house for years. Gluten-free diets and living with Celiac disease are the main focus of the magazine, but there is a lot of food allergy content as well. The content does feel a bit more geared towards families, but that doesn’t mean it isn’t an enjoyable and informative read. They rebranded recently from Living Without to Gluten-Free and More, which is a more descriptive title (and also not something that could be thought of as negative).


What is your favorite gluten-free or food-centric magazine? (I want to know if I am missing any must-reads!)


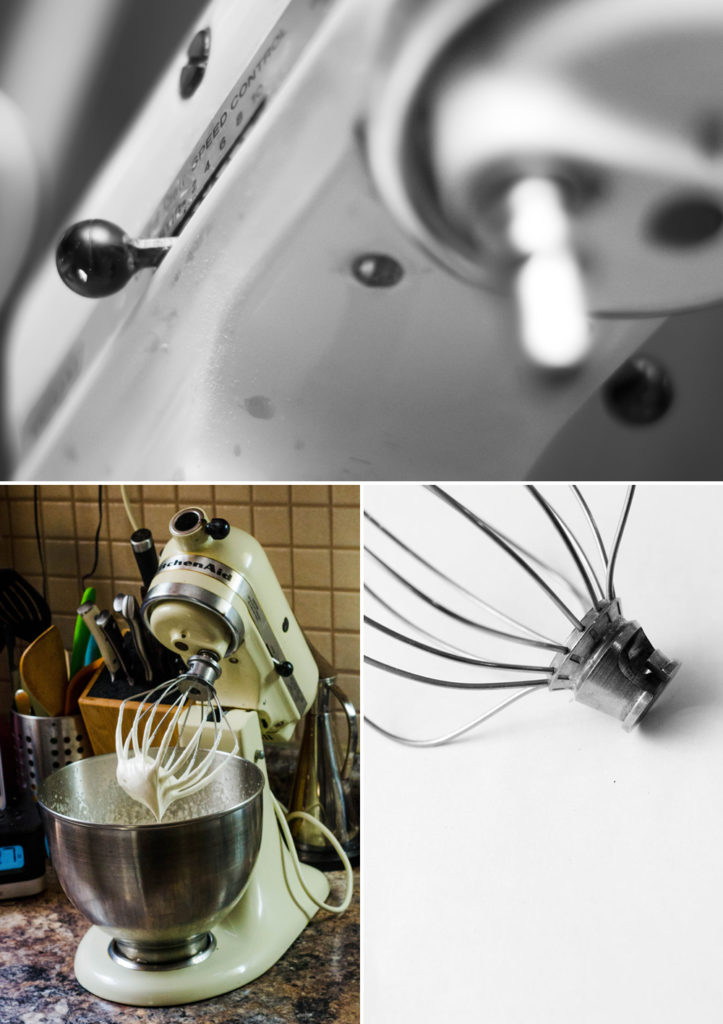
a kitchenaid stand mixer is indispensable in my gluten-free kitchen

5 indispensable small appliances in my gluten-free, single lady kitchen

I want to start this out by saying that there are a gazillion wonderful small appliances out there and I certainly have not tried them all (or even come close). But I find myself going back to the same appliances over and over again, while others make rarer appearances on my counter. I am also looking at products through the eyes of someone with a very small household (a total of 1) with limited counter & pantry space.  A giant espresso machine might be mighty useful in helping me complete my daily caffeine intake and an ice cream maker could make endless delights, I have to prioritize. (Now if my pantry were a Tardis or Mary Poppins’ bag this list might be quite a bit different).

a kitchenaid stand mixer is indispensable in my gluten-free kitchenOld Faithful (A KitchenAid Stand Mixer), $249-$650
This baby is built like a tank and got my mom through nearly 30 years of baking before Dad got her a new one and put it under the Christmas tree with her old one, bows on both. She got an upgrade & I got a work horse. I really don’t know what I would do without a mixer – hand mixers are only good for lighter use. Even making cakes from a mix is easier with a stand mixer. I love KitchenAid mixers for their quality and versatility – I can add a grain mill, a pasta maker, an ice cream bowl and countless other doodads to make the mixer a multi-tasking queen.

Breville Smart Convection Oven, $249.95 at Williams-Sonoma

This is the newest addition to my kitchen, and I think it might be one of the best appliances anyone could have. It’s small size means it preheats quickly and convection settings make for incredibly even baking. During the summer in an apartment without central air, baking anything in the oven is just unbearable and this little guy does the trick without making my kitchen even hotter. It’s also great for reheating leftovers which means your microwave won’t turn your gluten-free pizza to mush, or, for those of us without microwaves, it makes it possible to heat it up without turning on the oven. I did have to get a new set of muffin pans so that they would fit, but it is actually quite roomy for a counter-top oven.

vitamixs30

Vitamix S30, $349.95 at Williams-Sonoma

A blender is a must in any kitchen and a blender that means less dishes for me is always a win in my book. I wanted an easy way to make morning smoothies and I had a couple of criteria: it couldn’t just make smoothies (so a magic bullet was out) and it had to be sturdy. And what do you know, Vitamix was being mighty psychic because they launched the S30 right when I started looking. With the power of a Vitamix and the smaller footprint of this model, it was a no-brainer to include in my small kitchen. And the regular pitcher is just big enough for blending sauces, soups and margaritas.

SodaStream, $79.99-199.99 at SodaStream

This is probably the odd ball here. It isn’t electric and it doesn’t fill a basic need like a coffee maker. What it does do is encourage me to drink more water and gives me a way to enjoy some of the different syrups I experiment with in the summer. It is also a heck of a lot cheaper than buying cases of Lacroix every week (and the trouble of shlepping them on the bus).

Slow Cooker

I asked for a CrockPot for my 21st birthday. An ex bought me one for my 27th birthday (because he had adopted mine while I lived with my parents and I asked for it back when I moved away…he liked it so much he just replaced it). It can make so many things while you sleep or while you work. It makes it easy to make a big batch of something that can be divided up into a couple of lunches. They can be bought for as low as $30 and as much as $300 (Mammacakes has a fancy one where the inner pot can be placed on the stove to brown meat in and then put into the slow cooker to finish cooking away).

Honorable Mentions

Rice Cooker

I use mine to make more than just plain rice. It is actually a great way to make all types of gluten-free grains including sorghum and quinoa. Famous film critic Rodger Ebert even wrote a cookbook all about rice cookers and their versatility. Making a batch of grains on Sunday for healthy buddah bowl lunches during the week saves so much time, and it is a set it and go read a book kind of easy. Wait, who am I kidding. It is set it and drink a glass of red wine easy. 🙂

Coffee Maker

Now that I have one, I don’t know how I lived without one…but I did get by on a kettle and a french press for quite a while. I won’t lie, having hot coffee ready when I wake up is certainly easier than making it in a french press when I can barely open my eyes, but it can be done.

gluten-free chicken tikka masala recipe from frannycakes

Homemade take-out: Chicken Tikka Masala

I am regularly told by friends that they are impressed that I cook myself dinner every night. And every time someone brings it up, I am still surprised. If you don’t make yourself dinner, how do you eat?

I mean, there are nights when I make toast and pile it high with whatever I can rustle up, then I call it a tartine and pretend it is extra fancy. Or I roast some veg and put it on top of leftover rice or quinoa and call it a “whole grain bowl”. What I am really saying is that not every night is a big production – it just feels better to say I made something like that then when I cave and pull out a box of gluten-free macaroni and cheese.

gf chicken tikka masala for #singleladysupper

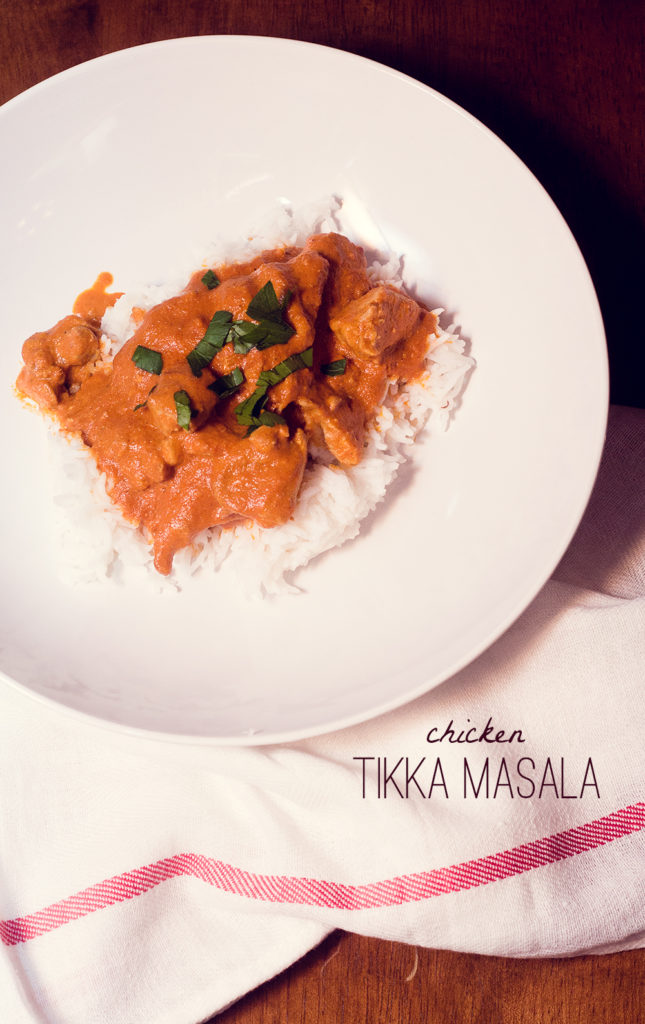
But some days, I do go all out. I make a dish with multiple parts that I want seconds (or even thirds) of. Like Chicken Tikka Masala – the non-Indian Indian dish that everyone loves (my last roommate Helen informed me it was a Scottish invention).

gluten-free chicken tikka masala for #singleladysupper

This creamy, spicy tomato dish is always a hit when I make it – even if it isn’t the most resolution-friendly dinner. (You can always balance it with a big salad or some extra kale in your smoothie). This isn’t an old family recipe or something that tastes like childhood. It is simply a good dish that despite its multiple parts is actually pretty easy to put together – easy enough to make after a full day of work.

gluten-free chicken tikka masala recipe from frannycakes

Gluten-Free Chicken Tikka Masala
Recipe Type: Entree
Cuisine: Indian
Author: Mary Fran Wiley
Prep time: 10 mins
Cook time: 35 mins
Total time: 45 mins
Serves: 4 servings
Chicken Tikka Masala is one of my favorite dishes (even if it isn’t totally authentic). Because I don’t have an old family recipe for this treat, I have adapted one by [url href=”http://www.foodnetwork.com/chefs/aarti-sequeira.html”]Aarti Sequeira from Food Network[/url] For best results, marinate the chicken starting the night before. If you decide at 6pm that this is what you want for dinner, you can get away with only marinating the chicken for half an hour,
Ingredients
  • For the chicken
  • 1 cup plain yogurt
  • 1 tablespoon grated fresh ginger*
  • 3 cloves garlic put through a garlic press or finely minced*
  • 1 teaspoon kosher salt
  • 1/2 teaspoon freshly ground black pepper
  • 1 pound boneless, skinless chicken thighs, poked with a fork, and cut into large bite-sized chunks
  • For the sauce
  • Sauce:
  • 2 teaspoons olive oil
  • 3 tablespoons butter
  • 6 cloves garlic*
  • 2-inch thumb ginger peeled and minced*
  • 2 serrano peppers, minced and seeds removed (if you like your food spicy, you can leave the seeds in)
  • 2 tablespoons tomato paste
  • 1 teaspoon garam masala
  • 2 teaspoons paprika
  • 1 28-ounce can diced tomatoes (or 2 14-ounce cans)
  • 1 1/2 teaspoons kosher salt
  • 1 to 2 cups water
  • Oil, for grilling
  • 1/2 cup heavy cream
  • Minced fresh cilantro, for garnish
  • Cooked basmati rice
Instructions
Marinate the chicken
  1. You are going to whisk together the yogurt, ginger, garlic, salt and pepper into a smooth sauce. Add the chicken to the mix and seal in a large ziploc or plastic container. Leave in the fridge overnight or at least 30 minutes before starting the sauce.
Make the sauce
  1. (If you need to make rice, I start it in a rice cooker before I make the sauce.)
  2. Place a large skillet over medium heat and add the olive oil and butter.
  3. Once the butter has melted, add the garlic, ginger and serrano peppers. Saute until lightly browned around the edges.
  4. Next, add the tomato paste to the skillet. Cook it until it starts to darken in color (about 3 minutes).
  5. Add the garam masala and the paprika and saute to draw out the flavors from the spices.
  6. Once they get aromatic (about a minute), add the tomatoes, salt, and 1 cup of water.
  7. Bring the sauce to a boil and then turn it down to a simmer. Cook until the sauce has thickened a bit, about 20 minutes.
Cook the chicken
  1. While the sauce simmers, heat a grill pan or cast iron griddle. Once it is hot, lightly brush it with oil.
  2. Place your chicken pieces on the grill – but make sure you shake of some of the excess marinade (too much gets a little messy)
  3. Cook the chicken until it starts to char -about 2 minutes on each side. The chicken will be purposefully undercooked because it finishes cooking in the sauce.
Finish the dish
  1. The sauce is currently a bit chunky, and we want a smooth, dreamy sauce. If you are using a deep enough skillet and have an immersion blender, feel free to use it. If not, pour your sauce into a food processor or blender and process until smooth.
  2. Pour your sauce back into the skillet and bring it back to a boil.
  3. Add the chicken, bring the sauce down to a simmer and cook for about 10 minutes.
  4. Stir in the cream.
  5. Serve over rice and garnish with fresh cilantro.
Notes
*I like to keep garlic and ginger pastes in my kitchen for occasions such as the desire to make this dish. You can find them in squeeze tubes in the produce section, and most often, I buy the ones from [url href=”http://www.gourmetgarden.com/en”]Gourmet Garden[/url]
3.2.2807