Home » gluten free » Page 15

Tag: gluten free

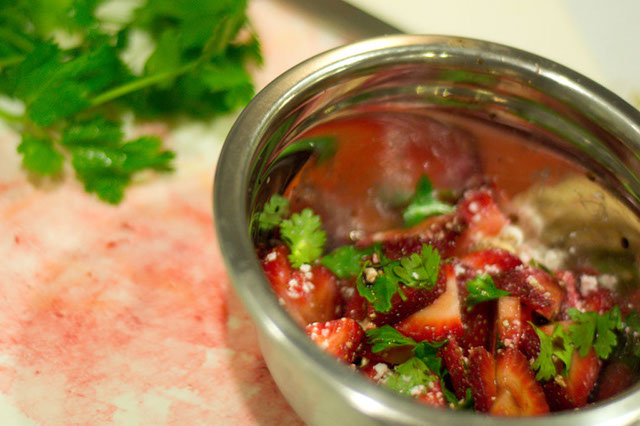
Strawberry Salad in a bowl

Strawberry Feta Salad

Strawberry Salad in a bowlI had a craving for fresh fruit this weekend. It was especially strong when I realized that the farmer’s market in town had started and that I had slept through almost all of it on Saturday morning.

Disappointed, I went to Meijer instead. I didn’t need much in the way of food, just a few things (you know cereal fit for a 5 year old and some milk to have it with and that fruit that I was craving).

Today, while putting together recipes to post this week (I am going to be out of town and on local television, so I need to put these posts together in advance), I got hungry.

Faced with more strawberries than I needed for tomorrow’s quick bread, I saved some for myself to eat. I dressed them up with big-girl accompaniments (unlike my love of strangely colored food, shaped pasta and infantile cereal might lead you to believe, I have excellent taste in food).

Without further ado, a summer salad that can be a side, an appetizer or even a dessert.

Strawberry Feta Salad
#ratingval# from #reviews# reviews
Print
Recipe Type: Salad
Author: Mary Fran Wiley
Prep time: 5 mins
Total time: 5 mins
Serves: 2
Ingredients
  • 1 cup sliced strawberries
  • 2 oz crumbled feta
  • 1/4 cup cilantro leaves, chopped
  • 1/8 cup balsamic vinegar
Instructions
  1. Toss salad ingredients and then drizzle with vinegar to taste immediately before serving.
Google Recipe View Microformatting by Easy Recipe
1.2.4


Sweet Pepper Pesto Grilled Chees

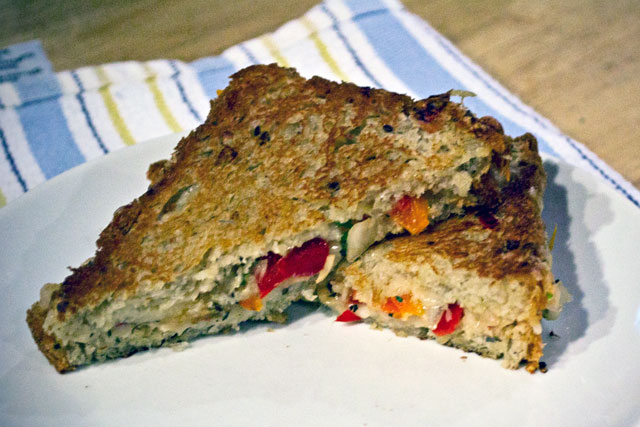
Sweet Pepper Pesto

Sweet Pepper Pesto Grilled CheesAfter the Gluten Free Expo, I went straight to Whole Foods and bought a loaf of Rudi’s Gluten Free Multigrain Bread. I really hate gluten free bread. And I mean, I really hate it. I refuse to eat sandwiches any more because of my intense dislike of it. I don’t even like the popcorn bread that my dad makes that every one raves about. Maybe it is all in my head, but I digress. I had a grilled cheese sample at the expo and I was sold.

There is this great little restaurant in town that makes an awesome grilled swiss with pesto sandwich that I remember from my glutinous days. It was simply delicious. I wanted to recreate that experience tonight. But, the basil plants that I have are not doing so well because it is too wet and I was out of roasted red peppers. So, a pesto recipe was born.

I then used it to make a grilled cheese sandwich. I have to say, this might be my favorite discovery from the Expo.

Sweet Pepper Pesto Grilled Cheese
#ratingval# from #reviews# reviews
Print
Recipe Type: Sauce
Author: Mary Fran Wiley
Prep time: 5 mins
Cook time: 10 mins
Total time: 15 mins
Serves: 2
Sweet peppers, sweet onion and italian herbs make this fresh pesto delectable.
Ingredients
  • 4 small sweet peppers or 1 large
  • 1 small sweet onion
  • 1 clove garlic
  • 1 Tablespoon dried basil or 10-12 leaves fresh basil
  • 1/2 teaspoon dried oregano or 1 tablespoon chopped fresh oregano
  • salt to taste
  • 1/4 cup olive oil
  • 4 slices Rudi’s Gluten Free Multi-grain bread
  • 1/2 cup shredded mozzarella
  • 2 Tablespoons soft butter
Instructions
  1. Chop onion into quarters. Peel garlic. Remove stem ends and seeds from peppers. Combine in food processor or manual chopper along with herbs. Pulse until ingredients are finely chopped. Add olive oil and pulse until desired consistency is reached. I like mine chunky, but some people prefer theirs to have a finer dice.
  2. Heat a skillet over medium heat and butter one side of each slice of bread. Put 2 slices butter side down in the heated skillet and sprinkle on enough cheese to cover the slice (I used about 1/8 cup per slice). Spread pesto on top of cheese. Sprinkle with remaining cheese and top with the second slice of bread, butter side up. Place a heavy frying pan on top and cook for about 4 minutes. Remove frying pan, flip sandwiches and put the frying pan back on top. After about 4 more minutes, the bread should be golden and toasted. The cheese should be melty and gooey. Remove from skillet, cut in half on the diagonal and enjoy.
Google Recipe View Microformatting by Easy Recipe
1.2.4


GFAF Expo Recap

Everyone loved my frannycakes tshirts! Although, everyone thought that I owned a bakery. Maybe someday, once I have become internet famous and have written a cookbook with my mom. I founnd so many new treats to eat, some new flour blends to try and loads of new brands to keep my eye on. I got to meet the editor of Living Without magazine, “The Pamela” of Pamela’s Products and a woman who is starting up a gluten-free deal site (similar to Groupon). I have to say that even though I was only able to be there for a few hours Saturday morning, I had a blast and learned a lot.

Allergy-friendly eating is a big deal in our family. Dad, the food allergy king, is allergic to wheat, oats, teff, pork, beans, peanuts and cashews. Mom can’t have gluten or teff. My sister is hugely allergic to nuts. I have wheat and shellfish allergies for sure and have an allergist appointment coming up to find out the true extent of mine. My poor boyfriend recently found out that he is lactose intolerant and has IBS. Needless to say, we easily get stuck in ruts because we eat what we know.

Saturday I brought my parents to the Gluten Free Allergen Free Expo put on by Jen Cafferty. I went last year with my boyfriend (from here on out, he will be refered to as Blondie – the name my girlfriends gave him when we first started dating). Blondie and I went on the Sunday afternoon last year and were completely overwhelmed by the shear awesomeness of the event. Naturally, as soon as the date for this year’s expo was released, I made plans with my cooking partner in crime (my mom) to go. We donned franncakes tshirts and brought along the boys for a ride.

My entourage and I spent 3 hours eating and shopping my way through the event. There were new products from some of our favorite brands and lots of new brands that I had never heard of before. We all had different missions for the event. My mission was to scope out gluten free flours and talk to companies about how they got their start in the Gluten Free market place. My mom’s mission was to wear a frannycakes shirt (it was her idea to order them) and try as many different foods as possible. Blondie’s mission was to taste everything and make sure it tasted good to a normal palate. My dad’s mission was the most specific: find gluten free soft pretzels.

Pretzels are one of those things that are not too difficult to make at home, but it is just my mom and dad now, so making a batch homemade isn’t always the most practical option. Needless to say, dad did not wait long to accomplish his mission. The father son team at Allerenergy had him with one of their pretzel bites. Our group’s first purchase was at the third table in the door and it couldn’t have been from better people.

We passed a few more tables and there were chicken nuggets. Immediately  after that were gluten free doughnuts (and gluten free sandwich cookies. We were drinking Woodchuck and Magner’s Irish Cider before noon. We found a perfect substitute for Ho-Hos. I found out that Costco sells a fantastic gluten free cracker. My favorite gluten free baguette manufacturer now has ready-made frozen pizzas. I FINALLY got to try Rudi’s gluten free bread. I got sour gummy bears (made with pectin) for my vegetarian cousin. I saw a couple of iphone/ ipad apps that look promising.

I will review individual products over the next couple of weeks, but for now, here are links to the companies that impressed me at this year’s expo and what product it was that caught my attention.


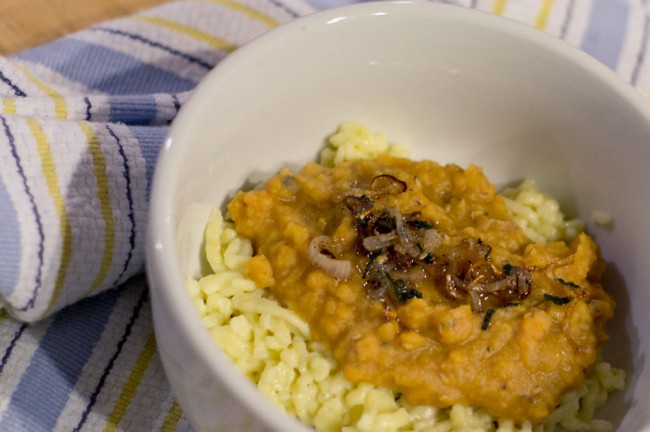
Spaetzle with Lentils

Spaetzle mit Linsen

Spaetzle and lentils in a white bowlI have been fascinated by spaetzle since my mom made with with a nifty device perched on a pot of boiling water. If you have never had spaetzle, you are living a life of deprivation. They are what I might consider a perfect food. Tender, noodly, carby goodness. And they go with everything. You can eat them with cheese (Kasespaetzle). You can eat them with schnitzle. You can eat them with a brat. Or, you can eat them all alone, pan fried with some herbs and salt.

Today, as this is a meatless Monday post, I am eating my spaetzle with lentils. Red lentils to be exact. Most of the recipes I saw on the internet called for brown lentils – but I think brown lentils are ugly. And, in my kitchen are red lentils.  This dinner includes the use of one of the few processed foods that I keep around – bouillon. You can use bouillon cubes or stock, but your water needs to be seasoned, or the lentils will taste flat.

Spaetzle with Linsen
#ratingval# from #reviews# reviews
Print
Recipe Type: Entree
Prep time: 20 mins
Cook time: 20 mins
Total time: 40 mins
Serves: 2
Gluten free German dumplings with a lentil stew and crispy shallots, sage and brown butter.
Ingredients
  • 1 cup gluten free flour blend
  • 1/2 teaspoon xantham gum (if not in your mix)
  • 3 eggs
  • 1/8 cup milk
  • 1 cup red lentils
  • 2 cups stock or water and a bouillon cube
  • 1 tablespoon sage
  • 2 shallots
  • 4 tablespoons butter
  • Salt & Pepper to taste
Instructions
  1. Whisk flour and xantham gum together.
  2. Make a well in the flour and crack eggs into it.
  3. Pour in milk and mix.
  4. Cover and put in the fridge for an hour or overnight.
  5. When it is time to cook, cook the lentils in the stock as directed on the package. It should be thick, but still liquid. The lentils should have started to break down but should not be completely disintegrated.
  6. Now, if you don’t have a spaetzle maker use a colander and a spatula to push the batter through the holes into a pot of boiling water. Boil the dumplings in batches.
  7. Once the spaetzle is cooked, fry the sage and shallots in the butter.
  8. Remove the sage and shallots from the frying pan and drain the butter.
  9. Sautee the spaetzle in the greased frying pan.
  10. Top with cooked lentils, a drizzle of the browned butter and fried sage and crispy shallots.
Google Recipe View Microformatting by Easy Recipe
1.2.4

This actually made 3 servings for me, but I eat small, measured portions.

top view of Raspberry Filled Yellow Cupcakes

Raspberry Surprise

top view of Raspberry Filled Yellow CupcakesI have a bad habit, and that bad habit is baking. Where so many people open a pint of ice cream or pour a glass of wine to unwind, I find a comfort in pulling flours from the cabinet, fitting a mixer with the paddle & bowl and whipping up a batch of something warm and soft. I have always known exactly where I got it. My mother. I went home for Easter this weekend and my mom made quite a spread. She wouldn’t let me cook at all (she says I am a messy cook, I say I was a messy cook when I was a kid) but, she made these fantastic cupcakes. She even said I could share her recipe.

Raspberry Surprise
#ratingval# from #reviews# reviews
Print
Recipe Type: Dessert
Prep time: 20 mins
Cook time: 25 mins
Total time: 45 mins
Serves: 24
Gluten free yellow cupcakes with a raspberry filling adapted from <a href=”http://www.kingarthurflour.com/recipes/gluten-free-yellow-cake-recipe” title=”Yellow Cake Recipe from King Arthur Flour”>King Arthur Flour</a>
Ingredients
  • 3 cups Gluten-Free Multi-Purpose Flour Blend
  • 2 teaspoon xanthan gum (if not already in your blend)
  • 1 1/2 cup sugar
  • 1 1/2 sticks butter, softened
  • 1 teaspoon salt
  • 2 teaspoon gluten-free raspberry liqueur
  • 3 teaspoons baking powder
  • 4 large eggs
  • 1 cup milk, at room temperature
  • Raspberry jam for filling (about 1 teaspoon per cupcake)
Instructions
  1. Preheat the oven to 350°F.
  2. Using an electric mixer beat together the sugar, butter, salt, liqueur and baking powder till smooth. Add 1 egg, and beat for several minutes, until fluffy.
  3. Add the remaining eggs, one at a time, scraping between each egg.
  4. In a separate bowl, whisk together the flour and xantham gum (if needed).
  5. In the bowl of the mixer, beat in the milk alternately with the dry ingredients, adding about 1/3 of each at a time, and ending with the dry ingredients.
  6. Measure batter into prepared cupcake pan. Bake for 18-25 minutes, and a cake tester inserted into the middle comes out clean.
  7. Remove from the oven, and cool for 5 to 10 minutes before turning out of the pan to cool on a rack.
  8. Once the cupcakes are cooled, use a pastry bag fitted with a filling tip, squeeze a teaspoon of jam into each cupcake.
  9. Frost with raspberry cream cheese frosting.

Mom frosted them with a cream cheese frosting (here is a similar one from King Arthur Flour). This time she replaced the vanilla and some of the milk with the raspberry liqueur, adjusting liquids and sugar as she went until she got the consistency that she wanted. The liqueur added a hint of raspberry flavor and a pink tint. The butter in this recipe keeps the frosting from the full amount of tang you get with normal cream cheese frosting.

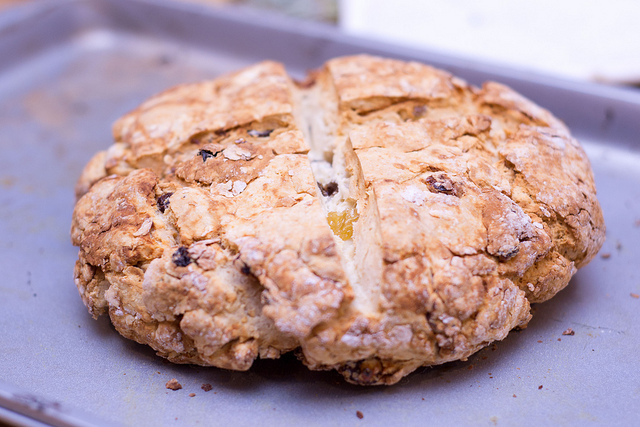
Irish Soda Bread Two Ways

I know this is a little late, but I made it the night before St. Patrick’s day and had to make a couple of tweaks to my recipes. I have to say that St. Patrick’s Day is my favorite holiday. Not because of green beer (I find that to be kind of tacky actually) but because of the meal that my mom makes every year. Corned beef & cabbage. Bread pudding with whiskey caramel sauce. Irish coffee. Baileys spiked cupcakes. And, my favorite, Irish Soda Bread.

I was saddened to find out that our family recipe given to us by an Irish nun (she claimed this recipe was from the emerald isle) is not actually a traditional recipe. So in addition to making our recipe gluten free, I also made a traditional plain loaf gluten free as well.

I have to say that I am really pleased at how these loaves turned out. They are dense breads, but the texture is pretty close to how I remember their glutinous counterparts. They are great quick breads any time of the year!

A couple of tips: if you think the dough is too dry, add moisture slowly – it can easily be overly wet. And, no matter your religious affiliation, the cross (or X) in the top of the bread actually provides a scientific benefit – it allows the bread to rise more, so no wimpy cuts.

Irish American Soda Bread

(adapted from my Mom’s secret family recipe)

  • 3 Cups Gluten Free Flour Blend (I used Cheatin Wheat )
  • 1.5 teaspoons xantham gum if your flour blend does not have it
  • 2 tablespoons ground flax seeds
  • 1 teaspoon salt
  • 1 teaspoon baking soda
  • 4 tablespoons butter
  • 1 1/2 cups buttermilk
  • 3 tablespoons honey or agave nectar
  • 1/2 cup golden raisins

Soak raisins in enough buttermilk to cover (about 1/2 cup) for 5-10mins. Preheat oven to 375. Mix flour, flax, salt & soda – I used a whisk to make sure there were no lumps. Cut in the butter with a pastry blender (a fork will work if you don’t have one) until the mixture resembles cornmeal/sand.  Add the buttermilk (1 cup) and stir until dry ingredients are moistened. Drain extra buttermilk off the raisins and add the raisins.  Knead dough breifly with your hands to mix in raisins. If dough is still too dry, add the buttermilk that you drained off the raisins. Pat into a round cake and place on a buttered baking sheet. Cut a cross into the top about 1 inch deep and most of the way across. Bake for 40 mins. When the bread is done, it will be a light golden brown and sound hollow when tapped.

Serve warm with butter whipped with honey.

Irish Soda Bread

Irish Soda Bread

(adapted from Epicurious)

  • 3 1/2 cups gluten free flour blend (I used Jules’s)
  • 1 teaspoon baking-soda
  • 3/4 teaspoon salt
  • 2 cups (about) buttermilk
  • 2 tablespoons ground flax seeds
  • 1/2 cup golden raisins (optional – they change this from basic soda bread to “spotted dog”)
  • Soak your raisins (if using) in about half a cup of your buttermilk. Preheat your oven to 425 degrees. Whisk the dry ingredients together. Dump in the raisins and the buttermilk that they are soaking in. Mix together well. Add more buttermilk as needed to get the dough to clump together. The dough will be quite sticky if you put in too much – it is sticky enough when it is just right! Knead it together in the bowl with your hands. Place dough formed into an 8″ circle on a greased baking sheet. Cut a cross in the top about 1 inch deep. Bake for 35-40 mins until the loaf is golden brown and sounds hollow when tapped.