Home » Food » Page 16

Category: Food

Food. Eaten. Made. Discussed. All gluten-free.

A trip to the GFAF Expo in San Francisco!

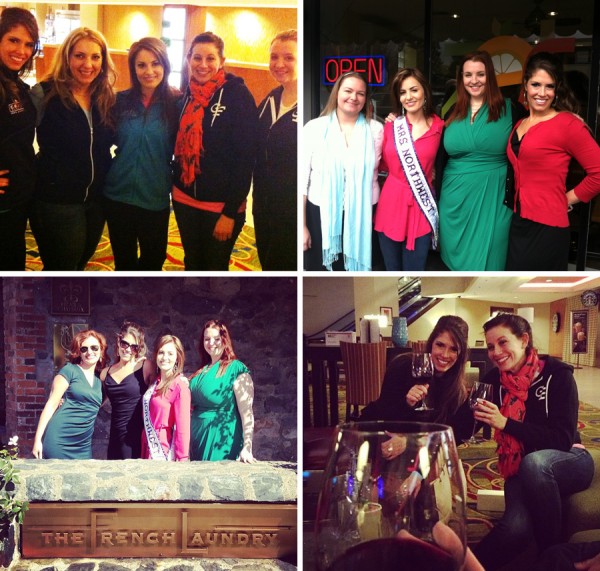
I spent 4 days hanging out in San Francisco this weekend – and I can tell you that I saw all the important things: Zest Bakery & the French Laundry. And that gluten-free people are the best people.

I loved seeing all of your smiling faces, answering your gluten-free baking questions and having the chance to meet you all!

Now, on to how it went!

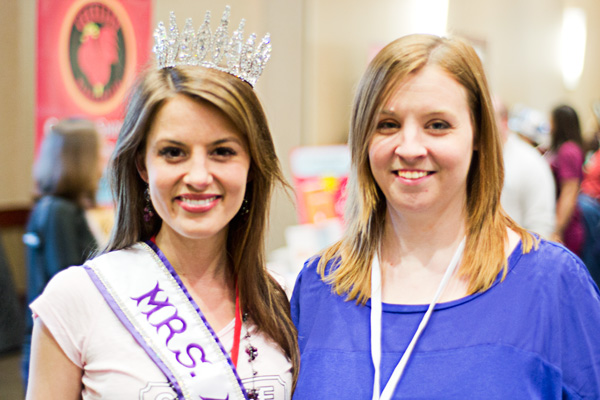
I planned this weekend for months- anxiously texting my dear friends Kyra (owner of Crave Bakeshop outside of Portland) and Brandy (Mrs. Northwest 2013) to coordinate flights & hotel rooms. Trade secret: we all come to these events together so we have an excuse to gather from far corners of the country. And to collect more awesome friends.

To get ready for this trip, I stalked the French Laundry on Open Table for a reservation. I read up on companies visiting the expo so I could make sure that I would have time to see what products we are missing in the Midwest. (And so that I could figure out whose employees might be the most fun to hang with). I gathered a crowd that included Brandy, Kyra, Alison – the sassy blogger behind A Girl Defloured, Charissa from Zest Bakery and Andrew from Taste Guru for a day of feasting.

I’m a food blogger, so of course this trip was all about the food.

So we started our first day like any responsible party that was about to spend $300/person on lunch. We went to our friend’s bakery and ate from the tasting menu. (In other words, we ordered some of every item in the case and stood there and tried them all). I was in gastronomic heaven, and it wasn’t even 10am.

zestcollage


After breakfast, The French Laundry had a pretty high bar it had to clear. And it did. I may never be able to look at vegetables the same way again (and I am ok with that). 10 courses of gluten-free vegetables, a root beer float and a peanut butter & jelly chocolate and a sinful chocolate something or other and I am set for life. I am working on a post just about that meal, but for now, you’ll have to take my word that it was perfect.


friends

Friday night was also the part that, for me, is the best part of the expo – meeting the smiling faces behind blogs, twitter handles and companies. There were two people I was on a mission to meet- Sabrina from the Tomato Tart (who got away without enough time chatting!) and Erica from Celiac and the Beast. They are as epically awesome in person as they are on their blogs. Funny, kind and gluten-free. There might have been some impressive bear hugs and squeals of delight when we all finally met.

And the there were the bloggers that I didn’t know were going to be there, or I hadn’t come across before – and they are pretty dang awesome too. You should totes check out GF Traveller, East Bay Celiac, The GFree Foodie and Sarah Bakes gluten-free. Because they are totes cool too.

talks


The weekend wasn’t all play – Kyra, Brandy & I all gave talks and shared our passions with the crowds. Erica sold me a pretty dang awesome hoodie.

But I know all you really care about are the goods. So I singled out a few of my favorites.

FAVORITESTop row: Crave Cake Mixes // Freedom Cereal Tropic Os // Red Apple Lipstick
Middle row: Kind Plus Bars // The Good Bean Chili Lime Chickpeas // Taste Guru (box of the month club with awesome stuff inside!)
Bottom row: Schar Lemon Wafers // Blackbird Bakery Bread Blend  //


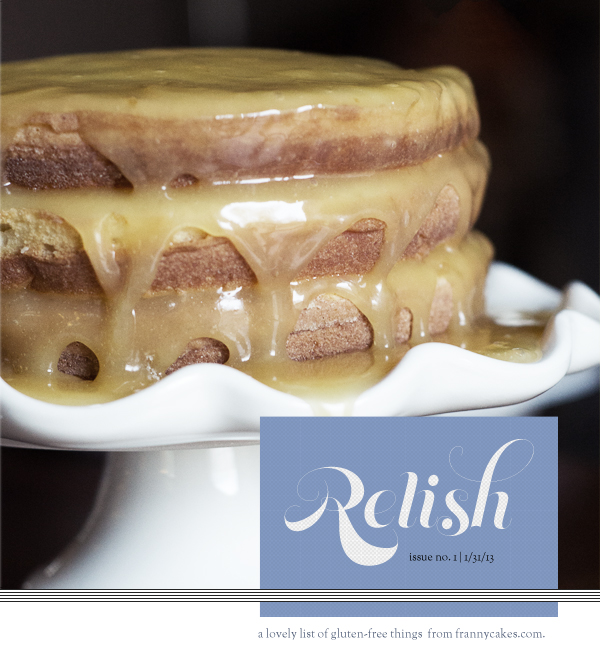
Relish 01: Comfort & Awesome Sauce

Relish is a compendium of things to enjoy greatly and that add a little flavor to your gluten-free life. Because really, life is all about the awesome sauce.

relish-jan2013

Want that cake? Come see my presentation at the San Francisco GFAF Expo next weekend and learn how!

amieanderica

[On the left] My dear friend Amie has a gluten-free column on the Glamour Magazine Vitamin G blog.

[On the right] Erica from Celiac and the Beast has some pretty excellent tshirts that she’ll have with her at the GFAF Expo in San Francisco. (Yes, I have one reserved for me)

thingstomake

And then there are things to make. Like (01) the oatmeal toppings ideas (translated with google translate) from J’veux être bonne. Or, (02) Peanut Butter and Chocolate Pudding from Joy the Baker. Um, yes please. There is no such thing as too much oatmeal, and this version (03) with blackberries and sesame seeds sounds like a winner too. Since it is winter, and comfort food is de rigueur, these pear pizzas on Cup4Cup’s new crust look like my ticket to happiness this weekend.

Ok, and there is this gem about the flu shot and its gluten-free status from The Celiac Diva.Because the flu is icky.


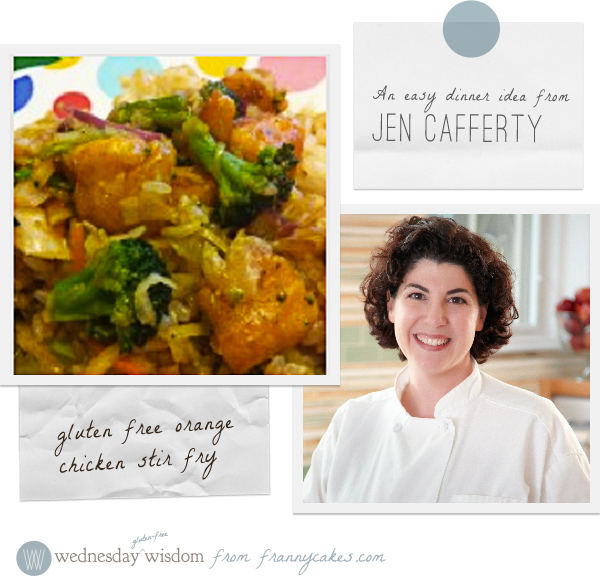
gluten free orange chicken stir fry from Jen Cafferty

Wednesday Wisdom: Fast Family Dinner – Orange Chicken

(gluten free) wednesday wisdom from frannycakes.com

Wednesday Wisdom is a series of posts with helpful ideas for getting started with being gluten-free, easy meal ideas and lifestyle thoughts from myself and my gluten-free friends. This week’s post is from Jen Cafferty from the Gluten & Allergen Free Expo.

When it comes to quick and easy dinners, one of my favorite things to make is stir-fry.  Asian stir-fry is already really easy to make and I have even simplified this chicken recipe more by using chicken nuggets.  I know that may sound gross, but the reality is that you are ultimately just frying some chicken with your vegetables and adding sauce, so why not start out with pre-fried chicken – the nuggets!

My favorite gluten-free asian sauces are by San-J.  They make a lot of wonderful sauces but my ultimate favorite is the Orange Sauce.  My husband finds it to be a little too sweet so we add a few splashes of sriracha chili sauce and it takes the sweetness away but still retains it’s orange flavor.
I hope you enjoy this recipe as much as our family does!  Jen
gluten free orange chicken stir fry from Jen Cafferty
Gluten Free Orange Chicken Stir Fry

Author: Jen Cafferty
Ingredients
  • 1 pound package chicken nuggets (we use Allergen Free Foods or Bell & Evans)
  • 1Tablespoons oil
  • 1 cup San-J orange sauce
  • a few splashes sriracha chile sauce (I like the bottle with the rooster on it)
  • 3 cups shredded cabbage (you can use a bag that was chopped for cole slaw)
  • 4 green onions, sliced (use the whites and greens)
  • 1 cup broccoli florets, cut into small pieces (you might want to heat them in the microwave for a minute to soften them)
  • 1 red pepper, sliced
  • any other veggies you love
  • cooked white or brown rice
Instructions
  1. Bake the chicken nuggets as suggested on the package. Once cooked, remove them from the oven and cut them into 1″ pieces.
  2. Heat a large skillet over medium heat. Add the oil.
  3. Add the vegetables to the skillet and saute for about 5 minutes until they are heated through and reduced slightly. Once the veggies are cooked, add the to the pan.
  4. Pour the orange sauce over the mixture and add a splash or two of the chili sauce. Stir to combine.
  5. Serve over white or brown rice or gluten-free noodles.
3.2.1337
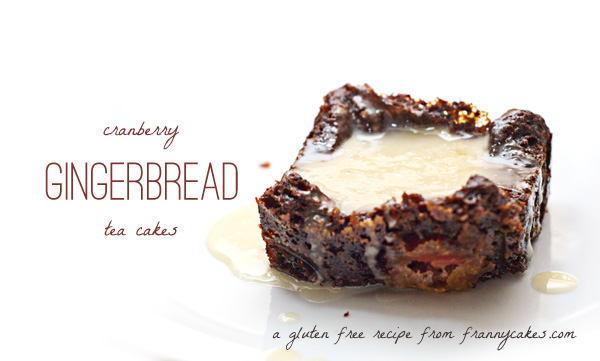
gluten free cranberry gingerbread tea cakes with an orange glaze

How to win at client meetings

I am a web designer in real life.

And that means I have to talk to clients. Often.

So I go to a lot of meetings. And meetings are hard. You have to be sharp, look like the smartest person in the room and you have to keep smiling even if a client hates your design.

You need a secret weapon. And I happen to have a couple of those.

First, you need fabulous shoes. It is best if you have a drawer full of options in the office, this way, you can put on your take-no-prisoner shoes for one meeting and your this-girl-has-style shoes for the next.

drawer

Next, you need something to smile about when discussions get intense. Or for when you realize that the venti dirty hippie (soy chai with 3 shots) that you had on your way to the office has ceased fueling your brain. I like fun socks when I am wearing boots. And every time I think about my silly socks, I smile. gluten free socks

A fancy notebook and pen can make you look serious. And important. Despite your silly socks. Spiral notebooks are for teenagers and legal pads are for old people. Never underestimate the power of a good notebook. Ever.

blankpage

Also, don’t be afraid to doodle. Science proves it helps you concentrate. My notebooks prove old doodles can be entertaining.

doodle

And if all else fails, feed them. Good food makes people happy. And the person who brought the treats is instantly the most popular person in the room. You will get bonus points if you made it. And double bonus points if it is something exciting. Like gluten-free cranberry gingerbread tea cakes. *

*n.b. if the client knows you write a food blog and you don’t ever bring a treat to a meeting, they will be very, very sad.

gluten free cranberry gingerbread tea cakes with an orange glaze

There is something about gingerbread that warms the soul.

Maybe it is only me. You see, I grew up with a photo of gingerbread men on my wall. My grandma always had gingersnaps in her cookie jar. It oozes warmth and comfort. A sense of delicious decadence.

Together, ginger and molasses make magic happen. And when they go on a double date with cranberry and orange.

Bam.

Now, put those bad boys into a muffin tin (I used one with squares rather than circles). Glaze them. Call them tea cakes. Pretend that makes them breakfast food. Bring them to a 9am meeting with clients. Be the most popular person in the room. (And don’t tell them that they are gluten-free until after they have devoured half of them).


Gluten- Free Cranberry Gingerbread Tea Cakes with Orange Glaze

Recipe Type: Snack
Cuisine: American
Author: Mary Fran Wiley
Prep time: 10 mins
Cook time: 30 mins
Total time: 40 mins
Serves: 18
These are adapted from Joy the Baker’s Orange Gingerbread
Ingredients
  • For the cakes
  • 305 grams (2 1/4 cups) gluten-free all-purpose flour*
  • 3 grams (1 teaspoon) xantham gum**
  • 2 teaspoons ground ginger
  • 1 teaspoorn ground cinnamon
  • 1/4 teaspoon ground cloves
  • 8 grams (1 3/4 teaspoons) baking soda
  • 1/2 teaspoon salt
  • 205 ml (3/4 cup plus 2 tablespoons) vegetable oil
  • 150 grams (3/4 cup) granulated sugar
  • 2 large eggs
  • 175 ml (3/4 cup) molasses
  • 60 ml (1/4 cup) honey
  • 175 ml (3/4 cup) warm water
  • 100 grams (2 cups) cranberries
  • For the glaze
  • 250 ml (1 cup) orange juice
  • 450 grams (2 cups) confectioner’s sugar, sifted to remove lumps
  • 1 teaspoon orange extract (optional)
Instructions
  1. Place a rack in the upper third of the oven and preheat oven to 350 degrees F. Grease & line a square-welled pan with parchment paper, and grease the parchment paper as well. (Or use a muffin tin and line with cupcake papers)
  2. In a medium bowl, whisk together gluten-free flour, xantham gum (if using), spices, baking soda, and salt. Set aside.
  3. In a large bowl combine vegetable oil, sugar, and eggs and whisk until they are thick and pale.
  4. Stir in the molasses and the honey.
  5. Now, add the dry ingredients to the wet ingredients and stir to combine. Once everything is mixed well, add the warm water and gently stir until it is entirely combined and the mixture has turned into a smooth batter.
  6. Divide the batter among the wells of your pan or cupcake tin, and they should be about 2/3 full.
  7. Add 3-4 cranberries to each tea cake.
  8. Bake cake for 25-35 minutes, or until a cake tester inserted into the center of the cake comes out clean.
  9. While your tea cakes bake, whisk together your juice, confectioners sugar and extract to form a smooth glaze. Feel free to add sugar to make a thicker (or sweeter) glaze. There is no exact science with this part.
  10. When the cakes are done, cool on a wire rack and drizzle with the glaze. The recipe makes a generous amount, so don’t be shy with it.
3.2.1337

Because donuts are so last year. And muffins are for boring people. (Well, just for today. Tomorrow cool people will be making muffins again).

San Francisco GFAF Expo Preview

Cupcake Wars 2-time champion Kyra Bussanich and Jamie from Crave Bakeshop in Portland

If you follow me on social media at all, you have no doubt picked up on the fact that I am going to be presenting at the San Francisco Gluten & Allergen Free Expo next month. I am going to be teaching 3 basic gluten-free recipes to memorize (or at least be comfortable with) so that you have a few items with endless variations.

And while coming to meet me should be enticement enough, there are a few other awesome things happening there that you might want to check out.

Basic Event Info

February 9-10, 2013 from 9am-4pm

San Francisco Airport Marriott Waterfront
1800 Old Bayshore Highway
Burlingame, CA 94010
(650) 692-9100

Presenters

The best part about this expo is that once you pay to get in to the event, all the presentations and classes are free. That means you can spend an entire weekend learning about cooking, baking and living gluten-free. The cooking and dining sessions range from getting started with gluten-free baking, identifying hidden gluten and some bakers giving away the secrets to gourmet desserts to identifying causes of gluten intolerance, travelling gluten-free and how heart disease and a gluten free diet affect your health. With 3 stages full of presentations, there is no doubt something for everyone to learn. Make sure to check out the full schedule.

withbrandy

Vendors

Vendors are a huge reason to go to this event. There are companies at the expo that are both local and national and this event provides you with a unique opportunity to try out products (because we have all bought something at the store and been less than pleased with the results). The representatives of all the different brands are all very willing to discuss manufacturing processes, allergens and their passion for eating safely.

Community

This might be the single largest reason to attend an event like this. There are going to be representatives from a number of gluten-free support groups and organizations as well as the faces behind several gluten free magazines, blogs and cookbooks.

Please share this event with any friends or family you have in the San Francisco area and I hope that I have a chance to meet you while I am there!

We are all stories in the end, so make it a good one, eh? - Quote from Doctor Who

Hello 2013. I’m glad you made it. I have big plans for you. Now let’s have soup.

It’s a new year. A clean slate.

So, eyes front soldier.

I can tell you what there will not be. In my life or on this site. There will be no checking over my shoulder to see what I should have done. No looking in the mirror and wondering why. No questioning my choices. No, as MammaCakes woud say, should-a, would-a, could-a ‘s. It’s all about the path ahead. It is time to look forward. To think about where I am going.

Read more

Cook the Books: GF on a Shoestring Quick & Easy

gf on a shoestring review

I buy a bunch of new cookbooks and cooking magazines. I read them, cook from them and let you know if they are worth your purchase or not. Read on for my review of  Gluten-Free on a Shoestring Quick & Easy (author’s affiliate link).

You probably know the blog, Gluten Free on a Shoestring. And if you don’t I encourage you to go check it out. Blogger Nicole Hunn is funny and accessible with recipes that are photographed at multiple points in the process. She has tackled all the kinds of pastry and baked goods that you could possibly want.

She recently released her second cookbook, Gluten Free on a Shoestring: Quick and Easy Meals (this is a link to the author’s Amazon store). And I have to say, in my book it is a hit. (It is one of my favorites from the past year).

This cookbook is full of easy meal ideas, fancy breakfast treats, yeasty pizza crusts and easy to make home baking mixes. (I know I often talk about how I dislike baking mixes, but I do see the benefit of them.) The recipes include a calculation of about what it will cost to make the recipe plus a comparison of what an equivalent store-bought product would cost and frequently it is quite shocking to see the amount you can save.

My only criticism of the book is that there aren’t enough pictures for me. But I work in a creative field where it is very much all about the looks, so I might be a wee bit biased… The layout is easy to follow and the type is big enough to read from a little distance. Making up for the limited number of pictures is the paper. The paper is the kind you can write on. I might be the only person who does this, but I annotate my cookbooks with substitutions I have tried and notes to myself about recipes. This doesn’t work well in fancier, photo-laden books.

This book has a great variety of meals and treats – and they are all presented in easy to follow language with lots of encouragement from the author.

The interview

Nicole gladly agreed to an interview about the book via email, and here are her responses.

Why did you decide to write this book?

I realized at some point that I hadn’t given enough thought in my first book to how long the recipes took to complete, and just because I was willing and able to put in the time to cook and bake gluten-free, not everyone else was. And the whole point of everything I do, on my blog and in cookbooks, is to make gluten-free food accessible to everyone who needs or wants it. I want to break down barriers to entry, and in a gluten-free world where preparing food is still portrayed by many as way more precious than it needs to be, quick & easy seemed like the way to go next.

Since I don’t yet have tiny humans of my own, what is one piece of advice you can give my readers about feeding a gluten-free child?

Feeding a very young gluten-free child isn’t any different than feeding any very young child. And feeding a very young child, to me, is what I imagine it would be like to feed a churlish dictator. 3 meals, 2 snacks a day, eat when you’re hungry, stop when you’re full!

What was the hardest part about learning to bake gluten-free?

Oh, the flours. The gluten-free flours! When I started out doing this in the antediluvian days, there weren’t all of the amazing all-purpose blends on the market, so I was stuck with bean flours—and blending my own bean flours even! That is a large part of the reason that all of my recipes begin with a high-quality all-purpose gluten-free flour. I cried real tears when I started out. Why should anyone else suffer the same early fate?

What is your favorite recipe from the book?

The yeast-free English muffins, on page 55. They come together so fast, and make a better burger bun than any burger bun I’ve ever had. Don’t tell the other recipes, though. They’re jealous mistresses.

Did you learn anything about gluten-free cooking/baking while writing this book and what was it?

I learned … that it’s possible (even advisable!) to incorporate good quality packaged gluten-free products into your repertoire without sacrificing your whole paycheck and without sacrificing the integrity of your meal.

Are there plans for more cookbooks?

Of course! Mostly because I have nothing better to do. I am writing a gluten-free bread book, slated for December 2013 publication. No bread machine, no special skills required. No sad, weepy mounds of gluten-free bread dough. No joke.

Did you have to put a doughnut on the cover of the cookbook? It is just mean that it is sitting next to me staring me in the face and making me hungry…

I did, because I’m not a very nice person. You heard it here first.

The Rating

Author: Nicole Hunn
Format: soft-cover, full color center photo section

Stars: 4.5/5*
Buy it or Forget it: Buy it (and keep the tiny humans happy, the adults satified and gluten-lovers fooled)
Must try recipes: Pumpkin Granola Breakfast Cookies, Chocolate Clafoutis, The whole chapter on make your own mixes.

*Read more about my cookbook review criteria.

I purchased my own copy of this book prior to reaching out to the author & publisher. The giveaway copy of this cookbook is being furnished by Lifelong Books, and has no bearing on my review.

A giveaway

The publisher has kindly agreed to send a copy of this cookbook to one of my readers in the US or Canada! All you need to do is comment here to win by January 12, 2013 at midnight Central Time. Get up to 3 additional entries for sharing this post on social media (Facebook, Pinterest or Twitter – making sure that you tag FrannyCakes in your post) and then leaving a new comment here for each share. A winner will be chosen via random number generator on January 13, 2013, and the cookbook will be sent directly to you from the publisher. You must be a resident of the United States or Canada to win.

Gluten-Free Chocolate Chip Cookie Mix

Recipe Type: Cookie
Author: Nicole Hunn
Prep time: 5 mins
Total time: 5 mins
Serves: 24
From the book Gluten-Free on a Shoestring Quick & Easy by Nicole Hunn. Excerpted by arrangement with Da Capo Lifelong, a member of the Perseus Books Group. Copyright (c) 2012.
Ingredients
  • 2 1/4 cups (315 g) high-quality all-purpose gluten-free four
  • 1 teaspoon xantham gum (omit if your blend already contains it)
  • 1 teasponn baking soda
  • 1/2 teaspoon kosher salt
  • 3/4 cup (164 g) packed light brown sugar
  • 3/4 cup (150 g) granulated sugar
  • 12 ounces semisweet chocolate chips
Instructions
  1. Place all of the ingredients, except the chips, in a large bowl and whisk well, being sure to get out as many of the lumps of brown sugar as possible. Add the chips and mix well. Store in an airtight container until ready to use.
3.1.09
GF Chocolate Chip Cookies from Nicole Hunn’s Mix

Author: Nicole Hunn
Prep time: 10 mins
Cook time: 10 mins
Total time: 20 mins
Serves: 24
From the book Gluten-Free on a Shoestring Quick & Easy by Nicole Hunn. Excerpted by arrangement with Da Capo Lifelong, a member of the Perseus Books Group. Copyright (c) 2012.
Ingredients
  • 1 batch make your own chocolate chip cookie mix
  • 8 tablespoons (112 g) unsalted butter at room temperature
  • 2 extra large eggs, at room temperature, lightly beaten
  • 1 teaspoon pure vanilla extract
Instructions
  1. Preheat oven to 325 degrees F. Line rimmed baking sheets with unbleached parchment paper and set them aside.
  2. Place tge dry cookie mix in a large bowl and whisk well. Add the butter, eggs and vanilla, and mix well. Refrigerate until firm or freeze briefly.
  3. Drop balls of dough about 1 1/4 inches in diameter about 2 inches apart on the prepared baking sheets. Place the baking sheets in the freezer until the dough is firm, about 10 minutes.
  4. Once the dough has chilled, place the rimmed baking sheets in the preheated oven one at a time and bake until the cookies are just beginning to brown on the underside, about 10 minutes. Remove from the oven and allow the cookies to cool until firm on the baking sheets.
3.1.09


2012 in review

2012 was quite the roller coaster ride. And I want to take a moment to thank you for being on this journey with me.

Some moments: I was on the cover of the Sun Times, I stole a crown from a beauty queen. There was enormous joy in our family. I went to conferences and I hung out with some pretty cool people.

2012-2

I did so much this year. I met Joy the Baker, Rick Bayless and Jillian Michaels.

peeps

But there were ups and downs. Hospital visits and experimental treatments. And a 10 year high school reunion (yes, that is the guy who was my prom date in the picture).

thisismylife

From the bottom of my heart, thank you. To everyone who shared this year with me. You are the bestest.

gluten free maple cinnamon rolls

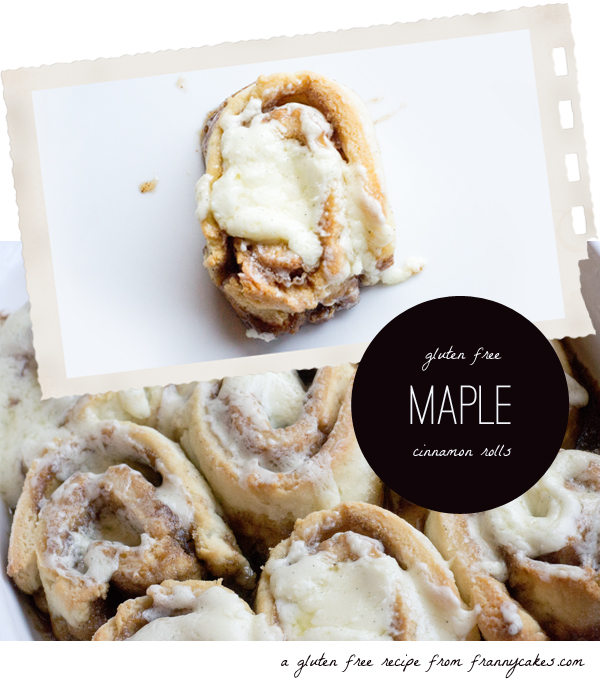
Gluten free maple cinnamon rolls

gluten free maple cinnamon rolls

Sometimes, it is all about the food.

And the smiles that warm cinnamon rolls can put on the face of a child. (Ok and the fact that the child in question started calling me the goddess of pastry doesn’y hurt either.)

Every morning, I walk through Union Station and I am haunted by the magical scent of warm cinnamon and butter rolled up in a yeasty dough. It is enough to drive a girl bonkers. Particularly when it is the scent of Cinnabon.

Seriously.

I have been craving cinnamon rolls for a year. So I finally did something about it.

I captured that magical scent and flavor combination in my very own kitchen.

These are easy to make, but they do take a little but of waiting. But they are totally worth it.

Gluten free maple cinnamon rolls

Author: Mary Fran Wiley
Prep time: 1 hour 15 mins
Cook time: 25 mins
Total time: 1 hour 40 mins
Ingredients
  • Dough
  • 160 ml milk (dairy or non-dairy), warmed
  • 35 grams sugar (2T)
  • 280 grams (2 cups) all-purpose gluten free flour*
  • 7 grams (1 t) active dry yeast
  • 40 grams (2.5 T) butter or EarthBalance
  • 1 teaspoon vanilla bean paste (or vanilla extract if you don’t have the paste)
  • Pinch salt
  • Filling
  • 210 grams (1 cup) Brown Sugar
  • 30 grams (2 tablespoons) Butter, melted
  • 1/4 cup (25 mL) Maple Syrup
  • 1 tbsp Maple Flakes or maple sugar (optional)
  • 1/4 tsp salt
  • Topping
  • 1/2 cup or so cream cheese frosting or
  • 1/4 cup powdered sugar
  • 2 T milk and
  • 1 teaspoon vanilla extract
Instructions
Dough
  1. Measure out your ingredients and prepare a mise en place.
  2. In a small bowl combine warm milk, a teaspoon of your sugar, a tablespoon of your flour and your yeast. Let sit for about 15 minutes – the mixture should have produced a decent amount of foam.
  3. In the bowl of a stand mixer combine the remaining flour, sugar, butter, vanilla and salt.
  4. Add in the yeast mixer and mix to combine. Once combined, turn the mixer speed to low-medium (mine was on 3) and let the dough “knead” for about 10 minutes.
  5. Watch the dough, if it is impossibly sticky add a little more flour a teaspoon at a time. (It was a bit humid in my apartment and I ended up adding 2 teaspoons of flour).
  6. After 10 minutes, place the dough in a greased bowl in a warm spot (my microwave is the warmest spot in my kitchen). Cover with plastic wrap or a damp towel. If you have a spare bowl for your mixer, pop it and the whisk attachment (or any bowl and the beaters for your hand mixer) into the freezer. You need it good and cold to whip the cream.
  7. Let the dough raise for 45 mins-1 hour. It should have just about doubled in size.
Filling
  1. Near the end of the rising time, mix together all the ingredients for the filling in a small mixing bowl.
Assemble
  1. Roll out the dough to 1/4” thickness and in a rectangle about 6×10″.
  2. Spread the filling on the dough in a thin layer.
  3. Roll the dough up along the long edge (you want a 10″ long tube).
  4. Place it on a cookie sheet, cover with a towel and set in a warm spot while your oven preheats to 350 degrees Fahrenheit.
  5. When the oven is warm, slice the roll into 6 even pieces.
  6. Arrange the rolls in a greased 8 or 9″ baking dish (shape is not important).
  7. Bake for 35 minutes, or until they are a light golden brown and bubbling.
  8. When the rolls are still warm, but before they are completely cool, slather them with leftover cream cheese frosting if you have it around. If not, mix together the powdered sugar, milk and vanilla and drizzle over the cinnamon rolls
Notes

*If you are not using a pre-blended flour, you can either use Shauna’s All-Purpose Blend and add 2 teaspoons xantham gum. Whisk well before using.
Or you can make your own with 90 grams (3/4 cup) tapioca starch, 100 grams (1/2 cup) sweet white rice flour, 60 grams (1/2 cup) sorghum flour. Add 2 teaspoons xantham gum and whisk together well to ensure that the gum is spread throughout the flour.

3.1.09


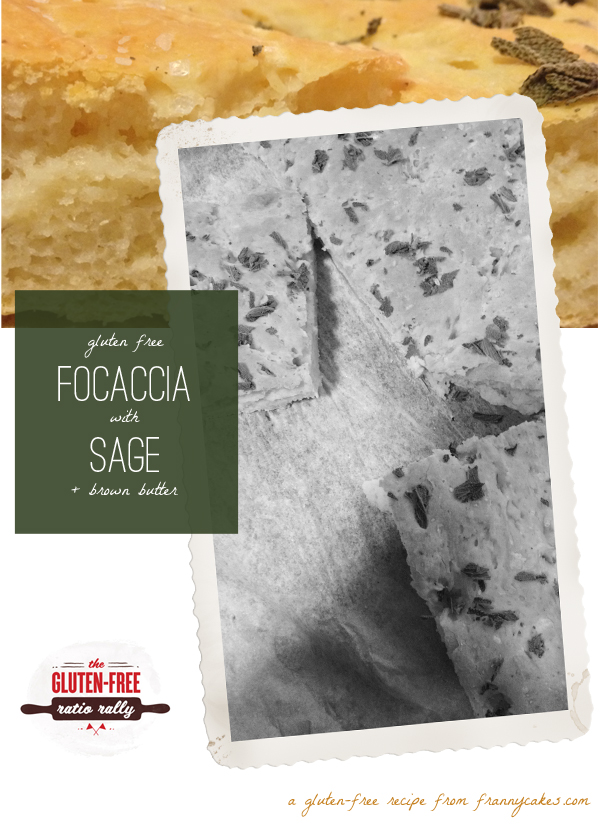
gluten free focaccia with sage & brown butter

Ratio Rally: Focaccia

This post is part of the Gluten-Free Ratio Rally, a group of gluten-free bloggers inspired and empowered by Ruhlman‘s Ratio and started by Shauna at Gluten-Free Girl. We get together each month and post many different takes on the same theme. This month that theme is Gluten-Free Tarts and the rally is being hosted by Heather from Discovering the Extraordinary.

gluten free focaccia with sage & brown butter

Yeast breads make me nervous. Very, very nervous.

Most likely because I never made yeasted bread before going gluten-free. I don’t have a lot of experience knowing how the dough or batter should behave.

Cakes, I got. Muffins & pancakes? We are good to go. Gluten-free cookies? Just call me an expert. Bread? Well, I am still learning. But I would qualify today’s recipe as a success.

The ratio: 5:4

Gluten free flours:liquids. Add a splash of oil for flavor. Call it winning.

I am serious. This is the easiest yeast bread I have made, and one that has a great flavor. There is an egg in there as part of the liquid, but it also helps beef up the structure and add a wee bit of lift.

Yes, this dough is wet. And a little sticky. You just have to trust me. It works. And it is darn good.

The flavors

Brown butter in place of the traditional olive oil. Sage on top. A sprinkling of sea salt. The yeasty flavor that you only get from home made or artisan loaves.

This is some seriously delicious bread.

It would make good sandwich bread when sliced in half. (Do I see paninis in my future? I sure hope so…)

Want a different flavor? Use good olive oil in place of the browned butter. Swap out the toppings. Mix something into the dough.

This months participants

Heather | Discovering the Extraordinary made Rosemary and Garlic Focaccia Bread 
Carol / Goodness Gluten Free made Gluten Free Garlic and Parmesean Focaccia 
Morri | Meals with Morri made Sweet Cinnamon Raisin Focaccia Bread
~Aunt Mae (aka ~Mrs. R) made Focaccia Bread 
Silvana / Silvana’s Kitchen made Sun-Dried Tomato and Olive Focaccia
TR | No One Likes Crumbley Cookies made Gluten Free Cheesy Herb Focaccia
Shauna| Gluten-Free Girl and the Chef made  Gluten-Free Cherry and Almond Focaccia

Ratio Rally: Focaccia

Author: Mary Fran Wiley
Prep time: 10 mins
Cook time: 35 mins
Total time: 45 mins
Serves: 8
Ingredients
  • 1 1/2 cups (355 ml) warm water
  • 13 grams (1 1/2 tablespoons) active dry yeast
  • 3 grams (1/2 teaspoon) sugar
  • 45 grams (3 tablespoons) butter
  • 1 egg
  • 1 teaspoon table salt
  • 500 grams (3 1/2 cups) GF All Purpose Flour (I use Cup4Cup)
  • 2 teaspoons xantham gum (omit if your flour blend contains this or a similar ingredient such as guar gum or Expandex)
  • generous sprinkling of chopped fresh or dried sage
  • 1 teaspoon sea salt
Instructions
  1. Preheat your oven to 150 degrees. Turn it off once it is warm.
  2. Line a 9×13 baking dish with parchment paper and grease well with olive oil or butter.
  3. In the bowl of a stand mixer, combine the warm water, yeast and sugar.
  4. Melt butter over medium-low heat and continue to cook until it turns brown and starts to smell slightly nutty. Be careful not to burn the butter. Let cool slightly.
  5. Add the egg and browned butter to the bowl of the stand mixer, and mix until just combined.
  6. Stir in the flour, salt and xantham gum (if using). Mix on a low speed for 3 minutes. You will have a slightly shaggy and tacky dough.
  7. Spread the dough into the baking dish with a spatula, trying to make it even.
  8. Cover the pan with a towel and place in the oven for 45 minutes.
  9. Remove from the oven, and heat the oven to 425 degrees Fahrenheit.
  10. Sprinkle the dough with the sage and sea salt.
  11. Put the pan in the oven, then drop the temperature to 375 degrees. Bake for 35-40 minutes, or until golden brown and hollow sounding when tapped.
3.1.09