Home » weight

Tag: weight

a recipe for mini gluten-free boston cream pies by frannycakes

Mini Gluten-Free Boston Cream Pies

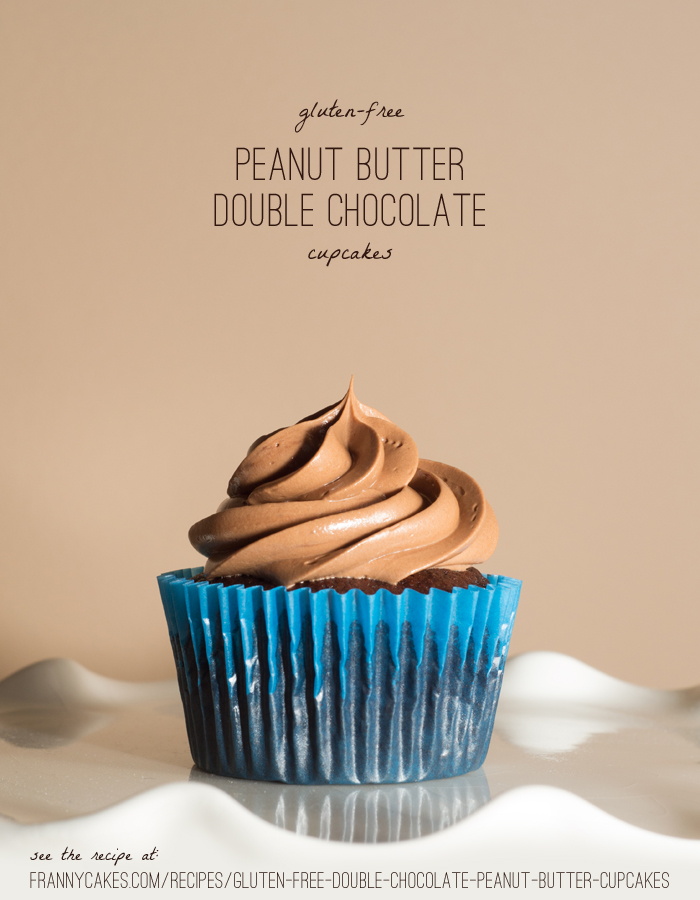
I really think that my coworkers are trying to stump me when it comes to making them birthday treats. Pulling whatever kind of flavor they can out of their heads to see if I really can do it. I mean, we had gluten-free peanut butter & jelly cupcakes and gluten-free double chocolate peanut butter cupcakes this summer.

learn to make gluten free boston cream pie on frannycakes.com

This time the request was for Boston Cream Pie Cupcakes – something that was actually a bit more traditional and a little less out there.

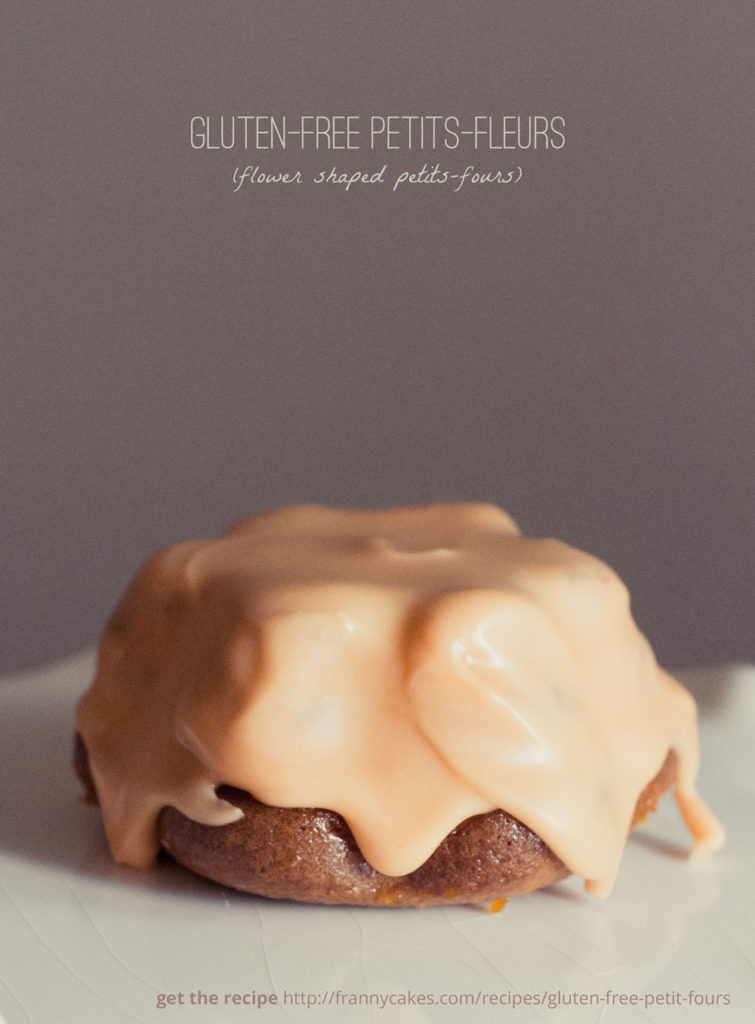
I decided that I was bored with the core & fill kind of cupcake, so I went a different route with these – I used a mini whoopie pie pan to make the cake pieces and then piped in some filling and poured on a thick glaze. And ended up with two-bite treats that were all gone before lunch.

chopped chocolate for chocolate glaze

The only caveat is that these do not transport well. If you try to take them on your 2-train 2-hour commute, they might just get a little banged up before you get them in to the office. (It won’t effect the flavor, but it might bruise your ego a wee bit). If these need to make a trip, I would bring all the components and assemble on-site. It takes about 10 minutes to combine all the parts into lovely little gluten-free boston cream (whoopie) pies.

a recipe for mini gluten-free boston cream pies by frannycakes

Mini Gluten-Free Boston Cream Pies
Recipe Type: Dessert
Cuisine: American
Author: Mary Fran Wiley
Prep time: 45 mins
Cook time: 25 mins
Total time: 1 hour 10 mins
Serves: 24
These are fun, but don’t travel well, so assemble shortly before serving.
Ingredients
  • For the Cakes
  • 175g (1¼ cups) gluten-free cake flour (143g high-quality all-purpose gluten-free flour + 4 tablespoons (32g) cornstarch)*
  • ½ teaspoon xanthan gum (omit if your blend already contains it)
  • ½ teaspoon baking powder
  • ¼ teaspoon baking soda
  • ¼ teaspoon kosher salt
  • 109 grams (½ cup) packed light brown sugar
  • 28 grams (2 tablespoons) unsalted butter, melted and cooled
  • 24 grams (2 tablespoons) vegetable shortening, melted and cooled
  • 1 extra-large egg at room temperature, beaten
  • 1 teaspoon vanilla bean paste (or replace with equal volume pure vanilla extract)
  • ½ cup + 2 tablespoons buttermilk
  • For the pastry cream
  • 30 grams (1/4 cup) cornstarch
  • 150 grams (3/4 cup) sugar, divided
  • 2 cups milk (I don’t drink milk, so I almost always use almond milk) , divided
  • 4 egg yolks
  • 1 teaspoon vanilla bean paste
  • 2 tablespoons butter
  • pinch of salt
  • Chocolate Glaze
  • 130 grams (4.5 ounces) bittersweet chocolate, roughly chopped
  • 60 grams (4 tablespoons) butter
  • 1 tablespoon corn syrup
Instructions
  1. Preheat your oven to 325 degrees F and grease a mini whoopie pie pan.
  2. In a large bowl, place the flour, xanthan gum, baking powder, baking soda and salt and whisk to combine well.
  3. Whisk in the brown sugar, making sure you remove any lumps.
  4. Next, mix in the butter, shortening, egg and vanilla and make sure everything is well combined.
  5. Now, add the milk and vinegar, and mix again to combine well. You will have a batter that is somewhere between cake batter and cookie dough in consistency.
  6. Using a small scoop or you can pipe about as much as a large marble to each well of your whoopie pie pan.
  7. Bake on a center rack for 8-10 minutes, or until the cakes bounce back when pressed gently in the center. Remove from the oven and allow to cool in the pan for 10 minutes before transferring to a wire rack to cool completely. Repeat with the remaining batter.
Make the pastry cream
  1. Prepare an ice bath.
  2. In a small mixing bowl, combine ¼ cup sugar, egg yolks and the creamer (or ½ cup milk).
  3. In a medium sauce pan over medium heat, bring the remaining 1½ cups milk to a boil, stirring constantly.
  4. Remove from heat and add the hot milk to the egg mixture about a third at a time to temper the eggs. If you do this too fast you will end up with scrambled egg yolks and not a smooth cream.
  5. Return the pot to the stove and add the egg mixture. Over medium heat, keep whisking until the cream thickens and when you scrape the bottom of a pot, the cream does not close the gap immediately. Stir in the vanilla, salt and butter.
  6. Put the pot over your ice bath and stir every 5-10 mintues for about half an hour, or until the cream has cooled.
Make the glaze
  1. When you are ready to assemble the mini boston cream pies, melt together the chocolate, butter and corn syrup over low heat. If the mixture is not pourable, add an extra tablespoon of butter.
Assemble the cakes
  1. Pipe the pastry cream onto half of the cake pieces. Take one of the other cake pieces and top each one. Pour or spread chocolate glaze on each mini Boston cream pie.
Notes
*I use Cup4Cup Gluten-Free All-Purpose flour, and if you don’t have cornstarch, you can use it for the full amount called for here, the cakes will just be a little denser. This recipe will work with almost any GF AP Blend but it will not work with bean-flour based blends or baking mixes that contain baking powder or baking soda.
3.2.2124


gluten-free petits (fours) fleurs

*sponsored post* Cake Boss Baking Gluten-Free Petits-Fleurs

gluten-free petits (fours) fleurs[box type=”info”]This post is made possible by Cake Boss Baking. Sponsors like them help me offset the costs of maintaining the site. I only work with brands who I trust and would use in my kitchen with or without sponsorship.[/box]

Let’s take a break from our gluten-free cupcakes for a hot second. We all know they are pretty awesome. But we can do better. Or at least different. And you can still win any office food event without them. (Because we all know that office food events are a contest and contests are made for winning).

gluten-free almond genoise cakes with apricot glaze and poured fondant

I really love almond paste. I will eat almond paste straight from the can. Sugar and almonds. I mean, it is almost just an unbaked macaron, right? And marzipan. Candy made from almond paste and either rolled over a cake like fondant or shaped into little fruits. Macarons. Dacquoise. Almonds and fancy, high-fallutin’ pastry go hand in hand.

Like in petits fours.

Often a genoise with jelly filling and a marzipan or jelly glaze and poured fondant. Fussy little mini layer cakes. (Ok, a petit four can be any individual size treat, but the most common is the mini layer cake kind).

But we don’t want to be too fussy. So we’re going to use flower cakelette pans from Cake Boss Baking to make flowers. We’re going to call them fleurs because we want people to think we are fancy pants.

gluten-free petits (fours) fleurs: almond genoise, apricot glaze and poured fondant

We’re going to make a poured fondant. If you have a food processor, it is easy peasy. And there is none of the precision that piping buttercream rosettes required. It is dump & done.

You’ll end up with a lovely little set of cakelettes. The delicate flavor of almonds dances with the apricot and fondant. And they are light little cakes of delight.

And if you use this lovely little pan, your cakelettes will be little flowers, or petit-fleurs. The pan is non-stick and heavy duty – perfect for any kind of cake you can throw at it. (But this is clearly the best cake you can…)

win a cakelette pan from cake boss


A giveaway you say?

Fo sho! The folks over at Cake Boss Baking are giving away one of their Flower Cakelette Pans so you can make your own Gluten-Free Petits Fleurs.

Make sure you check out Cake Roulette this Saturday, Spetember 28, 2013 at your local Michael‘s store from 10-12 noon for a chance to win more prizes and get recipes from their team.
a Rafflecopter giveaway

It must be a Throwback Thursday!

Remember when I met Buddy? (aka the Cake Boss) I got a special sneak peek back at the Home & Housewares Show in Chicago. He was super gracious to stop for a photo.

I loved all the different items in the line, from the pans to the bowls and accoutrements (including some pretty clever spatulas that say things like “addicted to dessert”).

Gluten-Free Petits Fleurs
Recipe Type: Dessert
Cuisine: American
Author: Mary Fran Wiley
Prep time: 2 hours
Cook time: 25 mins
Total time: 2 hours 25 mins
Serves: 9
These are a play on a traditional petit four. Almonds, apricots and poured fondant make these gluten-free cakelettes cake both simple and elegant.
Ingredients
  • For the gluten-free cakelettes
  • 85 grams (6 tablespoons) unsalted butter, softened
  • 175 grams (1¼ cups) gluten-free cake flour (143g high-quality all-purpose gluten-free flour + 4 tablespoons (32g) cornstarch)
  • 4 grams (3/4 teaspoon) baking powder
  • 1 gram (1/4 teaspoon) baking soda
  • 1/4 teaspoon salt
  • 200 grams (1 cup) sugar
  • 130 grams (1/2 cup) almond paste**
  • 4 large eggs, separated
  • 1/2 teaspoon vanilla extract
  • 1/2 cup whole milk
  • Glaze
  • 1/2 cup apricot jam, melted
  • For the poured fondant
  • 500 grams (2 1/2 cups) sugar
  • 115 grams (1/3 cup) corn syrup
  • 1/2 cup (120 ml) water
  • 1/2 – 3/4 cup simple syrup (if you don’t have any, make your own with 1 cup sugar and 1/2 cup water brought to a boil and cooled.)
  • 1/2 teaspoon vanilla extract
  • Food coloring (optional)
Instructions
Start the fondant
  1. In a mall sauce pan, boil together the sugar, corn syrup and water until they hit 238 degrees Fahrenheit.
  2. Pour into the bowl of a food processor and let cool until the temperature drops to 140 degrees.
  3. Turn on the processor and blend until the mixture turns to a smooth, creamy white (about 2 minutes).
  4. Transfer to the bowl of a double boiler.
Bake the cakelettes
  1. Preheat oven to 350 degrees. Grease & flour your cakelette pan Sift flour, cornstarch, baking powder, baking soda, and salt into a large bowl; set aside.
  2. Put 3/4 cup sugar and the almond paste into the bowl of an electric mixer fitted with the paddle attachment. Mix on medium-low speed until mixture resembles coarse meal, about 2 minutes. Raise speed to medium-high. Add butter; mix until pale and fluffy, about 2 minutes. Mix in egg yolks and vanilla. Add flour mixture in 2 batches, alternating with the milk. Transfer to a large bowl; set aside.
  3. Put egg whites into the clean bowl of an electric mixer fitted with whisk attachment; beat on medium-high speed until foamy. Gradually add remaining 1/4 cup sugar, beating until soft peaks form. Fold one-third of egg-white mixture into batter with a rubber spatula. Gently fold in remaining egg-white mixture.
  4. Fill the cake wells 2/3 full (I used 2 scoops with a standard cupcake scoop). Bake for 20-25 minutes. Cakes should be a light golden brown and should spring back when tapped lightly or a cake tester should come out clean when inserted. Invert over a wire rack immediately. Re-grease the wells and fill with the remaining batter and bake as before.
Decorate the cakelettes
  1. When cakes are cool, heat the apricot jam and strain. Discard the chunks and brush the cakes with the sticky syrup. Place on wire racks over rimmed baking sheets and set in the freezer while you warm the fondant.
  2. Add 1/2 cup simple syrup to the fondant and heat over gentle heat. (You don’t want the temperature to get over 110 degrees Fahrenheit). Heat and add syrup extra simple syrup until the fondant becomes just pourable. It needs to be thin enough pour and drip down the sides. If it is too thick, it won’t look delicate and will instead be a gloopy mess.
  3. Add your vanilla and food coloring (if using).
  4. Remove your cakes from the freezer and pour the fondant over the cakes. If it does not pour easily, add a little more simple syrup and re-warm. You can use a spatula to nudge the fondant over the edges of the cakes.
  5. If desired, top with sprinkles or other decorations while the fondant is still warm. Let cakes cool before serving.
  6. Cakes will keep for about 3 days once covered.
Notes
*I use Cup4Cup gluten-free all-purpose flour, and you can just use it for the full amount, but the result with the added cornstarch will be a slightly lighter cake.[br]**Make sure your Almond Paste is gluten-free. Some brands are not.
3.2.2124


gluten-free cannolizelli from kyra bussanich

Sweet Cravings | Kyra’s Gluten-Free Cannolizelli

sweet cravings by kyra bussanich review

I remember the first time I met Kyra, it was at the 2012 Gluten & Allergen Free Expo in Chicago. I was there promoting my first ebook and she was there with samples of her famous truffle brownies. It was friendship at first bite. Over the past couple of years I have had the opportunity to see her take on countless bakers on her 4 appearances on Cupcake Wars and knock out nearly all the competition (She has 2 wins and 2 runner-up finishes under her belt and was the first gluten-free winner on the show).

gf friends
Her cupcakes aren’t just good for gluten-free, they are damn good.   Needless to say, I was crazy excited when I found out she was writing a cookbook. And maybe even a little giddy when she showed off the cover art when I got to see her in February. The book, Sweet Cravings, did not disappoint. Kyra is a trained pastry chef, so she approaches recipes a little differently than us mere mortals. She worked out protein and starch content ratios to make sure that each recipe mimics (or bests) its gluten-filled counterpart.

As you page through the book you will feel urged to drop everything and get to your kitchen and bake. Lush photos (let’s call it what it is, food porn) make you feel like Kyra can help you do just about anything. The book has a very in depth introduction that talks you through the different ingredients she uses and what properties make each ingredient unique. Measurements are included in both volume and metric units, so no matter how you prefer to bake, you will be able to make everything in the book. Unleash your dreams of being a food tv rockstar and start baking some gluten-free cupcakes!

The Rating

Author: Kyra Bussanich
Title: Sweet Cravings
Format: hard cover, full color center photo section
Stars: 5/5*
Buy it or Forget it: Buy it and live out your dreams of Cupcake Wars Domination
Must try recipes: Cannolizelli, Persian Love Cakes with Cardamom Buttercream, Pumpkin Spice Bread

*Read more about my cookbook review criteria.Kyra and I are good friends, and if her cookbook were not super awesome, I wouldn’t review it. I received a copy of the book in PDF form from Kyra and Ten Speed Press provided a physical review copy as well as a copy to give away. 

The Giveaway

There are multiple ways to enter, the only one you have to do is leave a comment here, the rest are optional but they will increase your odds of winning. The giveaway will end on September 25 at 11:59pm CST.

a Rafflecopter giveaway

gluten-free cannolizelli from kyra bussanich

Gluten-Free Cannolizelli
Recipe Type: Dessert
Author: Kyra Bussanich
Serves: 20
Recipe reprinted with permission from Ten Speed Press/Kyra Bussanich. “When I was a child, our Christmas Day tradition was making cannoli. My dad grew up in the Bronx and was enamored with Ferraro’s Cannoli, a landmark in Little Italy. He had figured out a really great approximation of their recipe, so every year we would carefully stir together the ricotta, confectioners’ sugar, spices, and rum, spoon the cannoli filling into the crispy flour tortilla shells, and dust the whole thing with confectioners’ sugar. Then we would pile the cannoli on paper plates and deliver them to our friends and neighbors. Nowadays, I make cannoli in a gluten-free shell. Here’s how.”
Ingredients
  • Shells
  • 3 egg whites
  • 1/2 cup / 113 g sugar
  • 1/3 cup / 71 g butter, melted
  • 1 teaspoon / 5 g vanilla extract
  • 3/4 cup / 122 g sweet white rice flour
  • 1/4 cup / 31 g tapioca starch
  • 1 teaspoon / 5 g baking powder
  • Filling
  • 1 (15-ounce) container / 425 g whole milk ricotta cheese
  • 1/2 cup / 71 g confectioners’ sugar, plus extra for dusting
  • 1/4 cup / 59 g heavy cream
  • 1 teaspoon / 2.6 g cinnamon
  • 1/4 teaspoon / .9 g freshly grated orange zest
  • 11/2 teaspoons / .8 g rum
  • 1/2 teaspoon / 2.5 g vanilla extract
  • 1/4 cup / 43 g semisweet mini chocolate chips
  • 1/4 cup / 31 g toasted pistachio nuts, coarsely chopped (optional)
Instructions
Make the shells
  1. To make the shells, using a stand mixer with a whip attachment, whip the egg whites and sugar until very thick and pale and fluffy. Then whip in the butter and vanilla. In a small bowl, combine the flour, starch, and baking powder. Sprinkle into the egg white mixture and blend well.
  2. Drop by small spoonfuls onto a heated, greased Pizelle iron. Close the lid and cook 30 to 45 seconds, until no more steam is escaping and the shell is golden brown. Open the lid and immediately shape the shells around a cannoli tube form or a sanitized broom handle. Be careful because the cannoli will be super hot coming off the iron. I use a fork and then drape the shell around the cannoli form. Let the shells cool on the form before sliding them off. It’s helpful to have 4 or 5 cannoli forms so you can continue to bake while the previous batch is cooling.
Make the filling
  1. To make the filling, mix together the ricotta, confectioners’ sugar, cream, cinnamon, orange zest, rum, and vanilla until well combined. Stir in the chocolate chips and pistachio nuts.
Assembly
  1. Right before serving, fill a pastry bag with the filling (or use a zip-top bag with a corner snipped off) and gently squeeze the filling into each end of the shells. If you fill them too early, the shells will soften and may break. Dust with confectioners’ sugar and serve.
  2. You can make most of this ahead of time and assemble at the last minute: freeze the baked shells in an airtight container and refrigerate the filling until just before you’re planning to serve. If you want to assemble them ahead of time, melt together 1/2 cup of semisweet or dark chocolate and 11/2 teaspoons of butter and use a small pastry brush to gently paint the inside of the shells with the mixture. This acts as a barrier to the moisture, and also adds more chocolate flavor!
3.2.2124


gluten-free peanut butter chocolate cupcakes from frannycakes

Gluten-free Double Chocolate Peanut Butter Cupcakes

Just for one moment imagine you have met someone incredibly interesting. And that someone happens to be handsome. Fairly funny. A giant nerd who loves sic-fi and web related nerdery. He wears google glass and loves open-source software. Now imagine he can recite Shakespeare and quoted the first sentence of Pride & Prejudice when you were discussing your favorite books.

Don’t forget to imagine him as charming. The sort of charming that disarms you. Makes you want to hang on his every word. He tells you stories about a past filled with the types of risks you wish you took.

Oh, and then he kisses you. A real foot-popping kiss. An earnest, sweet kiss. The kind you both want to call all your girlfriends to discuss but want to keep it to yourself just a little bit longer.

Yes, imagine all that (although, if you would rather a surfer dude with a love of detective novels, feel free to replace my dream dude for yours in this little fantasy).

gluten-free double chocolate cupcakes from frannycakes

But as a cupcake. (Yes, I totally went there. And, no, I am not ashamed).

It is no secret that I have a life-long love affair with baked goods, so it should come as no surprise that I might have fallen in love with these particular cakes. Because unlike the boy, there is something real to the relationship. There is more than boyish charm and nerdy good looks. There is cake.

gluten-free peanut butter chocolate cupcakes from frannycakes

More precisely, there is moist chocolate cake, velvety chocolate buttercream, surprise peanut butter centers. This is a serious cupcake. Appropriate for any situation in which a cupcake needs to love you back. Like the time when the aforementioned boy decides you are not the girl of his dream, you know it’s ok because you have this cupcake.

A magic gluten-free cupcake that loves you.

gluten-free double chocolate peanut butter cupcakes from frannycakes

Gluten-free Double Chocolate Peanut Butter Cupcakes
Author: Mary Fran Wiley
Prep time: 1 hour
Cook time: 25 mins
Total time: 1 hour 25 mins
Serves: 30
This is a recipe for winning at life or at least for winning at dessert (or a bake sale or office party).
Ingredients
  • For the cupcakes
  • 63 grams (1/2 cup + 3 tablespoons) cocoa
  • 1 cup boiling water
  • 3 large eggs
  • 1 tablespoon vanilla
  • 235 grams (2¼ cups plus 2 tablespoons) GF AP flour*
  • 1 teasponn xanthan gum**
  • 300 grams (1½ cups) granulated sugar
  • 15 grams (1 tablespoon) baking powder
  • 5 grams (3/4 teaspoon) salt
  • 227 grams (2 sticks) butter, softened.
  • Filling
  • 170 grams (1 1/2 cups) confectioners’ sugar
  • 135 grams (1/2 cup) creamy peanut butter
  • 26 grams (2 tablespoons) butter, at room temperature
  • 1/2 teaspoon vanilla extract
  • For the Frosting
  • 8 large egg whites (30g each–total 225g, or 1 cup)
  • 400 grams (2 cups) granulated sugar
  • 560 grams (5 sticks) of unsalted butter, softened but cool, cut into cubes
  • 30 ml (2 tablespoons) pure vanilla extract
  • ¼ tsp salt
  • 400 grams (about 2 cups of discs) high quality chocolate
  • 1 teaspoon vanilla extract
Instructions
Bake the cupcakes
  1. Preheat the oven to 350 degrees Fahrenheit. Prepare the cupcake tins with papers & grease the tops.
  2. In a medium bowl, whisk together the boiling water and cocoa til smooth. Let sit for a couple minutes to come to room temperature.
  3. In a second bowl, lightly beat together the eggs, ¼ of the cocoa mixture and the vanilla.
  4. In the bowl of a stand mixer, combine the flour, sugar, baking powder and salt and stir on low to combine.
  5. Add butter and the remaining cocoa mixture and mix on low speed until all ingredients are moistened. Increase speed to medium for a minute and a half to develop structure.
  6. Scrape down the sides of the bowl and add the cocoa & egg mixture in 3 batches, beating for about 30 seconds after each addition.
  7. Use a scoop and fill the tins ½-2/3 full. You should end up with exactly 30 cupcakes.
  8. Bake for 20-25 minutes. If you are baking with multiple pans in the oven at once, rotate them halfway into baking.
  9. The cake should spring back when lightly pressed, or a toothpick inserted into the center should come out clean.
  10. Cool in the pans for about 5 minutes, and then move to a cooling rack until completely cool.
Make the filling
  1. While the cupcakes are baking, make the filling.
  2. In the bowl of an electric mixer fitted with the paddle attachment, or using a handheld mixer, beat together the sugar, peanut butter, butter, and vanilla at medium speed. The dough should end up slightly crumbly.
  3. Roll the dough into 30 balls, about 1 teaspoon each. Set aside.
For the frosting
  1. While the cakes cool, make the frosting.
  2. Combine the egg whites and sugar in a small pot until they reach 140 degrees fahrenheit.
  3. Transfer to a clean stand mixer bowl. Using the whisk attachment, beat until light and fluffy (soft peaks).
  4. Switch to the paddle attachment and add the butter one chunk at a time until it is all combined.
  5. Melt the chocolate in the microwave on half power, heating it first for 30 seconds, and then in 15 second intervals after that, always stirring after each burst of heat. Once melted, let the chocolate cool so that it is still melted but just warm, not hot – you don’t want it hot so that it melts the butter, and then add it to your frosting, beating and scraping down the sides so you have a velvety and evenly mixed buttercream.
Assemble the cakes
  1. Remove the centers from the cupcakes using a cupcake corer, melon baller or pairing knife.
  2. Place one peanut butter ball in each cake. Top with the tops of the centers so there is cake on top of the peanut butter. You just want the top 1/4 inch or so of the removed center.
  3. Pipe a generous swirl of buttercream on each cupcake.
Notes
*I test all recipes using Cup4Cup Gluten-Free All-Purpose flour and it is by far my favorite. If you cannot find it where you live, Jules Nearly Normal flour is a close second. [br]**Omit if your blend contains xanthan gum, guar gum or expandex.
3.2.2124


Peanut Butter & Jelly Cupcakes

My birthday is a once a year occasion. Which is sad because the more birthdays I have, the more excuses I would have to bake a cake. The good news here is that I have friends. And all of those friends have birthdays. And the best part is that friends with birthdays challenge me to make cupcakes, cakes and other desserts that I wouldn’t normally make.

gluten-free peanut butter and jelly cupcakes

Like these cupcakes. Peanut butter & jelly cupcakes. I had used the combination in some gluten-free blondies last fall, and thought that was enough exploration of the classic combination. A peanut butter & jelly chocolate at the French Laundry made me certain that I could never live up to something that elevated a childhood classic.

But when my friend/coworker/fellow WordPress geek/the person responsible for my further downfall into nerdiness, Andi, asked for peanut butter and strawberry jelly cupcakes for her work birthday treat, I couldn’t refuse. In fact, I spent a couple of weeks thinking about how I would make it happen. Peanut butter filled vanilla cakes with strawberry frosting? Strawberry cakes with peanut butter frosting? The ways this could have gone… But, I remembered. Joy the Baker had a recipe for Peanut Butter Birthday Cake in her cookbook. And that Joy, she has never steered me wrong.

gluten-free peanut butter & jelly cupcakes from frannycakes

So, I made a gluten-free buttermilk peanut butter cake. I frosted them with a classic American buttercream augmented with some peanut butter. But the crowning jewel? More of Mammacake’s home made strawberry preserves. (I might have used a whole jar…)

piping practice

These cupcakes also happened to be the first chance I had to use my new piping skills from the Wilton BlogHer workshop. I felt pretty accomplished piping buttercream flowers onto the tops of all of those cupcakes.

gluten-free pb&j cupcakes in holder

Gluten-Free Peanut Butter & Jelly Cupcakes
Recipe Type: Dessert
Cuisine: American
Author: Mary Fran Wiley
Prep time: 20 mins
Cook time: 25 mins
Total time: 45 mins
Serves: 24
The cake is adapted to be gluten-free (and cupcakes) from the Joy the Baker Cookbook by Joy Wilson. The frosting is how my mom taught me to make it when I was a kid. The preserves were stolen when Mammacakes wasn’t looking.
Ingredients
  • for the cake
  • 315 grams (2 1/4 cups) gluten-free all-purpose flour*
  • 1 gram (1 teaspoon) xanthan gum**
  • 10 grams (2 teaspoons) baking powder
  • 5 grams (1 teaspoon) baking soda
  • 3 grams (½ teaspoon) salt
  • 205 grams (3/4 cup) smooth peanut butter
  • 85 grams (6 tablespoons or 3/4 stick) butter, softened
  • 100 grams (½ cup) granulated sugar
  • 110 grams (½ cup firmly packed) brown sugar
  • 3 large eggs
  • 1 cup + 2 tablespoons (265 ml) buttermilk
  • for the frosting
  • 170 grams (1½ sticks) butter, softened
  • 65-130 grams (1/4-½ cup) smooth peanut butter
  • 675-900 grams (6-8 cups) confectioner’s sugar
  • 2 teaspoons vanilla extract
  • ½ cup (118 mls) milk
  • pinch of salt
  • filling
  • 1/2 pint jar of your favorite jam or preserves
Instructions
Make the cupcakes
  1. Preheat oven to 350 degrees Fahrenheit (175 C). Position one rack in the center and one in the top third of the oven. Line a cupcake tin with papers and grease the tops (just in case)
  2. In a medium bowl, whisk together the flour, xanthan gum (if using), baking powder, baking soda and salt. Set aside.
  3. In the bowl of a stand mixer, cream together the peanut butter, butter, sugar and brown sugar for 3-5 minutes. You want the mixture to be light and fluffy.
  4. Add the eggs one at a time, beating for 1 minute on medium and scraping down the sides of the bowl before each addition.
  5. Add half the flour mixture and mix on low speed and slowly add the buttermilk.
  6. Scrape down the sides and add the rest of the flour mixture until the batter just starts to come together. Remove the bowl from the mixer and finish stirring with a spatula.
  7. Use a spring loaded ice cream scoop or spoon to fill the cupcake papers 1/2-2/3 full.
  8. Place one cupcake tin on each rack and bake for 10 minutes. Rotate the pans and bake for another 8-12 minutes. You want a toothpick to come out clean and the top of the cakes to bounce back if pressed.
  9. Cool completely on a cooling rack.
Make the frosting
  1. In the bowl of a stand mixer combine the butter, 65 grams (1/4 cup) of the peanut butter, 450 grams (4 cups) of the sugar, the milk and the vanilla.
  2. Beat on medium for 3-5 minutes.
  3. Gradually add the remaining sugar 1 cup (115 grams) at a time, beating for 2 minutes after each addition.
  4. When the frosting is firm enough to pipe, stop adding sugar and add the salt. If the frosting is too firm or not peanut butter-y enough you can add more peanut butter. I used 1/4 cup and nearly the full amount of powdered sugar. Your results will depend on the humidity, the type of peanut butter and how soft your butter was.
Assembly
  1. Remove the centers of the cupcakes with a cupcake corer or a paring knife, being sure to leave a little cake at the bottom of your well.
  2. Pipe in the jam or preserves until the well is almost full. Replace the tops of your holes (you will toss some cake, just save the part that is the very top of the removed cake) to keep the jam from making the frosting mushy.
  3. Pipe your frosting on your cupcakes. I made rosettes because I don’t think these need that much frosting, but you will have enough frosting to do a normal swirl if you would like.
  4. Sprinkle with decorative sugar, if you feel like it. I used pink to represent the strawberry jam inside.
Notes
*I prefer Cup4Cup gluten-free all purpose flour and use it in all of my tests. You would also have good results with Jules Nearly Normal Flour and Better Batter.[br]**If your gluten-free all-purpose blend includes xanthan gum or an equivalent (the ones listed above all do), you can omit this.
3.2.2124


gluten-free lemon raspberry cupcakes

The three best cures for anything

There is an Irish proverb that says “A good laugh and a long sleep are the two best cures for anything.”

My ancestors got that mostly right.

Sure, there is nothing like curling up in your bed, wrapped in a comforter with squishy pillows to make you feel better. Bed is a great place to recover from colds, surgeries and broken hearts.
bed

As for laughter, it is a scientific fact that laughter is good for you and might even cure what ails you. There is nothing like a good, belly-punching laugh. You know the kind. You get them when you are talking to your girl friends about that night in college. You get them from I Love Lucy. And they make you feel better. Each and every time.

But they forgot something very important.

Cupcakes.

How could they forget cupcakes? Cupcakes cure a good deal of things.

Three Gluten-Free Lemon Raspberry Cupcakes

They are effective treatment for the times you get dumped because you bought a pair of designer shoes. They can also be used to help ease the regrets you have for kissing someone you shouldn’t have. Conversely, they are an excellent way for you to take time and over-analyze your interactions with that guy you like.

After surgery, cupcakes are an essential part of the recovery process.

They work wonders for friendships. (I bribe people to be my friends with cupcakes. It’s a thing. And I’m ok with it.)

Gluten Free Lemon Cupcakes on a wire rack

Sometimes, cupcakes can even be a force for good and help end childhood hunger.

These particular cupcakes were made for for the Chicago Blogger Bake Sale hosted by My Daily Find Chicago and the 900 Shops on Michigan Avenue. Proceeds from the event went to benefit No Kid Hungry as part of the Great American Bake Sale campaign.

Blogger Bake Sale 2013

 These are some serious gluten-free cupcakes. A lemon vanilla bean cupcake filled with raspberry jam and topped with a lemon merengue buttercream. They manage to be light and decadent at the same time, a balance that is hard to find in cupcakes.

gluten-free lemon raspberry cupcakes

Gluten-Free Lemon Cupcakes

Recipe Type: Dessert
Cuisine: American
Author: Mary Fran Wiley
Prep time: 20 mins
Cook time: 40 mins
Total time: 1 hour
Serves: 36
These cupcakes are a little bit sturdier than some white cakes, but that is because you need to make sure they don’t fall apart when you remove the centers.
Ingredients
  • For the cakes
  • 1½ cups (360 ml) milk at room temperature
  • 7 large (210 grams) egg whites (pasteurized are fine), at room temperature
  • 1 large egg, at room temperature
  • 1½ teaspoons vanilla bean paste OR 1 vanilla bean scraped OR 1½ teaspoons vanilla extract
  • 1½ teaspoons lemon extract
  • 460 grams ( 3¼ cups) gluten free all purpose flour*
  • 2 teaspoons xantham gum**
  • 450 grams (2¼ cups) granulated sugar
  • 7 grams (1 teaspoon) salt
  • 1½ sticks (170 grams) butter, at room temperature and cut into cubes
  • 85 grams (6 tablespoons) vegetable shortening
  • Zest from 1 lemon finely minced
  • To assemble
  • 1 recipe Lemon Merengue Buttercream (recipe follows)
  • approximately 1 cup raspberry jam
Instructions
Make the cakes
  1. Preheat oven to 350°F. Line 3 cupcake tins with papers, grease the tops of the pans and set aside.
  2. In a small bowl, mix together ½ cup of the mil, the egg whites, egg and vanilla
  3. extract.
  4. In the bowl of a stand mixer fit with the paddle attachment, combine the dry ingredients including the sugar on low speed for 30 seconds.
  5. Add butter & shortening and mix on low speed for 30 seconds. Add the remaining milk and stir untill just moistened. Increase the speed to medium and mix for a
  6. minute and a half.
  7. Scrape down the sides of the bowl and add the egg/milk/extract mixture in 3
  8. groups, scraping down the sides before each addition.
  9. Gently stir in the lemon zest.
  10. Using a large ice cream scoop, divide the batter evenly among the cupcake papers,
  11. making sure that none of them are more than ⅔ full (or you could have a little bit of
  12. a mess).
  13. Bake 2 cupcake trays at a time for 20-25 minutes, until a toothpick inserted into the
  14. center comes out clean.
  15. Cool cupcakes on a wire rack.
Assembly
  1. While the cupcakes bake, make a recipe of Lemon Merengue Buttercream.
  2. Remove the centers from the cupcakes using a cupcake corer or a paring knife, making sure you don’t go all the way to the bottom of the cupcake.
  3. Fill the wells with raspberry jam. I find that it is neatest when you use a pastry bag and a large, plain tip.
  4. You can replace the tops on the jam wells if you only fil them 2/3 full.
  5. Pipe the buttercream on top.
Notes
*I use [url href=”http://www.cup4cup.com/”]Cup4Cup gluten-free flour[/url] in almost all of my recipes. I find that it gives me the most consistent results. You can also use Jules’ Nearly Normal flour, Better Batter or the King Arthur gluten-free flour (this one requires the xantham gum). Baking mixes or bean flour based mixes will not work. **If your mix contains xantham gum, guar gum or expandex, leave this out.
3.2.1337
3.2.1337
Lemon Buttercream

Recipe Type: Dessert
Author: Mary Fran Wiley
Cook time: 45 mins
Total time: 45 mins
Ingredients
  • 8 large egg whites (30g each–total 225g, or 1 cup)**
  • 400 grams (2 cups) granulated sugar
  • The peel of 1 lemon
  • 560 grams (5 sticks) of unsalted butter, softened but cool, cut into cubes
  • 1 1/2 teaspoons pure vanilla extract
  • 2 teaspoons lemon extract
  • ¼ tsp salt
  • Yellow Gel Coloring
Instructions
  1. Combine the egg whites, sugar and lemon peel in a small pot until they reach 140 degrees fahrenheit.
  2. Strain your sugar syrup into a clean stand mixer bowl, you want to make sure that the lemon peel doesn’t make it into the bowl. Using the whisk attachment, beat until light and fluffy (soft peaks) and the temperature is neutral – the bowl should not be warm to the touch.
  3. Switch to the paddle attachment and add the butter one chunk at a time until it is all combined.
  4. It might look like it is starting to curdle, don’t panic! It should all smooth out by the time you add the last bit of butter. If it is getting too loose, you can pop it in the fridge for 5 minutes to help it set up.
  5. Add small amounts of yellow gel coloring until the buttercream is the color you desire.
3.2.1337
3.2.1337


A spring in my step : Honey Lavender Ice Cream

Yes, darlings, I have been over-sharing a bit lately. Or just sharing. Spreading some awareness.

But awareness is exhausting. I need a break from telling you so much about myself. Because, soon, you are going to know me better than I know myself.

And, besides, it is spring. It even momentarily was get a pedicure and dig out the sandals weather here in Chicago.

So, I dug out some spring flavors and the ice cream maker. And I made you a treat.  Read more

gluten-free jammie dodgers

Ratio Rally: Shortbread (Gluten-Free Jammie Dodgers)

This post is part of the Gluten-Free Ratio Rally, a group of gluten-free bloggers inspired and empowered by Ruhlman‘s Ratio and started by Shauna at Gluten-Free Girl. We get together each month and post many different takes on the same theme. This month that theme is Gluten-Free Shortbread and the rally is being hosted by Meaghan from Wicked Good Vegan.

Come along, Pond.

It has been a while since my last contribution to the Ratio Rally, and I can’t be happier to be back. With a pot of coffee, twelve jammie dodgers and a fez.

I might be excited because I am letting my nerd flag fly just a little bit. I can’t begin to tell you how long I have been planning to make these – it has been since I found out that the rally this month was for shortbread. Because shortbread meant an excuse to make a gluten-free “jammie dodger”. A british sandwich cookie that has a jam filling. They are buttery, just the right about of crumbly and crunchy.

A cookie for a grown up who likes the charm of a sandwich cookie but with the simple sophistication of a shortbread. Ok, and a cookie for your next gluten-free Doctor Who marathon.

For those of you who are not as awesomely nerdy as I am, the BBC sci-fi series Doctor Who has featured these cookies as the current incarnation of the Doctor’s favorite cookie, they even stood in for a self destruct button for the Tardis, his time machine/space ship, in one episode.

So clearly, I, as a proud nerd, had to make some. Having never had the real ones, and not being to able to ever have them, all I know is that these cookies seem to fit the descriptions of Jammie Dodgers that I could find. A shortbread cookie with a jam filling.

Done.

gluten free ratio rally logo

Shortbread is easy: 1 part sugar, 2 parts butter, 3 parts flour. And you can experiment from there. My ratio is a little different, but only because I bumped up or down amounts to get them to be even with the way butter is sold and to have an even cup of sugar (just in case you are still using your old fashioned measuring cups…shame on you!)

You can find the full list of this month’s participants at Wicked Good Vegan.

gluten-free jammie dodgers

Gluten-Free Jammie Dodgers

Recipe Type: Cookie
Cuisine: British
Author: Mary Fran Wiley
Prep time: 30 mins
Cook time: 17 mins
Total time: 47 mins
Serves: 24
Ingredients
  • 460 grams (4 sticks) unsalted butter, room temperature
  • 200 grams (1 cup) sugar
  • 1/2 teaspoon salt
  • 2 teaspoons vanilla bean paste
  • 680 grams (5 cups) gluten-free all purpose flour blend*
  • 2 1/2 teapsoons xantham gum**
  • Strawberry or rasperry jam
Instructions
  1. Cream together the butter, sugar, salt and vanilla bean paste until it is just blended.
  2. Add the flour in 2 batches, scraping down the sides of your mixer after each addition.
  3. Stir in the vanilla bean paste.
  4. Refrigerate the dough for about 30 minutes. About halfway through this time, preheat your oven to 350 degrees.
  5. Lightly flour a surface and roll the dough out and cut into 2.5″ circles. On half of them, cut out a small circle or heart.
  6. Pop the cut out cookies on cookie sheets into the freezer for 5 minutes before baking.
  7. Arrange about a half inch apart on a cookie sheet lined with parchment and bake for 12-15 minutes.
  8. Cool on a wire rack.
  9. Spread the half the cookies with a scant teaspoon of jam and then top with a cookie with a hole cut out of it to make a sandwich.
Notes
*This recipe will work best with Cup4Cup Gluten-Free All Purpose Flour. You may use Jules Nearly Normal or Better Batter flours with good results. Do not use a baking mix such a Pamela’s or Gluten-Free Bisquick. **Xantham gum only needed if it isn’t in your all-purpose blend, the suggested blends already include it.
3.2.1337
gluten free maple cinnamon rolls

Gluten free maple cinnamon rolls

gluten free maple cinnamon rolls

Sometimes, it is all about the food.

And the smiles that warm cinnamon rolls can put on the face of a child. (Ok and the fact that the child in question started calling me the goddess of pastry doesn’y hurt either.)

Every morning, I walk through Union Station and I am haunted by the magical scent of warm cinnamon and butter rolled up in a yeasty dough. It is enough to drive a girl bonkers. Particularly when it is the scent of Cinnabon.

Seriously.

I have been craving cinnamon rolls for a year. So I finally did something about it.

I captured that magical scent and flavor combination in my very own kitchen.

These are easy to make, but they do take a little but of waiting. But they are totally worth it.

Gluten free maple cinnamon rolls

Author: Mary Fran Wiley
Prep time: 1 hour 15 mins
Cook time: 25 mins
Total time: 1 hour 40 mins
Ingredients
  • Dough
  • 160 ml milk (dairy or non-dairy), warmed
  • 35 grams sugar (2T)
  • 280 grams (2 cups) all-purpose gluten free flour*
  • 7 grams (1 t) active dry yeast
  • 40 grams (2.5 T) butter or EarthBalance
  • 1 teaspoon vanilla bean paste (or vanilla extract if you don’t have the paste)
  • Pinch salt
  • Filling
  • 210 grams (1 cup) Brown Sugar
  • 30 grams (2 tablespoons) Butter, melted
  • 1/4 cup (25 mL) Maple Syrup
  • 1 tbsp Maple Flakes or maple sugar (optional)
  • 1/4 tsp salt
  • Topping
  • 1/2 cup or so cream cheese frosting or
  • 1/4 cup powdered sugar
  • 2 T milk and
  • 1 teaspoon vanilla extract
Instructions
Dough
  1. Measure out your ingredients and prepare a mise en place.
  2. In a small bowl combine warm milk, a teaspoon of your sugar, a tablespoon of your flour and your yeast. Let sit for about 15 minutes – the mixture should have produced a decent amount of foam.
  3. In the bowl of a stand mixer combine the remaining flour, sugar, butter, vanilla and salt.
  4. Add in the yeast mixer and mix to combine. Once combined, turn the mixer speed to low-medium (mine was on 3) and let the dough “knead” for about 10 minutes.
  5. Watch the dough, if it is impossibly sticky add a little more flour a teaspoon at a time. (It was a bit humid in my apartment and I ended up adding 2 teaspoons of flour).
  6. After 10 minutes, place the dough in a greased bowl in a warm spot (my microwave is the warmest spot in my kitchen). Cover with plastic wrap or a damp towel. If you have a spare bowl for your mixer, pop it and the whisk attachment (or any bowl and the beaters for your hand mixer) into the freezer. You need it good and cold to whip the cream.
  7. Let the dough raise for 45 mins-1 hour. It should have just about doubled in size.
Filling
  1. Near the end of the rising time, mix together all the ingredients for the filling in a small mixing bowl.
Assemble
  1. Roll out the dough to 1/4” thickness and in a rectangle about 6×10″.
  2. Spread the filling on the dough in a thin layer.
  3. Roll the dough up along the long edge (you want a 10″ long tube).
  4. Place it on a cookie sheet, cover with a towel and set in a warm spot while your oven preheats to 350 degrees Fahrenheit.
  5. When the oven is warm, slice the roll into 6 even pieces.
  6. Arrange the rolls in a greased 8 or 9″ baking dish (shape is not important).
  7. Bake for 35 minutes, or until they are a light golden brown and bubbling.
  8. When the rolls are still warm, but before they are completely cool, slather them with leftover cream cheese frosting if you have it around. If not, mix together the powdered sugar, milk and vanilla and drizzle over the cinnamon rolls
Notes

*If you are not using a pre-blended flour, you can either use Shauna’s All-Purpose Blend and add 2 teaspoons xantham gum. Whisk well before using.
Or you can make your own with 90 grams (3/4 cup) tapioca starch, 100 grams (1/2 cup) sweet white rice flour, 60 grams (1/2 cup) sorghum flour. Add 2 teaspoons xantham gum and whisk together well to ensure that the gum is spread throughout the flour.

3.1.09


gluten free focaccia with sage & brown butter

Ratio Rally: Focaccia

This post is part of the Gluten-Free Ratio Rally, a group of gluten-free bloggers inspired and empowered by Ruhlman‘s Ratio and started by Shauna at Gluten-Free Girl. We get together each month and post many different takes on the same theme. This month that theme is Gluten-Free Tarts and the rally is being hosted by Heather from Discovering the Extraordinary.

gluten free focaccia with sage & brown butter

Yeast breads make me nervous. Very, very nervous.

Most likely because I never made yeasted bread before going gluten-free. I don’t have a lot of experience knowing how the dough or batter should behave.

Cakes, I got. Muffins & pancakes? We are good to go. Gluten-free cookies? Just call me an expert. Bread? Well, I am still learning. But I would qualify today’s recipe as a success.

The ratio: 5:4

Gluten free flours:liquids. Add a splash of oil for flavor. Call it winning.

I am serious. This is the easiest yeast bread I have made, and one that has a great flavor. There is an egg in there as part of the liquid, but it also helps beef up the structure and add a wee bit of lift.

Yes, this dough is wet. And a little sticky. You just have to trust me. It works. And it is darn good.

The flavors

Brown butter in place of the traditional olive oil. Sage on top. A sprinkling of sea salt. The yeasty flavor that you only get from home made or artisan loaves.

This is some seriously delicious bread.

It would make good sandwich bread when sliced in half. (Do I see paninis in my future? I sure hope so…)

Want a different flavor? Use good olive oil in place of the browned butter. Swap out the toppings. Mix something into the dough.

This months participants

Heather | Discovering the Extraordinary made Rosemary and Garlic Focaccia Bread 
Carol / Goodness Gluten Free made Gluten Free Garlic and Parmesean Focaccia 
Morri | Meals with Morri made Sweet Cinnamon Raisin Focaccia Bread
~Aunt Mae (aka ~Mrs. R) made Focaccia Bread 
Silvana / Silvana’s Kitchen made Sun-Dried Tomato and Olive Focaccia
TR | No One Likes Crumbley Cookies made Gluten Free Cheesy Herb Focaccia
Shauna| Gluten-Free Girl and the Chef made  Gluten-Free Cherry and Almond Focaccia

Ratio Rally: Focaccia

Author: Mary Fran Wiley
Prep time: 10 mins
Cook time: 35 mins
Total time: 45 mins
Serves: 8
Ingredients
  • 1 1/2 cups (355 ml) warm water
  • 13 grams (1 1/2 tablespoons) active dry yeast
  • 3 grams (1/2 teaspoon) sugar
  • 45 grams (3 tablespoons) butter
  • 1 egg
  • 1 teaspoon table salt
  • 500 grams (3 1/2 cups) GF All Purpose Flour (I use Cup4Cup)
  • 2 teaspoons xantham gum (omit if your flour blend contains this or a similar ingredient such as guar gum or Expandex)
  • generous sprinkling of chopped fresh or dried sage
  • 1 teaspoon sea salt
Instructions
  1. Preheat your oven to 150 degrees. Turn it off once it is warm.
  2. Line a 9×13 baking dish with parchment paper and grease well with olive oil or butter.
  3. In the bowl of a stand mixer, combine the warm water, yeast and sugar.
  4. Melt butter over medium-low heat and continue to cook until it turns brown and starts to smell slightly nutty. Be careful not to burn the butter. Let cool slightly.
  5. Add the egg and browned butter to the bowl of the stand mixer, and mix until just combined.
  6. Stir in the flour, salt and xantham gum (if using). Mix on a low speed for 3 minutes. You will have a slightly shaggy and tacky dough.
  7. Spread the dough into the baking dish with a spatula, trying to make it even.
  8. Cover the pan with a towel and place in the oven for 45 minutes.
  9. Remove from the oven, and heat the oven to 425 degrees Fahrenheit.
  10. Sprinkle the dough with the sage and sea salt.
  11. Put the pan in the oven, then drop the temperature to 375 degrees. Bake for 35-40 minutes, or until golden brown and hollow sounding when tapped.
3.1.09