Home » Food » Recipes » Page 5

Category: Recipes

gluten-free brown butter chocolate chunk cookies

Gluten-free brown butter chocolate chunk cookies

There is something to be said for the magic of a gluten-free chocolate chip cookie. They have strange and wonderful powers.

I’m serious. It doesn’t matter if you are a crunchy cookie lover, or a ooey-gooey center devotee. The magic is there in all kinds.

making gluten-free chocolate chip cookies

When you take them out of the oven, and they are still so hot they might just burn your mouth, they draw you in. The caramelized sugars and melty chocolate tug at your senses until you cave and take a bite.

A good gluten-free chocolate chip cookie can turn a bad day around.

gluten-free brown butter chocolate chunk cookies

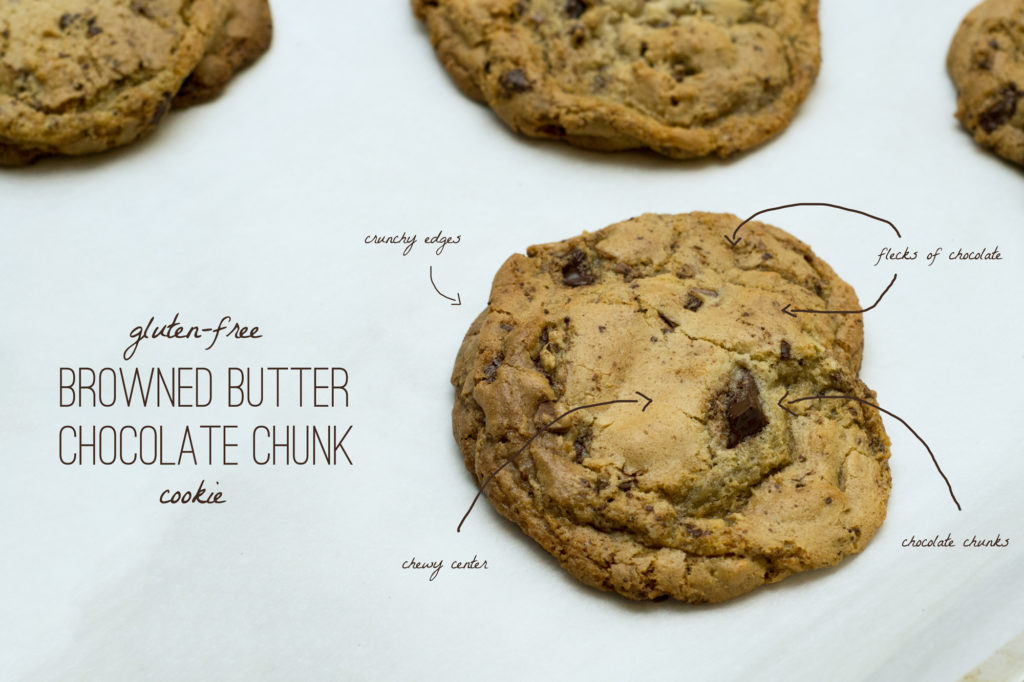
These particular cookies are crunchy and chewy (which in my mind makes them perfect), but that isn’t what makes them special. First, we use browned butter to add a layer of complexity to the flavor of the cookies. Then, we chop up a chocolate bar rather than using chips. When you chop the chocolate yourself, you get little shards of chocolate. When you add those to the cookie batter, you get a bit of chocolate in every bite.

I call for chilling the dough, or scooping the cookies onto baking sheets and popping those in the freezer before baking. This controls the spread of the cookie, and gives the sugar and flour some time to absorb the liquids and fats. It also slows the baking a bit, creating the crunchy outside and maintaining a chewy interior.

If you want to save them for later, or if you are a single lady and just want one or two cookies at a time, scoop the batter onto a cookie sheet, fitting as many on to the sheet without them touching and freeze for several hours. Once frozen, put them in a ziplock bag, label them with the baking temp & time and put the bag back in the freezer. You can take out a couple at a time and bake them as you want them, so you can always have a fresh cookie.

Gluten-free brown butter chocolate chunk cookies
Recipe Type: Dessert
Author: Mary Fran Wiley
Prep time: 25 mins
Cook time: 30 mins
Total time: 55 mins
Serves: 24
Ingredients
  • 2 sticks (225g /8 ounces) unsalted butter
  • 360 (a scant 2 1/2 cups) grams gluten-free all-purpose flour blend*
  • 1 teaspoon xantham gum**
  • 1 teaspoon kosher salt
  • 1 teaspoon baking soda
  • 55 grams (approximately 1/4 cup) sugar
  • 285 grams (approximately 1 1/4 cups) light brown sugar
  • 1 whole egg
  • 1 egg yolk
  • 2 tablespoons whole milk
  • 1 1/2 teaspoons vanilla extract
  • 12 ounces high-quality semisweet chocolate baking bars, roughly chopped
Instructions
  1. Line 3 baking sheets with parchment paper.
  2. To brown the butter, place it into a saucepan over medium heat. It will melt, then begin to foam and slowly the color will change from golden to light brown. As soon as the scent starts to turn nutty, remove it from the heat and pour it into the bowl of your stand mixer.
  3. In a medium bowl, whisk together the gluten-free flour, xantham gum (if it is not in your flour blend), salt and baking soda.
  4. In the bowl of your stand mixer, add the sugar and brown sugar to the browned butter and cream them together for 1 minute using the paddle attachment. Add the egg, egg yolk, milk and vanilla extract and mix until well combined.
  5. Slowly add the flour mixture, scraping down the sides of the bowl to make sure you have a well-mixed batter.
  6. Stir in the chocolate chunks and any shards of chocolate you created while chopping.
  7. Scoop 2-ounce balls of dough 3″ apart on a cookie sheet (you can fit about 8 balls of dough per sheet). Place the dough in the freezer for 20-30 minutes. When there is about 10 minutes of freezer time left, preheat your oven to 375 degrees.
  8. Bake the cookies for 13-15 minutes. If you bake 2 sheets at once, rotate them halfway through baking.
Notes
*[b]I use Cup4Cup Gluten-Free All Purpose flour[/b] because I find it to be the best. If you prefer to blend your own flours, the following is a good mix: 310 grams (approximately 2 cups) brown rice flour, 35 grams (approximately 1/4 cup) cornstarch, 15 grams (approximately 2 tablespoons) tapioca flour[br]**[b]If your blend includes xantham gum[/b], you can leave it out.
3.2.2310


Win tickets to the 2014 Chicago GFAF Expo!

GFAF Expo Preview

When I went gluten-free buying products was a nightmare – you never knew if what was in the box was edible or not. Then, four years ago, my friend Melissa told me about some sort of wonderland. You could try all the food before you bought it. And it was all the good stuff.

These days I make a point of making it to several GFAF Expos each year, and there is one coming up in Chicago on April 12 & 13, 2014. I can’t wait to see old friends, like Jay & Andrea from Red Apple Lipstick , Whitney from Bakery on Main or the girls from Rudi’s.

Because I love you so much, I have 5 passes to the expo to give away!

Leave a comment below to win! Winners will be announced on April 8, 2014!

Win tickets to the 2014 Chicago GFAF Expo!


ingredients for home made gluten-free instant oatmeal from frannycakes

Homemade Gluten-Free Instant Oatmeal

After the crushing revelation that Shamrock Shakes are not green smoothies, and that lattes and gluten-free doughnuts (sorry, Do-Rite) are not actually parts of a complete breakfast, I was left at a loss for what to start with as fuel for my days.

I eat breakfast in the office most days, due to a 2+ hour commute and a stomach that is even less of a morning person than the rest of me. So, I need something that transports easily and can be prepared with just a microwave and a spoon. Oh, and it has to be something my coworkers couldn’t mock me for, like they do for my love of Fruity Pebbles.

home made gluten-free instant oatmeal from frannycakes

The perfect solution? Instant oatmeal. The problem? It adds up pretty quickly and none of the grocery stores around me stock packets of the gluten-free variety. Oh, and the buckets of extra sugar they add to make it taste good…

What’s a girl to do? Make it at home!

It costs a whole heck of a lot less, can pack a nutritional punch, can be made in batches of any size and comes in an infinite number of flavors. So far I’ve made Dirty Chai, Chocolate Chocolate Chip, Honey Ginger (my favorite), Maple Raisin, and Mocha.

how to make home made gluten-free instant oatmeal from frannycakes

I found a lot of recipes that included powdered milk, presumably to up the creaminess factor, but it is an ingredient most people don’t keep on hand. (And by most people I mean me). When I was creating my base recipe, it was important to keep things as simple as possible. I didn’t want to add dairy to something that should be vegan and dairy free (even Quaker Instant Oatmeal is dairy free) and I most definitely didn’t want to tell people to get an ingredient they otherwise wouldn’t keep in their pantry.

As I experimented, I found that simply grinding some of the oats made the oatmeal as creamy as its store-bought cousins. I couldn’t believe it was that simple. I also added chia seeds, which you could forgo if you don’t keep them on hand, for some protein and added vitamins.

ingredients for home made gluten-free instant oatmeal from frannycakes

Homemade Gluten-Free Instant Oatmeal
Author: Mary Fran Wiley
Prep time: 10 mins
Cook time: 2 mins
Total time: 12 mins
Serves: 6
You can scale this recipe up or down to suit your breakfast needs
Ingredients
  • 175 grams (2 cups) + 35 grams (6 tbsp) gluten-free instant oats, divided
  • 76 grams (6 tbsp) sugar*
  • 3/4 tsp salt
  • 30 grams (3 tbsp) chia seeds
  • Mix-ins (optional, see suggestions below)
Instructions
  1. Grind the smaller amount of oats in a food processor or spice mill.
  2. Combine all ingredients in a large bowl, a stir to make sure the ingredients are evenly dispersed.
  3. If you want to make all your baggies the same flavor, add your mix-ins now.
  4. Divide your ingredients evenly amongst 6 snack-sized plastic zip bags. If you want to add different flavors, you can add them to each baggie.
  5. To prepare, empty the baggie with your oat mixture into a bowl or mug. If you want to make it in a microwave, add a scant half cup of water and heat for 1:30- 2mins. Stir well and allow to cool slightly. If you hate the microwave, you can add a scant half cup of boiling water and let it sit until the oats are tender, about 3 minutes.
Notes
[i]These are suggestions per serving, so to make the whole recipe the same, you would have to multiply these amounts by 6.[/i][br][br][b]Dirty Chai[/b][br]1 tsp espresso powder[br]1/2 tsp cinnamon[br]1/8 tsp nutmeg[br]1/8 tsp cardamom [br]1/4 tsp dried lemon peel[br]1 tsp granulated honey (optional)[br][br][b]Ginger Honey[/b][br]2 tsp granulated honey [br]1 tbsp crystalized ginger[br][br][b]Mocha[/b][br]1 tsp espresso powder[br]2 tsp cocoa powder[br]1 tbsp brown sugar
3.2.2265


Gluten-Free Sweet Potato & Kale Lasagna | A gluten-free recipe from FrannyCakes

Wednesday Weigh-In: Gluten-Free Kale & Sweet Potato Lasagna

As I work to get my body back in 2014, I will be sharing healthy recipes, tips and my journey each Wednesday this year. You can see this week’s progress at the end of the post.

Gluten-Free Sweet Potato & Kale Lasagna | A gluten-free recipe from FrannyCakes

Is it seriously Wednesday already? I don’t know how on earth it keeps coming so fast, I can’t keep up. It might have something to do with the snow. Or the newly renamed Chiberia.

I might have indulged in a double dirty chocolate soy chai to cheer myself up about my commute. Or warm myself up from the winter. Either excuse works.

The indulgence was totally worth it, because, believe it or not, I cooked kale! First broccoli. Now kale. I think the world might be ending. Or something. If I ever start thinking that kale chips are better than potato chips, please stage an intervention. For now, though, I am ok with these new veggies in my life.

Gluten-free lasagna recipe

Also, don’t think I grew up too much. I turned it into a lasagna and had myself a winter weather pity party. It could have only been improved by some Hot Chocolate Cupcakes or some Hot Lemon Ginger Rum Punch.

This recipe was inspired by my favorite man ever, Jamie Oliver and the Spinach & Squash Rotolo in a recent copy of his magazine. I didn’t have any squash or spinach, but I had a can of sweet potato puree (I was planning to make a pie…) and a big ol’ bag of kale. And the more I thought about it, the better and better the idea was sounding. Besides, lasagna is un-fussy food at its best. Which makes it perfect for me.

Gluten-Free Sweet Potato & Kale Lasagna | A gluten-free recipe from FrannyCakes

{Gluten-Free} Kale & Sweet Potato Lasagna
Recipe Type: Entree
Author: Mary Fran Wiley
Prep time: 15 mins
Cook time: 1 hour
Total time: 1 hour 15 mins
Serves: 8
Swapping out sweet potato puree for the ricotta typically in lasagna, you can make an easy, delicious and even healthy upgrade. Kale packs a vitamin punch to help balance out the cheese that is left.
Ingredients
  • 1 package gluten-free lasagna noodles* or 1 recipe [url href=”http://frannycakes.com/recipes/fresh-gluten-free-pasta-with-pink-vodka-sauce”]gluten-free pasta dough[/url] rolled out into sheets
  • 1 can sweet potato puree
  • 1 egg
  • 1/4-1/2 cup grated parmesan cheese
  • 2 cups tomato sauce
  • 4 cups chopped kale, ribs removed
  • 18 slices provalone or 2 cups shredded mozzarella
Instructions
  1. Preheat the oven to 325 degrees Fahrenheit.
  2. Mix together the sweet potato puree, egg and grated parmesan cheese. If your tomato sauce has parmesan in it already, use the lesser amount.
  3. In a 9×13″ pan, spread 1/2 cup sauce over the bottom. Line the bottom of the pan with 1/3 of the noodles – it should be enough to cover the bottom in one layer.
  4. Spread 1/3 of the sweet potato mixture over the noodles. Top with 1 1/2 cups of the kale.Dollop another 1/2 cup of the tomato sauce over the kale and top with 1/3 of the cheese.
  5. Add another layer of pasta and repeat the sweet potato, kale, tomato sauce and cheese.
  6. Add the final layer of pasta, spread the remaining sweet potato mixture on top. Sprinkle with the remaining 1 cup of kale, dollop on the remaining tomato sauce and top with the last of the cheese.
  7. Bake covered for 45 minutes. Remove the cover and bake for 15 minutes more – until the cheese is bubbly and golden around the edges
Notes
*I used RP’s fresh gluten-free pasta sheets, and this recipe is best with fresh pasta if you can get it. If not, par boil your gluten-free lasagna noodles (cook them about half way). If you don’t pre-cook your GF lasagna, it will likely not cook properly.
3.2.2265


Progress:

  • -.2 lbs this week, -9.4 lbs total
  • New step goal: 9,000 steps a day.
  • Fitness goal: 15 minutes of deliberate fitness each day
  • 64 ounces of water each day (I am at 32, making progress!)
Gluten, Dairy, Nut-Free Vegan Sesame Broccoli Salad

Wednesday, er, Friday Weigh In: Gluten-Free Sesame Broccoli Salad

As I work to get my body back in 2014, I will be sharing healthy recipes, tips and my journey each Wednesday this year. You can see this week’s progress at the end of the post.

Sesame Broccoli Salad | From FrannyCakes

Ok, ok, this is 2 days late. I know. But it’s ok, I made you broccoli. Delicious, sesame broccoli. And I have to admit, learning to cook vegetables is growing on me. So much that I ate broccoli and carrots every day this week. It was almost like I was a proper grown up or something.

It was weird.

Having a job and going to work never really feels like wearing my big girl pants, but eating broccoli does. I guess this is what happens when you learn that cupcakes, macarons and crepes are not the major food groups. And that the guy at Roti knowing your order before you say it is probably a little bit not normal.

I guess I am turning in to someone responsible. A responsible someone who snacks on broccoli and turns it in to salads.

Gluten, Dairy, Nut-Free Vegan Sesame Broccoli Salad

Gluten-Free Sesame Broccoli Salad
Recipe Type: Salad
Prep time: 5 mins
Cook time: 10 mins
Total time: 15 mins
Serves: 4
This recipe is adapted from Jamie Magazine.
Ingredients
  • 1 large head (about 1 1/2 pounds) broccoli
  • 1 tbsp sesame seeds
  • 1 tbsp vegetable oil
  • 2 tsp sesame oil
  • 2 tsp finely chopped garlic*
  • 1 1/2 tsp gluten-free tamari
  • 2 spring onions, finely chopped
Instructions
  1. Preheat the oven to 350 degrees.
  2. Cut the broccoli florets off the stems, and peel and slice the stems. Blanch in salted, boiling water for 4-5 minutes. The broccoli will turn a vibrant, dark green, but you don’t want it to get soft. Rinse with cold water, drain and place in a large bowl.
  3. In a baking dish lined with parchment, roast the sesame seeds until they are a light golden brown.
  4. While the seeds are baking, whisk together the vegetable oil, sesame oil, garlic, tamari and spring onions. Stir in the sesame seeds and pour over the broccoli.
  5. Keeps well tightly covered for several days.
Notes
*I always keep a tube of chopped garlic in the fridge. I know fresh is best, but if it means my hands don’t smell like garlic and there is one less dirty knife, I am all for it. I buy Gourmet Gardens brand.
3.2.2265


Progress:

  • -1.4 lbs this week, -9.2 lbs total
  • Step goal: 8,000 steps a day.
  • Fitness goal: 10 minutes of deliberate fitness each day
  • 64 ounces of water each day (I am at 32, making progress!)
warm brussels sprouts salad | a gluten-free recipe from frannycak

Wednesday Weigh In: Warm Brussels Sprout Salad

As I work to get my body back in 2014, I will be sharing healthy recipes, tips and my journey each Wednesday this year. You can see this week’s progress at the end of the post.

I’m just going to say it. Brussels sprouts are cool (much like bow ties and fezzes). Seriously. They are itty bitty heads of cabbage that grow on stalks. (Which makes them even cooler than kohlrabi.) Even better? They are full of antioxidants for cancer fighting and vitamins that help with DNA repair. Gotta keep those cells healthy.

If I can be honest, I don’t have a whole heck of a lot of time to cook during the week, so I try to make things I can pack up and bring to work for multiple days. This salad makes an excellent work lunch with some baked chicken or a sandwich.

warm brussels sprouts salad | a gluten-free recipe from frannycak

Warm Brussels Sprout Salad
Recipe Type: Salad
Author: Mary Fran Wiley
Prep time: 10 mins
Cook time: 25 mins
Total time: 35 mins
Serves: 6
This dish is easy to make on Sunday and can be packed up to bring to lunch all week. The serving size is generous because it is darn good for you.
Ingredients
  • 1 1/2 tablespoons olive oil
  • 1/2 bunch parsley, leaves picked and stems finely chopped (keep the stems separate from the leaves)
  • 2 garlic cloves, peeled and finely sliced
  • 2 red onions, peeled and finely sliced
  • 1/8 teaspoon dried red pepper flakes
  • 1/4 cup dried cranberries
  • 1/4 cup pine nuts, toasted (optional)
  • 1 1/4 pounds brussels sprouts
  • Red wine vinegar
  • Salt & pepper to taste
Instructions
  1. In a large frying pan over medium-low heat, sautee the parsley stems, garlic and onion until soft and starting to carmelize, about 15 minutes. Do not rush it, flavor takes time and the gentle sweetness of the onion is key.
  2. Add the red pepper flakes, dried cranberries and pine nuts (if using) and cook for a couple more minutes.
  3. Shred your brussels sprouts in a food processor so they are about the same size as cole slaw. Increase the heat to medium high and add the sprouts to the pan with a couple tablespoons of water. Cover and let cook for 2 minutes.
  4. Remove the lid and increase the heat to high. You want to cook the sprouts until they are golden and a little crispy, just a couple minutes more. Remove from heat.
  5. Finely chop the parsley leaves and mix them into the sprouts. Season with red wine vinegar, salt and pepper to taste.
3.2.2124


Progress:

  • -2.8 lbs this week, -7.8 lbs total
  • New step goal: 8,000 steps a day.
  • Fitness goal: 10 minutes of deliberate fitness each day
  • 64 ounces of water each day

Alrighty. Forward progress. Some of my pants are feeling a bit looser, and I have managed to stay on track even when eating out. Where did I get stuck? Daily fitness and water. Can I blame the polar vortex? Because I am. It is totally legit.

As for the water, I got precisely half the amount I was shooting for. How do people drink that much water in a day? It is just plain crazy. But for me, even drinking 32 ounces of liquids a day is a major improvement.

gluten-free, dairy-free, vegan roasted tomato fennel soup

Wednesday Weigh In: Roasted Tomato & Fennel Soup

As I work to get my body back in 2014, I will be sharing healthy recipes, tips and my journey each Wednesday this year.

Progress:

  • -5 lbs this week, -5 lbs total
  • Hit 7,000 step goal 5/7 days.
  • New goal: 1 10 minute fitness video each day.
  • New goal: 64 ounces of water each day.

Ok, I have made it a week without cupcakes, doughnuts, brownies or cookies. That might be a record for me. But I think I will survive.

I have been down this path before, trying to get healthy, making it for a short time before something derails me. Usually something delicious. And most likely involving butter, bacon or both. Although, I think the reason that usually happens is due to lack of interesting food. One too many “shakes” for breakfast. Unimaginative salads.

I get bored. No one wants to eat boring food. So, I spent Sunday afternoon chugging away at new recipes in the kitchen, trying to make healthy lunches that I could be excited about eating each day. The trick? Roasting vegetables. Really, it is that simple.

Roasting vegetables caramelizes residual sugars and deepens the flavors of the vegetables. Like a magic trick. A delicious, hearty magic trick.

You can do this with any combination of vegetables. Carrots would be excellent here. Maybe leeks in place of the fennel. Some left over rice might bulk it up. Anything goes, really, when it comes to soup, and this template is a great one to experiment with.

gluten-free, dairy-free, vegan roasted tomato fennel soup

Roasted Tomato & Fennel Soup
Recipe Type: Soup
Author: Mary Fran Wiley
Prep time: 5 mins
Cook time: 30 mins
Total time: 35 mins
Serves: 4
A simple, quick soup that makes the perfect complement to any main course or works as an easy to pack lunch. It is gluten-free, dairy-free and most other allergen-free. It can be made vegan if you use veggie stock rather than chicken stock.
Ingredients
  • 8 large tomatoes, halved and cored
  • 1 large fennel bulb, fronds removed, cut into eighths and core removed
  • 1 red chili, halved lengthwise, some seeds removed
  • 4 garlic cloves
  • 2 tablespoons olive oil
  • A handful of fresh basil, leaves picked and stems discarded
  • 2/3 cup (150 ml) chicken or vegetable stock
  • 1 tablespoon tomato paste
  • Salt and Pepper
Instructions
  1. Heat the oven to 350 degrees Fahrenheit and line a rimmed sheet pan with parchment paper.
  2. Arrange the tomatoes, fennel and garlic on the tray. Drizzle with the olive oil and sprinkle with fresh ground pepper. Toss with tongs to make sure the oil evenly covers.
  3. Roast for 20-30 minutes until the veg starts to soften and you start to see a little color change near the base of the vegetables.
  4. When soft, transfer them to a food processor with the basil leaves. Pulse to make room for the stock.
  5. Add the stock and tomato paste, then process until fairly smooth. Taste and adjust the seasoning.
  6. Serve warm, with a drizzle of olive oil and some freshly ground black pepper
3.2.2124


gluten free sage & apple stuffing from frannycakes

My famous sage & apple gluten-free stuffing

Generally, I am a traditionalist when it comes to certain food-related things. First, it is not St. Paddy’s Day without corned beef and cabbage, home made Irish soda bread and bread pudding with whiskey caramel sauce. It is not Christmas without cranberry upside down cake. It is not Easter without lamb cake. And it is most definitely not Thanksgiving without at least one kind of stuffing. In all honesty, I could handle a feast of just different kinds of gluten-free stuffing, no need for a turkey.

gluten free sage & apple stuffing from frannycakes

Thankfully, we also get gluten-free stuffing at Christmas, about a month later. And then nothing. 11 months with no stuffing. We have celebratory meals, so why don’t we include it more often?

I think we should. And there is no better stuffing to make for a Sunday dinner (and then Monday’s lunch), than this Apple & Sage stuffing.

Sweet apples and the woody flavor of sage combine and make this a hearty side for any cold weather meal.

Sage & Apple gluten-free stuffing
Recipe Type: Side
Cuisine: American
Author: Mary Fran Wiley
Prep time: 30 mins
Cook time: 45 mins
Total time: 1 hour 15 mins
Serves: 12
This stuffing can be made with turkey or pork, but make sure you are using seasoned sausage meat and not just ground meat, the seasoning would be off.
Ingredients
  • 4 tablespoons (55 grams) butter
  • 3 1/2 (50 ml) tablespoons olive oil
  • 2 onions, peeled and diced
  • 2 celery stalks, finely diced
  • 2 garlic cloves, minced
  • 2 large apples peeled, cored and diced
  • 1 bunch sage, leaves picked and chopped
  • 1/2 bunch flat leaf parsley, leaves picked and chopped
  • 1 3/4 – 2 pounds sausage meat*
  • 2 1/2 cups (10 ounces or 280 grams) gluten-free bread crumbs
  • 1 egg, beaten
Instructions
  1. In a large sauce pan, melt the butter and oil over medium heat. Add the onion, celery and garlic and cook, stirring constantly, for 5-7 minutes until the veggies are soft and translucent.
  2. Add the apple and cover. Cook for an additional 4-5 minutes, until the apple has softened. Remove from heat and transfer to a tray to cool.
  3. When cool, heat the oven to 375 degrees.
  4. In a large bowl, combine the cooled onions, celery, garlic and apples with the sage, parsley, sausage, bread crumbs, and egg. Use your hands to squish it together and make sure that everything is evenly mixed. If you are concerned about the seasoning, fry a small amount to taste. Adjust salt and pepper if needed – usually the seasoning in the sausage is plenty.
  5. Place in a greased casserole dish and bake covered for 35 minutes. Remove lid and bake for an additional 10-15 minutes. You want the outside to be nice and golden, and the inside to be cooked through.
Notes
*I’ve used pork breakfast sausage most often, but even turkey sausage works well here.
3.2.2124


a recipe for gluten-free peppermint hot chocolate cupcakes from frannycakes

Gluten-free Peppermint Hot Cocoa Cupcakes

Baby, it is cold outside. Freeze your patootie off while wearing all the clothes you own cold. Close all the schools in Chicago cold.

It's going to be a cold one in Chicago
Image courtesy NBC 5 Chicago

It hasn’t been winter like this since I was a kid. Tomorrow’s high is estimated to be -13 Fahrenheit (that’s -26 Celsius). We are at almost 20″ of snow this week too.

a recipe for gluten-free peppermint hot chocolate cupcakes from frannycakes

I think that means it is high time to stay inside and bake some cupcakes. And to take the extra time and make a merengue buttercream, because, heck, where are you going to go when it is that cold and with that much snow on the ground?

And then you can surprise your coworkers with some fabulous cupcakes, if you have any left when this pair of winter storms (Hercules and Ion – seriously who names these things?) has made its way out.

a recipe for gluten-free peppermint hot chocolate cupcakes from frannycakes

Gluten-free Peppermint Hot Cocoa Cupcakes
Recipe Type: Dessert
Author: Mary Fran Wiley
Prep time: 25 mins
Cook time: 40 mins
Total time: 1 hour 5 mins
Serves: 24
Ingredients
  • For the gluten-free peppermint chocolate cakes
  • 85 grams (1/4 cup + 3 tablespoons) unsweetened cocoa
  • 1½ cups (354 mL) boiling water
  • 3 large eggs
  • 1½ teaspoons vanilla extract
  • ½ teaspoon peppermint extract or 3-5 drops of peppermint oil
  • 300 grams (2 cups + 1T) gluten-free all purpose flour*
  • ½ teaspoon xantham gum**
  • 434 grams (2 cups firmly packed) light brown sugar
  • 11 grams (2¼ teaspoons) baking powder
  • 4 grams (3/4 teaspoon) baking soda
  • 5 grams (1/4 teaspoon) salt
  • 237 grams (2 sticks) butter, softened
  • Peppermint Chocolate Swiss Merengue Buttercream
  • 8 large egg whites (30g each–total 225g, or 1 cup)
  • 400 grams (2 cups) granulated sugar
  • 560 grams (5 sticks) of unsalted butter, softened but cool, cut into cubes**
  • 30 ml (2 tablespoons) pure vanilla extract
  • ¼ tsp salt
  • 400 grams (about 2 cups of discs) high quality chocolate
  • 1/2 teaspoon vanilla extract
  • 1/2 teaspoon peppermint extract or 3-5 drops peppermint oil – adjusted for taste.
  • Candy cakes or peppermint candies, crushed (optional)
Instructions
Bake the cupcakes
  1. Whisk together the boiling water and cocoa until smooth. Cool to room temperature.
  2. Preheat oven to 350 degrees Fahrenheit.
  3. In a medium bowl, whisk together the eggs, the vanilla, the peppermint and ¼ of the cocoa mixture.
  4. In the bowl of a stand mixer, combine all the dry ingredients and mix for 30 seconds – just long enough to create a uniform mixture.
  5. Add the butter and remaining cocoa mixture to the dry ingredients. Mix on low until the dry goods are moistened. Increase the speed to medium and beat for 1½ minutes. Scrape down the sides.
  6. Add the egg mixture in 3 parts, mixing for 30 seconds on medium after each addition and scraping down the sides.
  7. Fill the cupcake tins ⅔ full and bake for 15-20 minutes. Cakes are done when they bounce back after being tapped gently with a finger or a tester comes out clean.
  8. Cool in the pan for 5 minutes and then move to a cooling rack until completely cool.
For the frosting
  1. While the cakes cool, make the frosting.
  2. Combine the egg whites and sugar in a small pot until they reach 140 degrees fahrenheit.
  3. Transfer to a clean stand mixer bowl. Using the whisk attachment, beat until light and fluffy (soft peaks).
  4. Switch to the paddle attachment and add the butter one chunk at a time until it is all combined.
  5. Melt the chocolate in the microwave on half power, heating it first for 30 seconds, and then in 15 second intervals after that, always stirring after each burst of heat. Once melted, let the chocolate cool so that it is still melted but just warm, not hot – you don’t want it hot so that it melts the butter, and then add it to your frosting, beating and scraping down the sides so you have a velvety and evenly mixed buttercream.
Assemble
  1. When completely cool, pipe a generous swirl of chocolate peppermint swiss merengue buttercream on each cupcake.
  2. Top with crushed peppermint candies or edible glitter for something extra special.
Notes
*This recipe was tested using Cup4Cup Gluten-Free all purpose flour, but will work with your preferred blend as long as you measure by weight. **Omit if using a blend that already includes xantham gum.[br]**I prefer to use Plugra butter (or other high-butterfat) butter in my buttercream. You can really taste a difference, but the best butter you have on hand will work just fine.
3.2.2124


Sweet Potato Korma | Gluten-Free by FrannyCakes

Gluten-Free Sweet Potato Korma

Oh lordy. It is winter outside. Complete with that white stuff that covers the ground.

Aside from that meaning that it is officially mitten weather, it also means that it is high season for hearty dinners. Spicy stews. And dishes to keep you warm. Not the shake off the cool edged wind of fall. But to warm you up from the cold that gets all the way to your bones.

To be honest, I am almost glad that pumpkin-filled everything is done for a while. Because it is high time for some cassoulet. And maybe some soup. And a curry or two.

I have been trying to make sure that I spend some time on Sundays making lunches for the week, and when it gets cold things like a dish that reheats and travels well. (I like to win at lunch). This dish is does just that. And if you pack a little fresh cilantro, you can look like you packed a fancy pants takeout meal that is both more delicious and healthier.
Gluten-Free Sweet Potato Korma | FrannyCakes

I fell in love with Indian food in college. It was part influenced by my best friend, Sid, and part because it is so easy to eat gluten-free. And these days, I do not get to eat it nearly enough. This sweet potato korma is easy to make thanks to purchased korma curry paste and is ready to go in 45 minutes which makes it perfect for weeknight dinners. It is vegetarian and can easily be vegan if you swap out the yogurt for a dairy-free variety or cashew cream.

Gluten-Free Sweet Potato Korma
Recipe Type: Entree
Cuisine: Indian
Author: Mary Fran Wiley
Prep time: 15 mins
Cook time: 30 mins
Total time: 45 mins
Serves: 4
An easy, weeknight dinner, this vegetarian korma is perfect to make ahead and pack as work lunches. If you wish to make it vegan, you can swap a non-dairy yogurt or use cashew cream in place of the plain yogurt or sour cream.
Ingredients
  • 2 large sweet potatoes
  • Olive Oil
  • 1 red onion
  • 2 garlic cloves
  • 1 thumb-sized piece of ginger*
  • 1/2 bunch fresh cilantro, leaves picked and stalks reserved
  • 1 fresh red jalapeño or fresno chili, seeds and veins removed
  • 1 heaped tablespoon korma curry paste**
  • 1 14oz can chickpeas
  • 2 1/2 cups boiling water
  • juice from 1/2 lemon
  • 1/4 cup plain yogurt or sour cream
  • 1 cup of your favorite long grain rice, I prefer basmati
Instructions
  1. Cut the sweet potatoes into 1 1/2 inch chunks and place in a large frying pan over medium heat with a good glug of olive oil (2 tablespoons). Fry them for about 5 minutes, or until they start to turn golden.
  2. While the sweet potatoes cook, peel and finely slice the onion, garlic and ginger. Finely chop the cilantro stalks and mince the chili.
  3. Add all the veggies and the korma paste and cook for another 5-10 minutes and stirring occaisionally. You want to make sure that the onions have softened.
  4. Add the chickpeas, canning liquid and all, to the frying pan along with the boiling water.
  5. Bring everything to a boil and then reduce to a simmer and cook for about 30 minutes, or until thickened.
  6. While the korma is cooking, prepare 1 cup of rice according to the package directions and drink a glass of wine (because you deserve it for cooking on a week night).
  7. When the korma has thickened, stir in the yogurt or sour cream and the lemon juice. Garnish with the cilantro leaves.
3.2.2124