 There are some things I have always wanted to try but have been slightly (or not so slightly) intimidated by. Now that FrannyCakes has matured a little bit, I want to start tackling these items one by one.
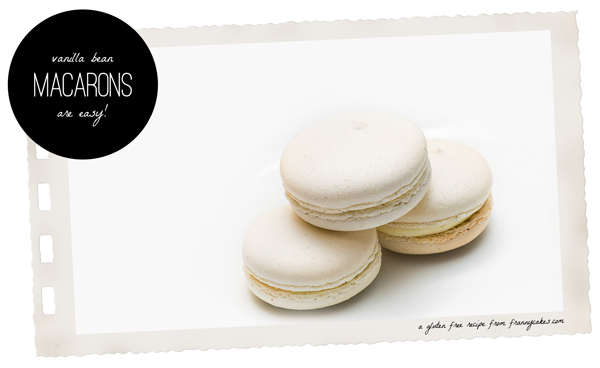
I have been waiting for this moment for a while. The moment where I sucked it up and attempted a macaron. No, not a macaroon. A macaron. One o. The snooty french sandwich cookie that dreams are made of.
If you have never had one, you need to get your hands on one ASAP. Hopefully you live near a bakery or patisserie that makes these and does it safely/ without cross contamination.

Because they are heaven in cookie form. Nutty, chewy clouds. With a pop of flavor in the middle. Seriously. I am in love.
With a cookie.
And I am OK with that.
Now, once you have fallen under the magic spell of macaron love, you, intrepid baker, will want to make some yourself. I am going to beg you to do one thing. Do not google macaron recipes. So very many are filled with “essential tips” that are totally not essential. Or they will convince you that there are some sort of pastry gods who dole out rare moments of success.
The internet is afraid of macarons. And it is mostly uncalled for. Sure, if you mess up, it will most likely make ugly cookies. But I am pretty dang sure that sugar, almonds and egg whites will taste good no matter what deformed shape they have taken.
But I know a few things that might help you stay on the good side of those pastry gods.
- Prepare a mise-en-place. This is a very, very basic step. And one I skip way more often than I should admit to. When making something like macarons, timing and precision is key, so having your ingredients measured out and ready to go when you need them increases your chances of success. Plus, it is just a good habit to get in to. (It helps keep things neat and easy to clean!)
- Weigh your ingredients. I can’t believe I still need to tell you all that this is better. But it is. Weights are more precise and more consistent than the volume measurements that American bakers are more familiar with. In this recipe I even weigh the eggs because a slight variation can have unintended consequences.
- Use an oven thermometer. Most ovens aren’t really the temperature that they say they are. You will be amazed at how dramatically your baking improves from simply getting your oven set properly.
- Be patient and precise. Reread the recipe until you are comfortable with the progression of steps. Pour slowly, stir carefully. There is no rushing in macronage! Also, separating your eggs carefully so you don’t break the yolks is quite important!
- Use a stable merengue as a base. Sure these are a French cookie, but that doesn’t mean that you need to make a French merengue. Swiss merengue (cooking egg whites & sugar into a syrup and then beating) and Italian merengue (beating a sugar syrup into egg whites) produce a more stable merengue than just egg whites and sugar beat in a mixer (French Merengue). Do a little extra work and be handsomely rewarded.
- Start with a basic flavor/color and then move on. Additional flavor components and colorings add more variables to the mix. Wait to add them until you are comfortable with your technique.
- 212 grams (1 3/4 cups + 2 1/2 tablespoons) almond meal
- 212 grams (1 3/4 cups + 1 tablespoon + 2 teaspoons) confectioners’ sugar
- 82 (1/4 cup plus 1 1/2 tablespoons) egg whites
- 90 grams egg whites (1/4 cup plus 2 tablespoons) egg whites (yes, you need both quantities, divided)
- 1 vanilla bean, slit open
- 236 grams granulated sugar (1 cup plus 3 tablespoons), plus a pinch (about 5 grams)
- 158 grams (2/3 cup) water
- Your favorite buttercream flavored with vanilla bean or vanilla bean paste.
- Cut 2 sheets of parchment paper to fit your cookie sheets. Trace 2 1/4 inch circles with a fine point marker like a Sharpie approximately 1 inch apart in alternating rows of 3 & 4. Turn the parchment paper over and lay it on your sheet pans/ cookie sheets.
- Preheat the oven to 350°F (convection) or 400°F (standard).
- Place the almond flour in a food processor and pulse to grind it as fine as possible. This is really not an optional step unless your almond meal is ultra fine. Most isn’t, and skipping this step can leave you with lumpy macarons. (Although the flavor won’t be bad)
- Sift the almond flour and powdered sugar into a large bowl and whisk together. If you have more than a couple of tablespoons of almonds remaining in the sifter, re-grind the flour in the food processor. Create a mound in the bowl with the almond flour mixture, then make a 4-inch well in the center, leaving a layer of the flour at the bottom. Pour in the 82 grams | 1/4 cup plus 1 1/2 tablespoons egg whites and combine with a spatula, stirring until evenly distributed and paste-like. Scrape the seeds from the vanilla bean into the bowl and mix until they are fairly well distributed. Set aside.
- Place the remaining 90 grams (1/4 cup plus 2 tablespoons) of the egg whites into the bowl of a stand mixer fit with a whisk attachment. In a small saucepan, combine the 236 grams (1 cup plus 3 tablespoons) granulated sugar and the water and heat over medium-high heat until the syrup reaches 203°F/110°C, stirring only until the sugar is dissolved and the mixture is clear.
- While the syrup continues to cook, add the pinch of sugar to the egg whites, turn the mixer to medium speed (a 5 or 6 on my mixer), and whip to soft peaks. If the whites reach soft peaks before the syrup reaches 248°F/12o°C, reduce the speed to the lowest setting, just to keep them moving.
- When the syrup reaches 248°F/120°C, remove the pan from the heat. Turn the mixer to medium-low speed, and slowly add the syrup, pouring it between the side of the bowl and the whisk. Do not panic when the meringue deflates.
- Increase the speed to medium and whip for 5 minutes, or until the whites hold stiff, glossy peaks. Although the bowl might still be warm to the touch, the meringue should have cooled; if not, continue to whip until it is cool.
- In the bowl with the almond mixture, fold in one-third of the meringue, then continue adding merengue to the almonds little at a time (you might not use them all – I used about 90% each time I have made these. You can pipe the left over plain merengue out when you are done and make little pavlova shells) until when you fold a portion of the batter over on itself, the “ribbon” slowly moves. The mixture shouldn’t be so stiff that it holds its shape without moving at all, but it shouldn’t be so loose that it dissolves into itself and does not maintain the ribbon; it is better for the mixture to be slightly stiff than too loose. So go slowly! Take your time! You want to make sure that your mixture does not have any ribbons of plain merengue, where there are no almonds or your shells could crack.
- Transfer your mixture to a pastry bag fit with a 1/2-inch plain tip. Hold the bag upright about a half inch above the center of one of the traced circles and pipe out enough of the mixture to fill in the circle. Lift away the pastry bag and repeat, filling the remaining circles on the first pan.
- Next (and this is important!) Lift up the sheet pan and firmly (but not too hard) tap the bottom of the pan to the spread the batter evenly and smooth any peaks left by the pastry bag (there will be some, and if that doesn’t make them go away, wet your fingertip and tap them down).
- If you are using a convection oven, which I recommend, bake the shells for 8 to 10 minutes. You want to cook them until the tops are shiny and crisp. If you are using a standard oven, place the sheet pan in the oven and then immediately lower the oven temperature to 325°F, and bake for 9 to 12 minutes, again, until the tops are shiny and crisp.
- Set the pan on a cooling rack, and if using a standard oven, preheat it to 350°F again.
- Pipe the remaining meringue mixture into the circles on the second sheet pan and bake as directed above. Let cool completely.
- Pipe a buttercream (or ganache) filling onto one half of the shells and pair them with a matching half. Be gentle when sandwiching them together, you could accidentally smush them.

 I am a joiner. And this time it was for something really great – the blogging event started by Shauna at GlutenFreeGirl – the Gluten Free Ratio Rally. It is all about the relationship between the ingredients. It gives you freedom to just cook. And bake. We start with a ratio for a well known (& loved) product and go from there.