Home » vanilla

Tag: vanilla

gluten free chocolate cupcakes with vanilla buttercream for the Great big Gluten Free Barbecue

Great Big Gluten-Free Barbecue

I love summer, and all it entails. Festivals. Evening concerts with friends. Barbecues every weekend.

I really love a good barbecue. The friends, the food, maybe a cold gluten-free beer or a margarita.

gluten free chocolate cupcakes with vanilla buttercream for the Great big Gluten Free Barbecue

But the part I love the most? That they are special even when they are last minute. They can be fancy affairs with sandals and dresses. They can be celebrations for just making it through the week. Or they can be celebrations of great love.

vow renewal

Just last week I invited the whole dang family over to celebrate my parents and godparents 35th wedding anniversary. And we had a barbecue. Complete with potato salad, jicama salad and a grape salad. There was meat on the grill and several types of sangria. The whole thing was gluten-free. And it was a dang good cookout. People were just there, celebrating and relaxing. Being family and enjoying some good food.

I want everyone to be able to have a cookout like that, for any occasion.

So, I gathered some blogger friends and planned a virtual barbecue.

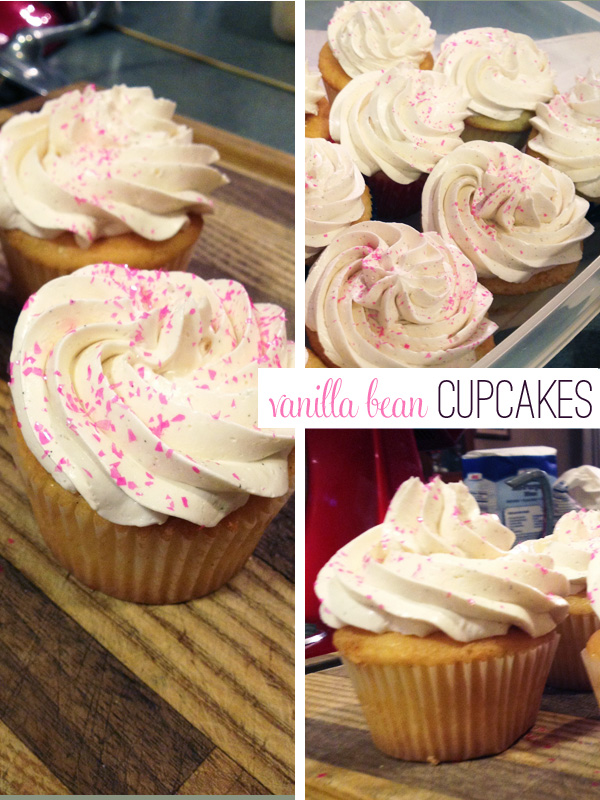
There are main dishes, desserts and even some sangria. I brought some gluten-free vanilla on chocolate cupcakes. My friends brought the rest, and we wanted to invite you to the party.

Thanks for dropping in!

greatbigglutenfreebarbecue

Pam from I’m A Celiac made Slow Cooker Pork BBQ
Taylor from Gluten-Away made Gluten-Free BBQ Burgers
Cindy from Vegetarian Mamma made Eggy Potato Salad
Cara from Cara’s Cravings made Fudgesicles (recipe review from the Great Vegan Bean Book)
Betsy from Gluten Free Betsy made Old School Potato Salad
Melissa from Stockpiling Moms made GF Strawberry Pretzel Salad
Alissa from Breaking Up with Captain Crunch made GF Pasta Salad  and DIY Sorta Sangria
Iris from The Daily Dietribe made Coleslaw
Alison from A Girl Defloured made Strawberry Basil Paletas
Mel from GeekilyGF made Peanut Butter Ice Cream Sandwiches
Erica from Celiac and the Beast dishes barbecue survival advice with Don’t Burn Bridges Or The Burger: Gluten Free BBQ

gluten free chocolate cupcakes with vanilla buttercream

Gluten-Free Vanilla on Chocolate Cupcakes
Recipe Type: Dessert
Author: Mary Fran Wiley
Prep time: 45 mins
Cook time: 25 mins
Total time: 1 hour 10 mins
Serves: 24
The cake recipe is adapted from The Cake Bible – a book every baker should own.
Ingredients
  • For the cupcakes
  • 85 grams (3/4 cup + 3 tablespoons) unsweetened cocoa
  • 1 1/2 cups (354 mL) boiling water
  • 3 large eggs
  • 1 1/2 teaspoons vanilla extract
  • 300 grams (2 cups + 1T) gluten-free all purpose flour*
  • 1/2 teaspoon xantham gum**
  • 434 grams (2 cups firmly packed) light brown sugar
  • 11 grams (2 1/4 teaspoons) baking powder
  • 4 grams (3/4 teaspoon) baking soda
  • 5 grams (1/4 teaspoon) salt
  • 237 grams (2 sticks) butter, softened
  • For the Frosting
  • 2 sticks (225 grams) butter, softened
  • 675-900 grams (6-8 cups) confectioner’s sugar
  • 2 teaspoons vanilla extract or 1 tablespoon vanilla bean paste
  • 1/2 cup (118 mls) milk
  • pinch of salt
  • food coloring
Instructions
  1. Whisk together the boiling water and cocoa until smooth. Cool to room temperature.
  2. Preheat oven to 350 degrees Fahrenheit.
  3. In a medium bowl, whisk together the eggs, the vanilla and 1/4 of the cocoa mixture.
  4. In the bowl of a stand mixer, combine all the dry ingredients and mix for 30 seconds – just long enough to create a uniform mixture.
  5. Add the butter and remaining cocoa mixture to the dry ingredients. Mix on low until the dry goods are moistened. Increase the speed to medium and beat for 1 1/2 minutes. Scrape down the sides.
  6. Add the egg mixture in 3 parts, mixing for 30 seconds on medium after each addition and scraping down the sides.
  7. Fill the cupcake tins 2/3 full and bake for 15-20 minutes. Cakes are done when they bounce back after being tapped gently with a finger or a tester comes out clean.
  8. In the bowl of a stand mixer combine the butter, 450 grams (4 cups) of the sugar, the milk and the vanilla.
  9. Beat on medium for 3-5 minutes.
  10. Gradually add the remaining sugar 1 cup (115 grams) at a time, beating for 2 minutes after each addition.
  11. When the frosting is firm enough to pipe, stop adding sugar and add the salt and color. If the frosting is not pipable with all the sugar, put it in the fridge for 10 minutes – it means your butter was a little too soft.
  12. Pipe a generous amount of frosting on each cupcake when they are completely cool.
Notes
*This recipe was tested using Cup4Cup Gluten-Free all purpose flour, but will work with your preferred blend as long as you measure by weight. **Omit if using a blend that already includes xantham gum.
3.2.2310


gluten-free vanilla bean macarons

Culinary Bucket List: Vanilla Bean Macarons

gluten-free vanilla bean macarons
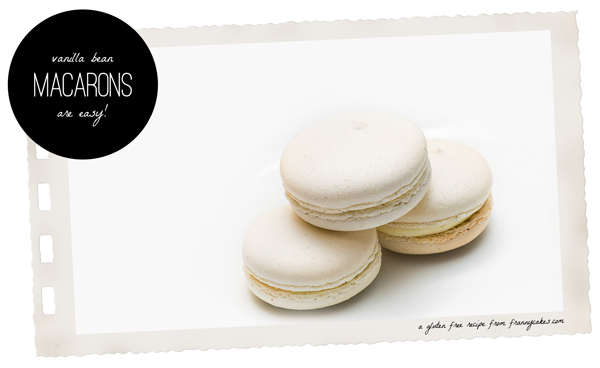
There are some things I have always wanted to try but have been slightly (or not so slightly) intimidated by. Now that FrannyCakes has matured a little bit, I want to start tackling these items one by one.

I have been waiting for this moment for a while. The moment where I sucked it up and attempted a macaron. No, not a macaroon. A macaron. One o. The snooty french sandwich cookie that dreams are made of.

If you have never had one, you need to get your hands on one ASAP. Hopefully you live near a bakery or patisserie that makes these and does it safely/ without cross contamination.

collage of gluten-free macarons

Because they are heaven in cookie form. Nutty, chewy clouds. With a pop of flavor in the middle. Seriously. I am in love.

With a cookie.

And I am OK with that.

Now, once you have fallen under the magic spell of macaron love, you, intrepid baker, will want to make some yourself. I am going to beg you to do one thing. Do not google macaron recipes. So very many are filled with “essential tips” that are totally not essential. Or they will convince you that there are some sort of pastry gods who dole out rare moments of success.

The internet is afraid of macarons. And it is mostly uncalled for. Sure, if you mess up, it will most likely make ugly cookies. But I am pretty dang sure that sugar, almonds and egg whites will taste good no matter what deformed shape they have taken.

But I know a few things that might help you stay on the good side of those pastry gods.

  1. Prepare a mise-en-place. This is a very, very basic step. And one I skip way more often than I should admit to. When making something like macarons, timing and precision is key, so having your ingredients measured out and ready to go when you need them increases your chances of success. Plus, it is just a good habit to get in to. (It helps keep things neat and easy to clean!)
  2. Weigh your ingredients. I can’t believe I still need to tell you all that this is better. But it is. Weights are more precise and more consistent than the volume measurements that American bakers are more familiar with. In this recipe I even weigh the eggs because a slight variation can have unintended consequences.
  3. Use an oven thermometer. Most ovens aren’t really the temperature that they say they are. You will be amazed at how dramatically your baking improves from simply getting your oven set properly.
  4. Be patient and precise. Reread the recipe until you are comfortable with the progression of steps. Pour slowly, stir carefully. There is no rushing in macronage! Also, separating your eggs carefully so you don’t break the yolks is quite important!
  5. Use a stable merengue as a base. Sure these are a French cookie, but that doesn’t mean that you need to make a French merengue. Swiss merengue (cooking egg whites & sugar into a syrup and then beating) and Italian merengue (beating a sugar syrup into egg whites) produce a more stable merengue than just egg whites and sugar beat in a mixer (French Merengue). Do a little extra work and be handsomely rewarded.
  6. Start with a basic flavor/color and then move on. Additional flavor components and colorings add more variables to the mix. Wait to add them until you are comfortable with your technique.
Gluten-Free Vanilla Bean Macarons

Recipe Type: Cookie
Cuisine: French
Author: Mary Fran Wiley
Prep time: 35 mins
Cook time: 25 mins
Total time: 1 hour
Serves: 18
Oh, magical, temperamental cookie. Read the advice above, and remember that according to Chef Keller, these improve if you freeze them for a day! (Even though they are kind of awesome right out of the oven…)
Ingredients
  • 212 grams (1 3/4 cups + 2 1/2 tablespoons) almond meal
  • 212 grams (1 3/4 cups + 1 tablespoon + 2 teaspoons) confectioners’ sugar
  • 82 (1/4 cup plus 1 1/2 tablespoons) egg whites
  • 90 grams egg whites (1/4 cup plus 2 tablespoons) egg whites (yes, you need both quantities, divided)
  • 1 vanilla bean, slit open
  • 236 grams granulated sugar (1 cup plus 3 tablespoons), plus a pinch (about 5 grams)
  • 158 grams (2/3 cup) water
  • Your favorite buttercream flavored with vanilla bean or vanilla bean paste.
Instructions
  1. Cut 2 sheets of parchment paper to fit your cookie sheets. Trace 2 1/4 inch circles with a fine point marker like a Sharpie approximately 1 inch apart in alternating rows of 3 & 4. Turn the parchment paper over and lay it on your sheet pans/ cookie sheets.
  2. Preheat the oven to 350°F (convection) or 400°F (standard).
  3. Place the almond flour in a food processor and pulse to grind it as fine as possible. This is really not an optional step unless your almond meal is ultra fine. Most isn’t, and skipping this step can leave you with lumpy macarons. (Although the flavor won’t be bad)
  4. Sift the almond flour and powdered sugar into a large bowl and whisk together. If you have more than a couple of tablespoons of almonds remaining in the sifter, re-grind the flour in the food processor. Create a mound in the bowl with the almond flour mixture, then make a 4-inch well in the center, leaving a layer of the flour at the bottom. Pour in the 82 grams | 1/4 cup plus 1 1/2 tablespoons egg whites and combine with a spatula, stirring until evenly distributed and paste-like. Scrape the seeds from the vanilla bean into the bowl and mix until they are fairly well distributed. Set aside.
  5. Place the remaining 90 grams (1/4 cup plus 2 tablespoons) of the egg whites into the bowl of a stand mixer fit with a whisk attachment. In a small saucepan, combine the 236 grams (1 cup plus 3 tablespoons) granulated sugar and the water and heat over medium-high heat until the syrup reaches 203°F/110°C, stirring only until the sugar is dissolved and the mixture is clear.
  6. While the syrup continues to cook, add the pinch of sugar to the egg whites, turn the mixer to medium speed (a 5 or 6 on my mixer), and whip to soft peaks. If the whites reach soft peaks before the syrup reaches 248°F/12o°C, reduce the speed to the lowest setting, just to keep them moving.
  7. When the syrup reaches 248°F/120°C, remove the pan from the heat. Turn the mixer to medium-low speed, and slowly add the syrup, pouring it between the side of the bowl and the whisk. Do not panic when the meringue deflates.
  8. Increase the speed to medium and whip for 5 minutes, or until the whites hold stiff, glossy peaks. Although the bowl might still be warm to the touch, the meringue should have cooled; if not, continue to whip until it is cool.
  9. In the bowl with the almond mixture, fold in one-third of the meringue, then continue adding merengue to the almonds little at a time (you might not use them all – I used about 90% each time I have made these. You can pipe the left over plain merengue out when you are done and make little pavlova shells) until when you fold a portion of the batter over on itself, the “ribbon” slowly moves. The mixture shouldn’t be so stiff that it holds its shape without moving at all, but it shouldn’t be so loose that it dissolves into itself and does not maintain the ribbon; it is better for the mixture to be slightly stiff than too loose. So go slowly! Take your time! You want to make sure that your mixture does not have any ribbons of plain merengue, where there are no almonds or your shells could crack.
  10. Transfer your mixture to a pastry bag fit with a 1/2-inch plain tip. Hold the bag upright about a half inch above the center of one of the traced circles and pipe out enough of the mixture to fill in the circle. Lift away the pastry bag and repeat, filling the remaining circles on the first pan.
  11. Next (and this is important!) Lift up the sheet pan and firmly (but not too hard) tap the bottom of the pan to the spread the batter evenly and smooth any peaks left by the pastry bag (there will be some, and if that doesn’t make them go away, wet your fingertip and tap them down).
  12. If you are using a convection oven, which I recommend, bake the shells for 8 to 10 minutes. You want to cook them until the tops are shiny and crisp. If you are using a standard oven, place the sheet pan in the oven and then immediately lower the oven temperature to 325°F, and bake for 9 to 12 minutes, again, until the tops are shiny and crisp.
  13. Set the pan on a cooling rack, and if using a standard oven, preheat it to 350°F again.
  14. Pipe the remaining meringue mixture into the circles on the second sheet pan and bake as directed above. Let cool completely.
  15. Pipe a buttercream (or ganache) filling onto one half of the shells and pair them with a matching half. Be gentle when sandwiching them together, you could accidentally smush them.
Notes
Please don’t try to convert this recipe to volume. Just get a scale and weigh. You will be happy that you did. You will need a candy thermometer. Again, this isn’t really optional if you want success. Finally, don’t skip the tracing out of circles step. It makes it so much easier to get consistently sized cookies. Which makes matching them up easy peasy.
3.2.1337


gluten free mini bundt

Ratio Rally: Gluten-Free Mini Vanilla Chai Bundt Cakes

This post is part of the Gluten-Free Ratio Rally, a group of gluten-free bloggers inspired and empowered by Ruhlman‘s Ratio and started by Shauna at Gluten-Free Girl. We get together each month and post many different takes on the same theme. This month that theme is Gluten-Free Tarts and the rally is being hosted by Adina from Gluten Free Travelette.

gluten free mini bundt

This post is brought to you by the number 1.

Since Big Bird isn’t at risk of getting fired, I thought a Sesame Street reference would be OK.

And the ratio is full of them, so there is that.

The ratio

1:1:1:1 ish. Butter:Flour:Sugar:Eggs

And heck, throw in some liquid (up to 1 part) for good measure.

I mean, that is where pound cake got its name. A pound of butter, a pound of eggs, a pound of sugar and a pound of flour. Equal parts. Awesomely delicious.

Now, put that in a bundt and you have a winner.

I don’t want to get too crazy into the science here, but you can vary any of these ingredients by up to 20% and your ratio should still work. I added liquid, cut back a little on the sugar and added a little extra flour so that there was an even cup measurement for those of you who still bake by volume (someday you will see the light, I just know it). I also cut back on the butter and eggs, to make room for the liquid. (How the flavors got into the cake).

Kiss my bundt.

Ok, I just had to.

Mostly because Bundts are awesome. They are usually a dense cake, like a pound cake, baked in a pretty pan and topped with a glaze. Easy peasy.

How about a scene from a romantic comedy about bundts?

(I had to, mostly because I love that movie, even if it wasn’t filmed in Chicago)

Ok, enough sillyness.

Chai is one of my favorite things. I drink double dirty soy chai lattes. My first recipe on this blog was for Gluten Free Chai Latte Cupcakes. In my first Ratio Rally, I shared a recipe for chai gluten-free cream puffs.

And it is back again. Chai spiced vanilla bean bundt cakes. In minature.

Bundts are elegant and un-fussy, and can be whipped up in a jiffy. They are even a breeze to decorate. Excellent for a last minute birthday treat.

This month’s rally is over at GFTravelette – make sure you go check it out!

Gluten-Free Mini Vanilla Chai Bundt Cakes

Recipe Type: Dessert
Author: Mary Fran Wiley
Prep time: 30 mins
Cook time: 40 mins
Total time: 1 hour 10 mins
Serves: 18`
A fun take on a bundt! With milk steeped with spices, the cake combines some of my favorite flavors
Ingredients
  • 1/2 cup (120 mls) milk
  • 5 green cardamom pods
  • 2 star anise
  • 1 teaspoon grated fresh ginger
  • 4 cloves
  • 210 grams (1 1/2 cups) gluten-free all purpose flour
  • 1/2 teaspoon xantham gum (omit if using a blend that includes this)
  • 1 g baking soda (1/4 teaspoon)
  • 2 grams (1/2 teaspoon) baking powder
  • 1/2 teaspoon salt
  • 175 grams (3/4 cup + 2 tablespoons) sugar
  • 125 grams (1 stick + 1 tablespoon) butter, softened
  • 1 tablespoon vanilla bean paste
  • 2 eggs
  • 1 vanilla bean
  • 3 tablespoons milk
  • 1/2-1 cup powdered sugar
  • 1/4 teaspoon salt
Instructions
  1. In a small sauce pan over low heat, simmer the milk, cardamom pods, star anise, cloves and fresh ginger for 20 minutes. Remove from heat and set aside to cool for a few minutes while you prepare your miss en place.
  2. Preheat the oven to 350 degrees and grease your mini bunt pan.
  3. Whisk together the flour, xantham gum (if using), baking soda, baking powder and salt in a medium bowl and set aside.
  4. Cream together the butter and sugar until light and fluffy, using a stand mixer on medium-high and beating for about 5 minutes. Add the vanilla bean paste.
  5. Beat in the eggs one at a time, scraping down the sides after each addition.
  6. Strain the steeped milk, and add 1/3 to the batter.
  7. When it is fully incorporated, add half the flour, and scrape down the sides of the mixer. Repeat until you are out of milk and flour (it should go milk – flour- milk -flour – milk). Mixing on no higher than medium, and scraping down the sides after each addition.
  8. Use a #40 scoop (or fill the wells of the pan no more than half way), and divide the batter into the pan.
  9. Bake for 20 minutes, until the cakes are golden brown and a tooth pick inserted into the center comes out clean. Cool on a wire rack.
  10. Bake the remaining batter.
  11. While the cakes are baking, split the vanilla bean and scrape the seeds into the 3 tablespoons of milk in a liquid measuring cup or a bowl with a spout. You want this to sit for 20-30 mins.
  12. When the cakes are done and cooling, whisk the powdered sugar and salt into the vanilla milk. You want a glaze that is thick and opaque, but not so thick it won’t pour. If it is too thin, it will run off the cakes. My advice? Have a test cake and when you think you are close drizzle a little and see how it works. If the glaze gets too thick, add a half a teaspoon of vanilla extract.
  13. Serve in cupcake papers for a pretty, special treat.
3.1.09


The other recipes this month:
salted caramel swirls

No, we didn’t win that ring.

salted caramel swirls

It was kind of a busy weekend.

Blondie and I saw friends, had dinner with my family (because my cousin got engaged!), went to a baking demo, went out for lunch, managed to get in a few photos for my class and I made caramels.

Blondie and I were going to do a scavenger hunt/race for an engagement ring on Sunday. But we skipped it. To go to a gluten free baking demo at Williams Sonoma. But I will tell you more about that tomorrow, once I bake something with their new gluten free flour.

jam sessionBlondie graciously jammed on his guitar so I could do some homework. (Rapid fire shots combined into one swell image).

The real story is this caramel recipe. And a cookbook that I think you need.

You see, I was that strange kid that absolutely adored bulls eyes and cow tail candies. The chewy caramel filled with the creamy crumbly white sugar stuff.

This was my second time making the recipe, and it is divine.  (It sure made my dad happy too, he is the one who got me hooked on this type of candy as a kid).

Let me start with the book.

It is Sugar Baby by Gesine Bullock-Prado. Now, before you get all conspiracy theorist on me, yes, she is Sandra’s sister. I refuse to hold this against her (mostly because Sandra was super gracious to the neighborhood kids when she filmed While You Were Sleeping).

Almost the entire cookbook is gluten free. Simply because when you are cooking with sugar and making candies, you don’t need flour. (There are a half dozen recipes at the back of the book, but you could substitute your favorite cake, crepe or pâte à choux recipe for hers and just follow the technique and recipes for frosting and and other bits).

There are recipes for several different fudges, marshmallows, rock candy, milk candy and to top it off, cotton candy.

Another bonus? The ingredients are listed in both US measurements and by weight. (I made the caramels using both sets of measurements). For those of you afraid of relinquishing your measuring cups, the conversions are there. For those of you not in the states or who have started to use scales for baking, the weights are right there for you.

The instructions are clearly written in a friendly voice. She sounds like a friend teaching you how to do these things in the kitchen might sound. There are sweet stories in the recipe head notes and all the recipes look fabulous. (I would like an excuse to make fairy floss, so someone needs to have a party for me to bring it to).

I am sure this book is not dentist approved, but the recipes are fun and approachable. Plus, the author lists variations for each recipe.

Now, a few tips:

  1. Use a metal bowl for your stand mixer, if you have one of those beautiful Kitchen Aids with a glass bowl, whipping the fondant takes twice as long.
  2. The sharper your knife the better. I used a very sharp, serated knife.
  3. Cold caramel-fondant rolls smush less. Although, I think the smushed ones taste just fine.
  4. If it is super humid, you might need an extra tablespoon of cornstarch in your vanilla bean cream. It’s quite alright. It will still taste divine.
  5. Don’t use vanilla extract in the fondant. If you don’t have vanilla bean paste, scrape the seeds from a vanilla bean or use ground Tahitian vanilla beans (I used vanilla bean paste the first time and ground vanilla beans the second time).
  6. Consult the photo tutorial from the author. It helped me visualize many of the steps.

Finally, a recipe.

Salted Caramels with Vanilla Bean Cream
#ratingval# from #reviews# reviews
Print
Recipe Type: Candy
Prep time: 5 mins
Cook time: 75 mins
Total time: 1 hour 20 mins
Serves: 40
This recipe is adapted from Sugar Baby by Gesine Bullock-Prado. This is a brilliant interpretation of one of my childhood favorites, and this recipe happens to be gluten free (unlike the industrial variety). These take a bit of time to prepare, and are a good Saturday afternoon project.
Ingredients

Caramel

  • 1½ cups heavy cream
  • 400 grams (2 cups) sugar
  • 1 cup light corn syrup
  • stick (55 grams) unsalted butter
  • 1 teaspoon vanilla extract
  • 1 teaspoon sea salt

Vanilla Bean Cream

  • 2 cups sugar
  • cup water
  • 2 tablespoons corn syrup
  • pinch salt
  • stick (55 grams) unsalted butter
  • teaspoon vanilla bean paste or ground vanilla beans
  • 1-2 tablespoons cornstarch, plus additional to dust counter
Instructions
  1. Line a half sheet pan with parchment paper and grease well. Really, grease it. You do not want to end up with a sticky mess.
  2. Prepare your mise en place. (That means get your ingredients out and measured when you start). Cut both measures of butter into small pieces.
  3. Make the caramel. In a medium saucepan with a heavy bottom over medium heat, combine the cream, sugar and corn syrup. Clip a candy thermometer on your pot and stir the mixture gently. When it starts to boil, put your spoon down and step back from the stove. Wait while your sugar bubbles along. (If your pot is too small, it will boil over and make a huge mess. You are better off using a pot that is a little too big – as long as enough of your candy thermometer is submerged to effectively measure the temperature.) When it hits 257 degrees Fahrenheit, remove the pot from the heat, stir in the butter, vanilla extract and salt. Pour it into your prepared pan and spread evenly. Set aside.
  4. Make the vanilla bean cream. In the bowl of a stand mixer (preferably a metal bowl), place the chopped butter. In a clean pot, combine the sugar, water and corn syrup. Put the pot over medium heat, attach a candy thermometer and stir until the mixture becomes clear. Boil the mixture until it reaches 245 degrees Fahrenheit. Pour in the bowl of the stand mixer. Slowly bring the mixer to medium and mix until translucent. Add the salt and vanilla bean paste (or ground vanilla bean). Continue beating until the mixture is white, shiny and mostly opaque. Add 1 tablespoon of cornstarch. Raise the speed to high and beat like crazy. I beat it for about 10 minutes the first time I made these, and 20 minutes the second time. It was super humid, so I also added a little extra cornstarch to help the mixture dry out. Once the mixture looks like it is starting to dry, stop the mixer. It should hold its shape pretty well. Turn it out onto a cornstarch dusted surface and knead. You should have a soft, pliable dough.
  5. Assemble the rolls. Press the cream onto the caramel, leaving a half inch at each of the long ends. Remove the caramel from the pan and cut in half lengthwise (I used a pizza cutter for this). Roll the caramel and fondant into logs. Slice with a serrated knife. If your rolls smush or the fondant squeezes out, refrigerate the candies for about 10 mins. Then continue slicing.
Notes

Try using instant espresso powder in the fondant to create caramel frappucino candies.

You can make fat rolls (like the ones pictured), by leaving a half inch of fondant from the short sides, cutting the caramel in half lengthwise, and then in half crosswise to make 4 shorter, wider rolls.

Google Recipe View Microformatting by Easy Recipe
1.2.4


Mulberry tart

Mulberries

mulberry tree! This recipe tastes like childhood. It brings back the days of coming home when the sun went down and playing across every back yard on the block. It tastes like sitting on my dad’s shoulders and grabbing berries from trees as we walked to and from the ice cream shop or a movie. There were a couple of mulberry trees that every summer would be heavy from juicy, sweet berries. It was my favorite part of the walk. My hands would be stained purple from berries when they burst. My shoes would have gooey purple messes on the bottoms. It was summer. At it tasted good.

Imagine how excited I was to discover that there is a mulberry tree in my backyard. Right there, shading my tomato plants. A tree heavy with the flavor of childhood summers.

mulberries

I couldn’t pass it up. Plus, I recieved a tart pan (along with a dutch oven & a gym membership) from Blondie for my birthday. It was fate.

Now, mulberries have a tart & sour flavor if they are not yet ripe, and even at their juicy best, they are not as sweet as a black berry. But they are darn tasty. If you don’t have access to a mulberry tree in your back yard, front yard or down the street, you can always use raspberries, blackberries or strawberries.

Mulberry tart

The tart recipe has been de-glutened from a recipe and technique shared by David Lebovitz. Visit his site for more in-depth directions and photos of the process. There are no gums, just some flax, and you can use my substitution chart if you are working by weight and want to swap out some flours.

Vanilla Bean Tart with Mulberries
#ratingval# from #reviews# reviews
Print
Recipe Type: Dessert
Author: Mary Fran Wiley
Prep time: 15 mins
Cook time: 45 mins
Total time: 1 hour
Serves: 8-10
Thanks to an incredible method shared by David Lebovitz, the tart has an incredibly tender, melt-in-your-mouth crust
Ingredients

For the crust

  • 6 tablespoons (3oz/90 grams) unsalted butter, cubed
  • 1 tablespoon vegetable oil
  • 2 tablespoons water
  • 1 tablespoon vanilla bean paste
  • 1 tablespoon sugar
  • 1/8 teaspoon salt
  • 10 g ground flax seeds
  • 50 g sorghum flour
  • 30 grams brown rice flour
  • 30 grams white rice flour
  • 30 grams tapioca starch

For the pastry cream

  • 1/4 cup cornstarch
  • 1/4 cup + 1/2 cup sugar
  • 1/2 cup plus 1 1/2 cups milk
  • 4 large egg yolks, lightly beaten
  • 1 pinch salt
  • 2 tsp vanilla extract or vanilla bean paste
  • 2 T unsalted butter
  • 1 pint fresh berries, picked over with stems removed
Instructions
  1. For the crust: Preheat the oven to 410º. In a medium-sized ovenproof bowl, add the butter, oil, water, sugar, vanilla and salt. Place the bowl in your hot oven for 15 minutes. The butter should be bubbling and the mixture should be slightly brown around the edges. While it is baking, whisk together your flours. Carefully remove the bowl from the oven. (Don’t be like me and forget a pot holder, it will be HOT!) and dump in the flour and stir it in quickly, until it comes together and forms a ball which pulls away from the sides of the bowl. Put the dough in a 9in tart pan, and when it is cool enough to touch, press it into the tart pan with your hands, pinching dough up the edges. Prick the bottom with a fork and then bake for about 15 mins. The crust should be a light golden brown.
  2. For the pastry cream: While the crust is cooling whisk together cornstarch and 1/4 cup sugar in a mixing bowl. Stir in 1/2 cup of the milk. Blend yolks into the mixture, stirring until smooth. Prepare an ice bath (a very large bowl filled with ice & water – it should be a bowl that the sauce pan you are using does not quite fit in). Combine remaining milk (1 1/2 cups), salt and sugar (1/2 cup) in a medium sized sauce pan (non-reactive is ideal). Bring to a boil over medium heat while stirring constantly. Temper the egg mixture with about 1/3 of the hot milk (you have to whisk constantly – you do not want to cook the eggs unevenly) Add egg mixture to remaining milk mixture and return the pan to the heat. Continue to cook over medium heat, vigorously stirring with a whisk until the mixture boils and a trail forms after the whisk, about 5-7 minutes. Transfer pan to the ice bath and stir occasionally until the pastry cream is cool.
  3. Assemble the tart: Pour pastry cream (or vanilla pudding) into the crust and top with your fresh berries and enjoy the taste of summer.
Notes

If making pastry cream is too fussy, you could try a vanilla pudding.

If you wish to see the original crust recipe, visit David Lebovitz’s site.

Want to make the crust by volume? Use 1 slightly rounded cup of gluten free all purpose flour (I like Jules’ Nearly Normal Flour), if you use a flour without xantham gum or flax, add 1/2 teaspoon xantham gum.

Google Recipe View Microformatting by Easy Recipe
1.2.4