Home » Food » Page 18

Category: Food

Food. Eaten. Made. Discussed. All gluten-free.

gluten free sweet potato tart

GF Ratio Rally: Tarts

This post is part of the Gluten-Free Ratio Rally, a group of gluten-free bloggers inspired and empowered by Ruhlman‘s Ratio and started by Shauna at Gluten-Free Girl. We get together each month and post many different takes on the same theme. This month that theme is Gluten-Free Tarts and the rally is being hosted by Charissa from Zest Bakery.

gluten free sweet potato tart

The inspiration for the recipe

Frankly, I want chocolate. I want chocolate dipped in chocolate with melted chocolate and caramel on top. I have been having a rough go of things over the past few weeks.

I’ve been swamped at work.

My plan to spice up my life has worked a little too well, and I feel a little thrown.

My leg started turning purple again – and the color being normal was the only real progress that had been made since this all started.

I went to the dentist. <- that right there is reason enough to live on chocolate for a month.

But, when you want to eat your feelings, it is best not to.

I still wanted something comforting.

And fall-y. (Yes, that is a word now).

Orange food means fall, right?

So, sweet potatoes.

And since it is starting to get chilly in the mornings and evenings, i thought some nice cheese would help warm me up.

There you have it, orange + cheese + pie crust = parmesan sweet potato tart.

gluten free ratio rally logo

The ratio

Is still pretty close to 3 parts flour, 2 parts fat and 1 part liquid. The fats and liquids are just redistributed a little bit.

There is an egg yolk for fat, but also to act as a binding agent and a little bit of the liquid.

Then there is the buttermilk, which (please don’t ever buy low fat buttermilk for baking unless it is specifically called for) adds fat & liquid to the mix. I learned this trick from Lena over at Cup4Cup – it makes a dang tasty pie crust. I think it beats my old vodka trick.

Pulse it all in a food processor. Let it rest for 30 minutes or so, this re-chills your ingredients and makes the dough easier to handle.

GF Ratio Rally: Tarts

Author: Mary Fran Wiley
Prep time: 40 mins
Cook time: 40 mins
Total time: 1 hour 20 mins
Serves: 8
This tart will fit into a 9″ round perfectly. If you want to use a rectangular tart like pictured, you will end up with a wee bit extra filling. Use the extra crust and filling to make a mini tart or two in a ramekin.
Ingredients
  • The crust
  • 113 grams (1 stick) cold unsalted butter
  • 210 grams (1 1/2 cups) all-purpose gluten-free flour (I prefer Cup4Cup)*
  • 1/2 teaspoon xantham gum**
  • 5 grams (1 teaspoon) granulated sugar
  • 1/2 teaspoon salt
  • 1 large egg yolk
  • 1/4 cup buttermilk***
  • The filling
  • 2-3 medium sweet potatoes, cut into 1/4 inch slices
  • 6 sprigs of thyme with the leaves pulled off and the branches discarded
  • 2 tablespoons of olive oil
  • generous sprinkling of coarse salt & fresh ground pepper
  • 1 1/4 cup heavy cream
  • 1 egg
  • 115 grams (about 1 1/4 cups) finely grated parmesan cheese
  • 1/4 cup roughly chopped fresh sage
Instructions
  1. Cut the butter into fourths and place in a food processor. Add the flour, sugar and salt. Pulse until you have a mixture that is the texture of wet sand.
  2. Add the egg yolk & butter milk. Pulse until just combined.
  3. Gather the dough up, press it into a disc about 4″ in diameter. Wrap it in plastic and place it in the refrigerator. You can do this up to 24 hours before you want to make the tart.
Make the filling
  1. Line a rimmed baking sheet with parchment paper & preheat the oven to 350 degrees Fahrenheit.
  2. Peel & slice the sweet potatoes into 1/4inch thick slices. (Slice them one at a time and guage how many you need – drop them into your tart pan and see how full it gets, when it is mostly full, you have enough just in case we have very different ideas about what a medium sweet potato is)
  3. Lay them out flat and drizzle with olive oil, and sprinkle with thyme, salt and pepper. It is important that you don’t skip seasoning the potatoes.
  4. Bake them for 15-20 minutes. You want them to just be softening.
  5. In a small bowl, lightly beat the egg and cream together.
Assemble the tart
  1. Raise the oven temperature to 375 degrees Fahrenheit, and place a clean baking sheet on the middle rack of the oven.
  2. Take the dough out of the freezer, and on a well floured surface, roll it out to be 2″ wider and longer than your tart pan.
  3. Gently lift the dough and pace it into the tart pan. Press the dough into the edges and fix any tears with extra dough.
  4. Line the bottom of the tart pan with sweet potato slices and top with 1/4 of the parmesan cheese and then 1/4 of the sage. Repeat 2-3 more times (until you run out of potatoes).
  5. Slowly and carefully pour the egg and cream mixture over the potatoes and cheese. Be patient, it has to seep all around your potatoes to fill in all the air pockets.
  6. Top with any remaining parmesan and sage.
  7. Place the tart pan on top of the hot baking sheet in the oven. Bake for 40-45mins. When the crust is lightly browned and the cheese is golden and bubbly, your tart is done.
  8. Let cool for 10 minutes before removing the tart from the pan to allow the filling to set up.
Notes

*Frankly, I think Cup4Cup works the best of any of the blends you can currently purchase. Jules Nearly Normal and Better Batter are suitable alternates if you can’t have dairy or can’t find the Cup4Cup in your area.
**If you use any of the commercial blends I mentioned, you won’t need this, but if your flour blend doesn’t contain any gums, expandex or other binding agent, you will need this
***If you don’t have buttermilk use the following: 3 tablespoons + 2 1/2 teaspoons heavy cream and 1/2 teaspoon vinegar. Combine and let sit for 5 minutes before starting

3.1.08

This post is linked to: Slightly Indulgent Tuesdays


Chicago is my kind of town. (and gluten-free tiramisu)

I have seen a lot of cities. In fact, more than once I have threatened a move to Munich or Nice or Paris. (But never in a million years could you pay me to move to New York City).

I might love the look of medieval buildings mixed in with twentieth (and twenty first) century life and architecture.

I might imagine my life to be as romantic and full as Amelie Poulin.

But, really, nothing beats my city. The one whose humming energy greets me every morning when I get off the train. The city where the baseball team you cheer for could make or break a friendship.

The city with a strange taste in public art (Cow Parade or Color Jam anyone?).

The city that has State Street, that great street and the Magnificent Mile.

The city that was home to the first Ferris Wheel and the birthplace of the brownie.

“Come and show me another city with lifted head singing
so proud to be alive and coarse and strong and cunning.
Flinging magnetic curses amid the toil of piling job on
job, here is a tall bold slugger set vivid against the
little soft cities;” -Carl Sandburg, Chicago

This weekend reminded me even more how much I love this place.

This place where you have to pause a conversation as an El train passes overhead.

The energy and the pace here are intoxicating. Fast but not frantic. Busy, but not overwhelming.

Sit next to a stranger on the train and they are liable to tell you their life story. And they’ll want to know yours.

This weekend I got to do some very Chicago things.

I started the weekend with some leftover tiramisu and a gluten-free beer. I went to Gluten-Free Awareness Night at Comiskey Park US Cellular Field. I had gluten-free pizza from a place on Taylor Street. I had a cocktail in the Signature Lounge at the Hancock Building.  I bought my mom orange pants for Monday Night Football. All in all, it was a very Chicago weekend.

Good times.

Now for some good food.

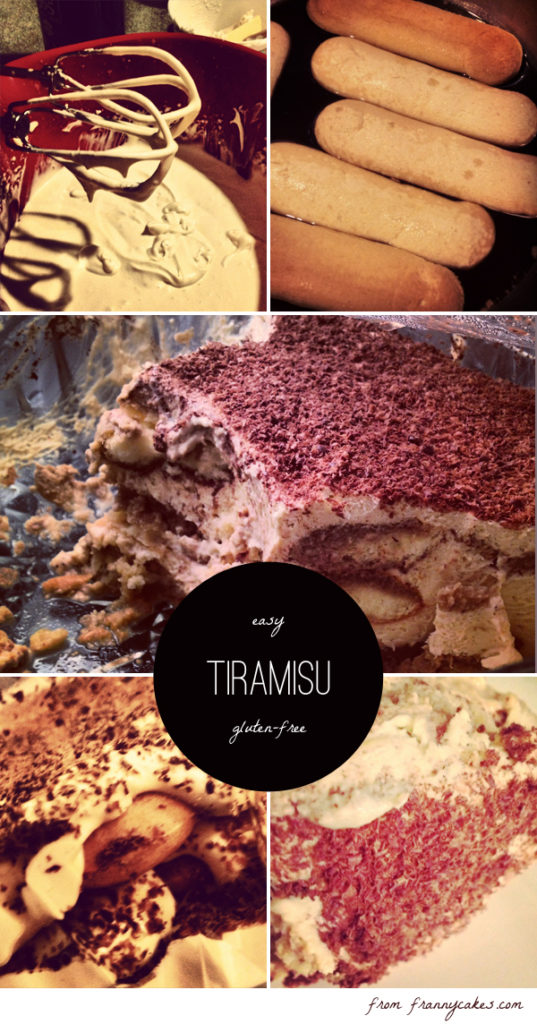
If any gentlemen happen to read this blog, know this: tiramisu is a romantic, impress the ladies kind of dessert.

And this version is oh-so-easy.

20 minutes start to finish plus an hour to chill. I cheat (a little) with some store-bought gluten-free lady fingers, but that is what makes this dish so easy. You could substitute the purchased cookies for a home-made genoise if you prefer.

Gluten-Free Tiramisu
#ratingval# from #reviews# reviews
Print
Recipe Type: Dessert
Prep time: 20 mins
Total time: 20 mins
Serves: 8
Adapted from the New Basics Cookbook & Mammacake’s notes
Ingredients
  • 1 1/4 cups strong espresso or coffee, room temperature
  • 3/8 cup triple sec
  • 6 egg yolks
  • 4 tablespoons powdered sugar
  • 1/4 cup marsala
  • 16oz marscapone, room temperature
  • 30 gluten-free lady fingers (2 boxes of [url href=”http://www.schar.com/us/gluten-free-products/ladyfingers/’]Schar gluten-free lady fingers[/url] are perfect here)
  • 3 ounces dark chocolate
Instructions
  1. In a medium sized mixing bowl, combine the espresso and the triple sec, set aside.
  2. In a separate mixing bowl, beat the egg yolks and powdered sugar until light buttery yellow and they have thickened, about 3 minutes with a hand mixer. Slowly add in the marsala and beat until combined.
  3. Add the marscapone 1/3 at a time, making sure that it is completely incorporated before adding more. If your marscapone is cold, you could end up splashing a lot (and messes are no fun).
  4. Soak the lady fingers 3-4 at a time in the coffee until they have started to soften (but not disintegrate), and turn over. It is about 45 seconds a side.
  5. Line the bottom of a trifle bowl or 11×7 glass baking dish with 10 espresso-soaked lady fingers. Top with 1/3 of the marscapone mixture. Grate chocolate over the layer with a microplane (or grind it in a food processor and sprinkle 1/3 of it now). Repeat twice more, resulting in 3 layers each of lady fingers, marscapone and chocolate.
  6. Make sure the top has a little extra chocolate.
  7. Let sit, covered, in the fridge for at least an hour and up to 48 hours.
2.2.8

This post is linked to: Gluten-Free Mondays


Wednesday Wisdom: Meal Planning

(gluten free) wednesday wisdom from frannycakes.comMeal planning is no easy task, especially when trying to accommodate a variety of diets. In our family, I have Celiac Disease so I always cook gluten-free, and my daughter is a vegetarian. To make sure that all of our dietary needs are being met, and to help me save time and money at the market, a weekly plan is a lifesaver.

Each weekend I ask for input on the menu and we go over our schedule as a family. Depending on what evening activities we have during the week (it’s always crazy), I will plan to have a few super quick meals (think gourmet gluten-free grilled cheese sandwiches) and a few more complicated ones. I have a running list of produce available from our CSA basket as well, to make sure we use up all of our veggies. I usually do all the grocery shopping on Monday, and then I write the menu choices on a large chalkboard in the kitchen.

I like a lot of flexibility, so I don’t assign a meal to a particular day–rather, I wait and see how the afternoon is turning out (and how much energy I have). Because I have the ingredients already, I have the freedom to choose from those 4-5 meals we have planned out. Finally, we’ve begun a new tradition in our family that we fondly call Wacky Wednesdays, where the kids take turns planning for, and preparing dinner. Since we’ve started doing this, the kids have a lot more appreciation for the work I do in the kitchen, and do a lot less complaining during the rest of the week.

Spice up your life! (A recipe for gluten-free spiced brownies)

It is really easy to get stuck in a routine.

Wake up. Get coffee. Get on the train. Read 30 pages in a novel. Walk a few blocks. Finish coffee. Get to the office. Pour another cup of coffee. Answer emails. Do design-y stuff. Walk a few blocks. Get on the train. Catch up on twitter. Go home. Eat dinner. Do blog-y stuff. Go to bed.

Lather, rinse, repeat.

Routine is comfortable, familiar. Known.

I have to say, I like my little routine. I read 9 novels this summer and I only read while on the train. Ok, I might have developed an unhealthy dependence on coffee. (Blame Mammacakes. I started sneaking sips of her coffee when I was 4 and she would leave a mug on the table). But the routine is mine.

But it is just that. A routine. Like a treadmill (the world’s most torturous piece of gym equipment).

Sometimes, you just have to do this:

(Yes. Really. A Spice Girls video.)

Maybe that means ordering a latte when you normally order a chai.

Maybe that means just going for it , whatever it happens to be. A new job. A date . A new cooking technique. Ordering something other than the usual.

A good friend told me that I need to just take a day and go for it. Do something I normally wouldn’t. Have fun just because I can. Shake things up to see where the pieces fall. Not a calculated risk. No weighing pros and cons. Just making things happen.

So, here’s to spicing things up.

Let’s start by spicing up some chocolate decadance.

gluten free mexican spiced brownies

At my super fabulous day job (yes, I am going to keep rubbing in how much I love it), we do fun things. Like brewing (gluten-free) beer and taco potlucks.

Last week, we had one of those potlucks. And I forgot to sign up. Because, really, would you expect me to bring anything other than dessert?

A concerned coworker asked if I was going to participate. Of course I was going to. I asked him what he wanted. His answer? Mexican Spiced Brownies.

It was the perfect excuse to make a new variation on one of my favorite treats (I even have my go-to gluten-free brownie recipe memorized) .

Fudgy bits of chocolate heaven, with a kick. They were such a hit at the potluck, all I got was that little corner of a brownie. I blame [my coworker] Shellie. (She swears that ice cream eaten with the brownies makes them even better).

gluten free mexican spice brownies being eaten

Gluten-Free Mexican Spiced Brownies
#ratingval# from #reviews# reviews
Print
Recipe Type: Dessert
Author: Mary Fran Wiley
Prep time: 15 mins
Cook time: 35 mins
Total time: 50 mins
Serves: 16
Oh baby. Decadent, fudgy brownies with a kick. Please and thank you.
Ingredients
  • 310 grams (11 ounces) dark chocolate, chopped
  • 230 grams (8 ounces/ 2 sticks) butter, chopped in 1 inch cubes
  • 1 tablespoon vanilla extract
  • 1 teaspoon salt
  • 10 grams (2 tablespoons) cocoa powder
  • 300 grams (1 1/2 cups) granulated sugar
  • 110 grams (1/2 cup) firmly packed brown sugar
  • 5 eggs
  • 150 grams (1 1/4 cups) gluten-free all-purpose flour like Cup4Cup*
  • 1/2 teaspoon chipotle
  • 1/2 teaspoon paprika (spicy if you have it)
  • 1 teaspoon cinnamon
  • 5 grams (1/2 teaspoon) fresh, finely grated ginger
Instructions
  1. Pre-heat the oven to 350 degrees Fahrenheit. Grease and line a 9×13 pan with parchment paper.
  2. In a medium pot over low heat, melt the butter and chocolate and salt.
  3. Once melted, remove the pot from the stove and stir in the vanilla, cocoa powder and sugars.
  4. In a sperate bowl, whisk together the gluten-free flour, cinnamon, ginger, chipotle and paprika.
  5. Add the eggs to the melted chocolate mixture in 2 groups, stirring to incorporate. As soon as the eggs are mixed in, add the flour in 2 groups.
  6. Be careful not to over-mix the batter. You want to incorporate as little air as possible into the batter or else you will end up with a brownie that is less chewy and more cake like.
  7. Pour the batter into the prepared pan and bake for 35-40 minutes. They are better a little under done than to be over cooked.
Notes

I use Cup4Cup flour or Jules’ Nearly Normal Flour when I use all-purpose flour. If you want to make your own bend for this recipe, use 10 grams ground flax meal, 40 grams sorghum flour, 20 grams brown rice flour, 20 grams white rice flour, 30 grams tapioca starch, 30 grams sweet white rice flour

2.2.8

This post is linked to: Slightly Indulgent Tuesday


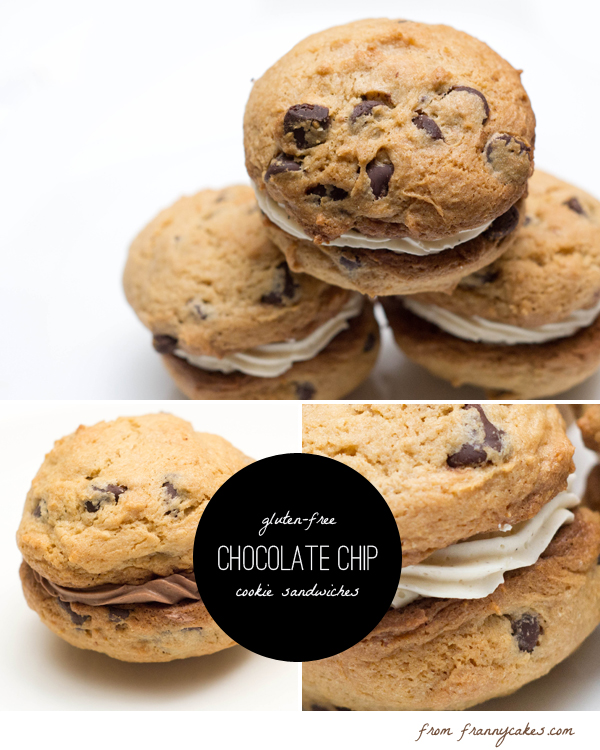
gluten free chocolate chip cookie sandwiches

Birthdays deserve special treats

gluten free chocolate chip cookie sandwiches

Birthdays really do deserve special treats.

Not boring, normal things.

Not something that you make to cheer yourself up when you are feeling blue. (Don’t tell me you never baked to make yourself feel better).

Birthdays deserve a little extra something.

A chocolate chip cookie might be a classic, but it is not what birthdays are made of.

It was almost a challenge. I promised my friend Matt a treat for his birthday. But it couldn’t be a normal treat, he already has had gluten-free birthday cake doughnuts and a red velvet cake.

But, he asked for chocolate chip cookies.

I couldn’t just bake cookies. That is too simple. Too easy. Not a big enough challenge. Not enough opportunity to impress people with ma skillz. (No, that is not a typo. I am trying to be cool. How is it working?)

more cookie sandwiches

Cookie sandwiches on the other hand are a much more exciting treat. Almost like an ice cream sandwich that doesn’t melt. Brilliant for when you have to commute with these bad boys to the city.

These were quite the hit with Matt & his coworkers. (And the extras were a hit with mine). So next time you need to impress someone who asks for just a chocolate chip cookie, this could be your answer.

Birthdays deserve special treats
#ratingval# from #reviews# reviews
Print
Recipe Type: Dessert
Author: Mary Fran Wiley
Prep time: 60 mins
Cook time: 45 mins
Total time: 1 hour 45 mins
Serves: 24
What is better than chocolate chip cookies? Chocolate chip sandwich cookies. Like an ice cream sandwich that doesn’t melt. It is brilliant. They do take a couple hours from start to finish, but you can make the frosting while the cookies bake – as long as you let the cookies cool completely before piping on the frosting.
Ingredients
  • 1 recipe [url href=”http://frannycakes.com/recipes/gluten-free-chocolate-chip-cookies-a-classic-treat/”]Gluten-Free Chocolate Chip Cookies[/url] using tablespoon sized scoops
  • 4 large egg whites (30g each–total 120g, or 1/2 cup)*
  • 200 grams (1 cups) granulated sugar
  • 280 grams (2.5 sticks) of unsalted butter, softened but cool, cut into cubes
  • 15 ml (1 tablespoon) pure vanilla extract
  • 1/4 tsp salt
  • 150 grams (about 3/4 cups of discs) high quality chocolate
  • 1 1/2 teaspoon vanilla bean paste
Instructions
  1. Bake the cookies, using tablespoon sized drops of cookie dough.
  2. While the cupcakes are baking, make the frosting. If this process intimidates you, Sweet Apolita made a pretty sweet tutorial.
  3. Combine the egg whites and sugar in a small pot until they reach 140 degrees fahrenheit.
  4. Transfer to a clean stand mixer bowl. Using the whisk attachment, beat until light and fluffy (soft peaks).
  5. Switch to the paddle attachment and add the butter one chunk at a time until it is all combined.
  6. Remove half of the frosting and set aside. Melt the chocolate in the micorwave on half power, heating it first for 30 seconds, and then in 15 second intervals after that, always stirring after each burst of heat. Let the chocolate cool a wee bit – you don’t want it hot so that it melts the butter, and then add it to half your frosting.
  7. Set this frosting aside. Add the vanilla bean paste to the reserved half of the frosting.
  8. When the cookies are completely cool, pipe frosting onto half of the cookies, topping with a similarly shaped partner cookie.
2.2.8


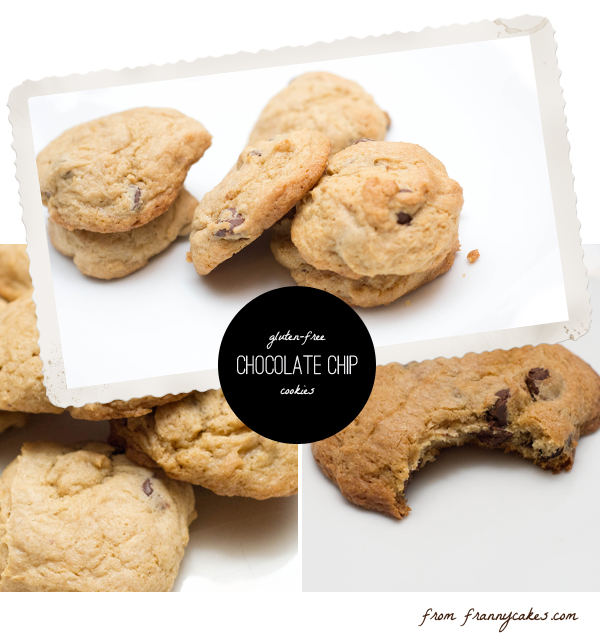
gluten free chocolate chip cookies

Gluten-free chocolate chip cookies, a classic treat

gluten free chocolate chip cookiesLittle black dresses. Peep-toe pumps. Red lipstick. Cucumber sandwiches. Sunday Roasts. French vanilla anything. Chocolate chip cookies.

I am a fan of classic things.

I have a go-to red lipstick. A perfect pair of pumps. Almost all of my dresses are little black dresses. I know how to swing dance and salsa. I can waltz and cha cha. (I cannot for the life of me do the Cha Cha slide.) I still wear Chanel No. 5 whenever I put on a suit.

When I need cheering up? Breakfast at Tiffany’s. Some Celine Dion. (Ok, fine, and maybe some 90’s pop)

Classics endure.

Like brownies, Sunday roasts and chocolate chip cookies. All things that are always a good choice.

Yes, there happen to be 2 other recipes for gluten-free chocolate chip cookies on frannycakes (one a birthday cake cookie with chocolate chips, the other a toffee chocolate-chip cookie), but neither of them is just a classic chocolate chip cookie.

Gluten-free chocolate chip cookies, a classic treat
#ratingval# from #reviews# reviews
Print
Recipe Type: Cookie
Author: Mary Fran Wiley
Prep time: 20 mins
Cook time: 15 mins
Total time: 35 mins
Serves: 36
Ingredients
  • 350 (2 1/2 cups) grams gluten-free all purpose flour*
  • 1 teaspoon xantham gum**
  • 1 teaspoon baking soda
  • 1/4 teaspoon salt
  • 215 grams (1 cup, firmly packed) dark brown sugar
  • 50 grams (1/4 cup) granulated sugar
  • 225 grams (2 sticks or 1 cup) cold butter, cut into cubes
  • 2 large eggs
  • 1 tablespoon vanilla extract
  • 350 grams (2 cups) semi-sweet chocolate chips
Instructions
  1. Prepare cookie sheets with parchment paper, but do not grease them.
  2. In a medium bowl whisk together the gluten-free flour, xantham gum if using, baking soda, and salt.
  3. In the bowl of a stand mixer, blend the sugars at medium speed.
  4. Add the cold butter and mix to form a grainy paste, scraping down the sides of the bowl. You are not looking for light and fluffy, you just want to mix until they are evenly combined.
  5. Add eggs and vanilla extract and mix at medium speed just until blended. Scrape down the sides of the bowl and do not over mix.
  6. Add the flour mix in 2 parts with the mixer at a low speed just until mixed. Then stir in the chocolate chips until just combined
  7. Drop by rounded tablespoons onto prepared cookie sheet, two inches apart.
  8. Place the cookie sheet in the freezer while the oven preheats.
  9. Preheat oven to 375° F. (Or 300° F. for a flatter, more spread out cookie).
  10. Bake 12-15 (20-22 for the cooler temperature) minutes until golden. Transfer cookies immediately to a wire rack to cool.
Notes

*This recipe works best with Cup4Cup flour from Williams-Sonoma. It will work with other blends that are not bean-based and do not have leaveners already added. Better Batter or Jules Nearly Normal Flour will work well here. You could also use your favorite home made blend.
**Xantham gum is only necessary if your blend does not include a binding agent such as xantham gum, guar gum or expandex.

2.2.8


wednesday wisdom

Wednesday Wisdom: A better gluten-free chocolate cake

Here’s a tip to make your fabulous GF chocolate cake even better.  When you are greasing and flouring the pan to prevent your cake from sticking, substitute cocoa powder for your GF flour.  The cocoa will add a little more chocolate-y flavor, and the color will blend right in with your dark cake.  You won’t end up with little clumps of white or tan flour on top of your cake.  You can even take it one step further by dusting your finished cake with powdered sugar mixed with cocoa powder.  It’s an easy, but elegant, way to finish off a cake instead of using frosting.

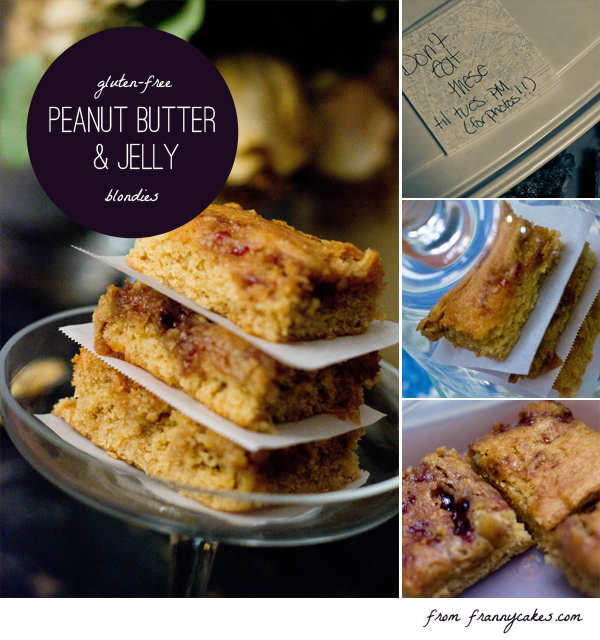
peanut butter gluten free blondies

“This is the marry me juice” (and a recipe for gluten-free pb&j blondies)

peanut butter gluten free blondiesI burst into a fit of giggles every time I hear this phrase.
Uncontrollable, side-splitting giggles.

That is a quote from a recipe called Engagement Chicken. Apparently it is a thing that girls make when they want to catch themselves a fine young gentleman. I happen to think it is funny. Like a chicken has magic properties. (On the other hand, these cupcakes do have amazing man-catching powers). That phrase has become something of an inside joke with a couple of my friends.

And it is kind of related to today’s post.

Kind of.

Today’s post isn’t about man bait. It is about great pairs.

Sonny & Cher. Sherlock Holmes & Dr. Watson. Lucy & Desi. Root beer & Vanilla Ice Cream. Nutella & bananas. Tom & Jerry. Bert & Ernie. Kermit & Miss Piggy. Peanut Butter & Jelly. Andy & Emily.

You haven’t heard of Andy & Emily? That’s ok. They aren’t exactly famous.

Andy is my cousin and one of my best friends (also, he is the one who gave me the nickname of FrannyCakes). Emily is my brand-new cousin-in-law. (And if it isn’t really a thing, I don’t care).

They got hitched Labor Day Weekend, and it was quite the celebration.

There were silly photos in a photo booth. Dancing. Silliness. Oh, and some mushy true love stuff transpired.

An excellent start for their life together.

A perfect pair for that list.

Welcome to the family, Emily! You and Andy make a great pair.

Just like peanut butter & grape jelly (does any one else have fond memories of Goober peanut butter? I might have mentioned before that I have the palate of a four year old…). These are slightly addictive.

Gluten-Free Peanut Butter & Jelly Blondies
#ratingval# from #reviews# reviews
Print
Recipe Type: Dessert
Author: Mary Fran Wiley
Prep time: 10 mins
Cook time: 30 mins
Total time: 40 mins
Serves: 24
A classic bar cookie paired with one of food’s greatest pairs: peanut butter & grape jelly.
Ingredients
  • 280 grams (2 cups) gluten-free all-purpose flour*
  • 1/2 teaspoon xantham gum(omit if using a flour blend that includes this)
  • 1 teaspoon baking powder
  • 1/2 teaspoon salt
  • 175 grams (1 1/2 sticks) butter, melted
  • 215 grams (1 cup, packed) dark brown sugar
  • 100 grams (1/2 cup) granulated sugar
  • 3 eggs
  • 1 tablespoon vanilla extract
  • 150 grams (generous 1/2 cup) smooth peanut butter**
  • 100 grams (1/2 cup) grape jelly***
Instructions
  1. Position a rack in the center of the oven and preheat the oven to 325 degrees F.
  2. Grease a 9×13-inch pan or heatproof glass dish and then line the pan with parchment paper, leaving about an inch of overhang on the long sides.
  3. In a medium mixing bowl, whisk together the flour, xantham gum (if using), salt and baking powder. Set aside.
  4. In a seperate, large mixing bowl, stir together the melted butter, brown sugar, granulated sugar, eggs and vanilla. For a denser blondie stir until just combined. For a lighter, cake-ier blondie, lightly beat the eggs before adding them to the sugars and butter.
  5. Stir in the flour mixture into the buter mixture. Spread the batter evenly in the prepared pan with the back of a spoon or a rubber spatula. (You might want to grease the spatula if you are having problems spreading the batter)
  6. Slightly melt the peanut butter and jelly in separate dishes in the microwave, and spoon them out all over the top of the batter.
  7. Swirl the batter with a spatula or butter knife, but be careful not to go all the way to the bottom of the pan, or the blondies might fall apart.
  8. Bake for 30 minutes, or until a wooden skewer inserted near the center comes out clean.
  9. Set the pan on a wire rack to cool for 15 minutes.
  10. Grasp the edges of the parchment and carefully lift the blondies out of the pan. Cut into bars.
Notes

*I usually use Cup4Cup brand all-purpose flour, but you could use most commercially available flour blends or a home-made AP blend.
**You could use SunButter to make these nut-free.
***Grape jelly is my favorite, but strawberry jelly would work just fine too.

2.2.8

This post is linked to Slightly Indulgent Tuesdays.


wednesday wisdom

Wednesday Wisdom: Making use of every crumb

Whether you make them yourself at home or buy a pre-made loaf at the supermarket, let’s face it: gluten-free bread can be expensive. You don’t want to let any go to waste. Follow these tips to put every last crumb to good use:

  1. Lightly toast slices to make delicious sandwiches. (Plus, don’t forget alternatives such as grilled cheese, hot open-faced sandwiches, French toast, and gluten-free paninis!)
  2. Tear or cut up slices and use to make a French toast casserole or bread pudding.
  3. Cube slices, lightly drizzle with olive oil, and season with a touch of salt, pepper, and garlic powder, then pop into the toaster oven or oven until golden brown to make easy croutons for salad.
  4. Pulse stale bread, heels, or lightly toasted slices in the food processor to make easy breadcrumbs. Season to taste with salt, pepper, garlic powder, dried basil, and dried oregano to make Italian-seasoned breadcrumbs.

Enjoy!

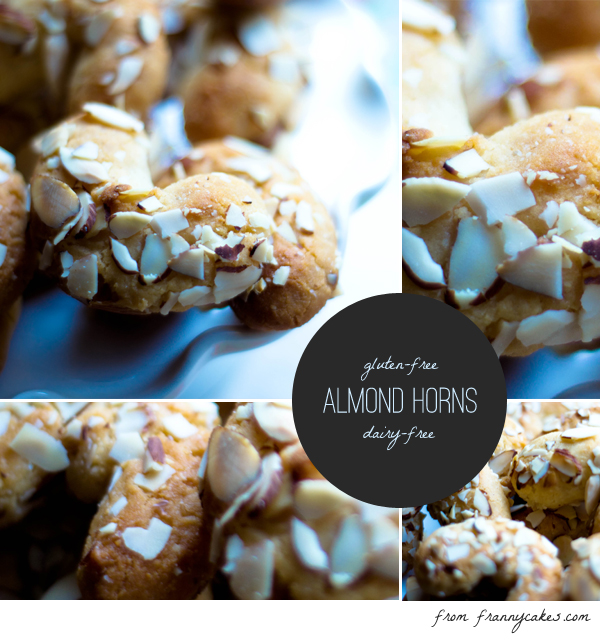
gluten free almond horns (they are also dairy free!)

Some days are hard and you just want a cookie (a recipe for gluten-free almond horns)

Do you ever have a day like that? When the whole world seems determined to get you. I have these cookies for you if you ever have a bad day. Chewy, and delightfully crunchy, these are a traditional pastry that are naturally gluten & dairy free (but be careful, some people put flour in theirs, so always ask if someone brings them to you…)

Read more