Home » chocolate

Tag: chocolate

a recipe for mini gluten-free boston cream pies by frannycakes

Mini Gluten-Free Boston Cream Pies

I really think that my coworkers are trying to stump me when it comes to making them birthday treats. Pulling whatever kind of flavor they can out of their heads to see if I really can do it. I mean, we had gluten-free peanut butter & jelly cupcakes and gluten-free double chocolate peanut butter cupcakes this summer.

learn to make gluten free boston cream pie on frannycakes.com

This time the request was for Boston Cream Pie Cupcakes – something that was actually a bit more traditional and a little less out there.

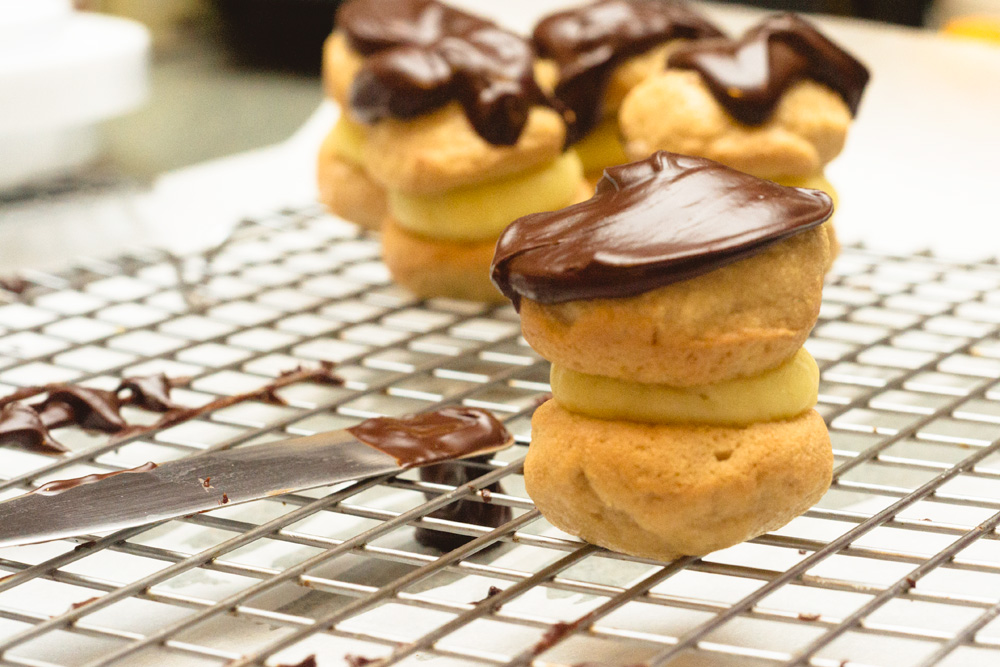
I decided that I was bored with the core & fill kind of cupcake, so I went a different route with these – I used a mini whoopie pie pan to make the cake pieces and then piped in some filling and poured on a thick glaze. And ended up with two-bite treats that were all gone before lunch.

chopped chocolate for chocolate glaze

The only caveat is that these do not transport well. If you try to take them on your 2-train 2-hour commute, they might just get a little banged up before you get them in to the office. (It won’t effect the flavor, but it might bruise your ego a wee bit). If these need to make a trip, I would bring all the components and assemble on-site. It takes about 10 minutes to combine all the parts into lovely little gluten-free boston cream (whoopie) pies.

a recipe for mini gluten-free boston cream pies by frannycakes

Mini Gluten-Free Boston Cream Pies
Recipe Type: Dessert
Cuisine: American
Author: Mary Fran Wiley
Prep time: 45 mins
Cook time: 25 mins
Total time: 1 hour 10 mins
Serves: 24
These are fun, but don’t travel well, so assemble shortly before serving.
Ingredients
  • For the Cakes
  • 175g (1¼ cups) gluten-free cake flour (143g high-quality all-purpose gluten-free flour + 4 tablespoons (32g) cornstarch)*
  • ½ teaspoon xanthan gum (omit if your blend already contains it)
  • ½ teaspoon baking powder
  • ¼ teaspoon baking soda
  • ¼ teaspoon kosher salt
  • 109 grams (½ cup) packed light brown sugar
  • 28 grams (2 tablespoons) unsalted butter, melted and cooled
  • 24 grams (2 tablespoons) vegetable shortening, melted and cooled
  • 1 extra-large egg at room temperature, beaten
  • 1 teaspoon vanilla bean paste (or replace with equal volume pure vanilla extract)
  • ½ cup + 2 tablespoons buttermilk
  • For the pastry cream
  • 30 grams (1/4 cup) cornstarch
  • 150 grams (3/4 cup) sugar, divided
  • 2 cups milk (I don’t drink milk, so I almost always use almond milk) , divided
  • 4 egg yolks
  • 1 teaspoon vanilla bean paste
  • 2 tablespoons butter
  • pinch of salt
  • Chocolate Glaze
  • 130 grams (4.5 ounces) bittersweet chocolate, roughly chopped
  • 60 grams (4 tablespoons) butter
  • 1 tablespoon corn syrup
Instructions
  1. Preheat your oven to 325 degrees F and grease a mini whoopie pie pan.
  2. In a large bowl, place the flour, xanthan gum, baking powder, baking soda and salt and whisk to combine well.
  3. Whisk in the brown sugar, making sure you remove any lumps.
  4. Next, mix in the butter, shortening, egg and vanilla and make sure everything is well combined.
  5. Now, add the milk and vinegar, and mix again to combine well. You will have a batter that is somewhere between cake batter and cookie dough in consistency.
  6. Using a small scoop or you can pipe about as much as a large marble to each well of your whoopie pie pan.
  7. Bake on a center rack for 8-10 minutes, or until the cakes bounce back when pressed gently in the center. Remove from the oven and allow to cool in the pan for 10 minutes before transferring to a wire rack to cool completely. Repeat with the remaining batter.
Make the pastry cream
  1. Prepare an ice bath.
  2. In a small mixing bowl, combine ¼ cup sugar, egg yolks and the creamer (or ½ cup milk).
  3. In a medium sauce pan over medium heat, bring the remaining 1½ cups milk to a boil, stirring constantly.
  4. Remove from heat and add the hot milk to the egg mixture about a third at a time to temper the eggs. If you do this too fast you will end up with scrambled egg yolks and not a smooth cream.
  5. Return the pot to the stove and add the egg mixture. Over medium heat, keep whisking until the cream thickens and when you scrape the bottom of a pot, the cream does not close the gap immediately. Stir in the vanilla, salt and butter.
  6. Put the pot over your ice bath and stir every 5-10 mintues for about half an hour, or until the cream has cooled.
Make the glaze
  1. When you are ready to assemble the mini boston cream pies, melt together the chocolate, butter and corn syrup over low heat. If the mixture is not pourable, add an extra tablespoon of butter.
Assemble the cakes
  1. Pipe the pastry cream onto half of the cake pieces. Take one of the other cake pieces and top each one. Pour or spread chocolate glaze on each mini Boston cream pie.
Notes
*I use Cup4Cup Gluten-Free All-Purpose flour, and if you don’t have cornstarch, you can use it for the full amount called for here, the cakes will just be a little denser. This recipe will work with almost any GF AP Blend but it will not work with bean-flour based blends or baking mixes that contain baking powder or baking soda.
3.2.2124


gluten-free peanut butter chocolate cupcakes from frannycakes

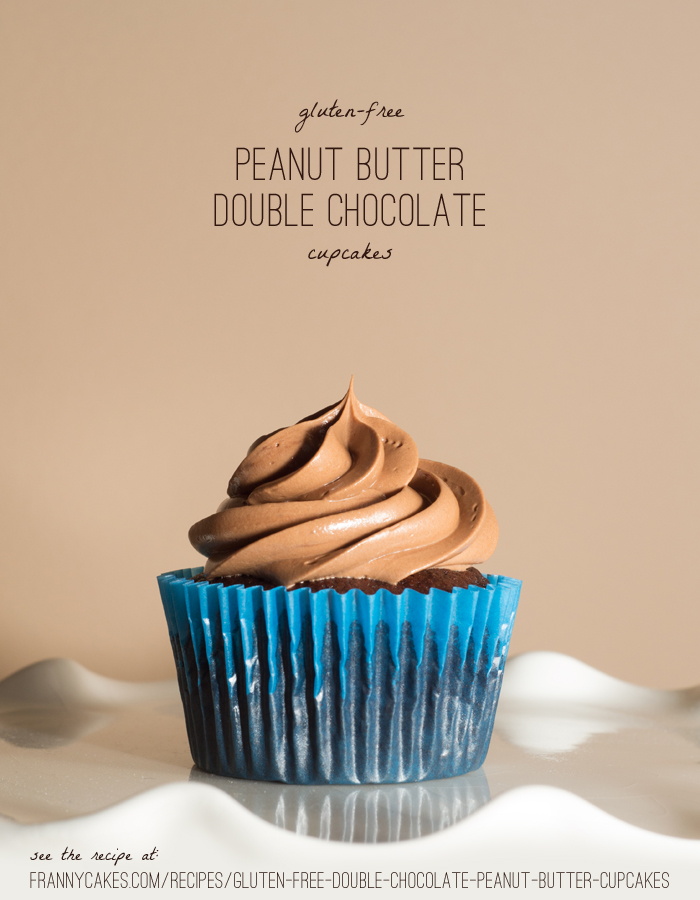
Gluten-free Double Chocolate Peanut Butter Cupcakes

Just for one moment imagine you have met someone incredibly interesting. And that someone happens to be handsome. Fairly funny. A giant nerd who loves sic-fi and web related nerdery. He wears google glass and loves open-source software. Now imagine he can recite Shakespeare and quoted the first sentence of Pride & Prejudice when you were discussing your favorite books.

Don’t forget to imagine him as charming. The sort of charming that disarms you. Makes you want to hang on his every word. He tells you stories about a past filled with the types of risks you wish you took.

Oh, and then he kisses you. A real foot-popping kiss. An earnest, sweet kiss. The kind you both want to call all your girlfriends to discuss but want to keep it to yourself just a little bit longer.

Yes, imagine all that (although, if you would rather a surfer dude with a love of detective novels, feel free to replace my dream dude for yours in this little fantasy).

gluten-free double chocolate cupcakes from frannycakes

But as a cupcake. (Yes, I totally went there. And, no, I am not ashamed).

It is no secret that I have a life-long love affair with baked goods, so it should come as no surprise that I might have fallen in love with these particular cakes. Because unlike the boy, there is something real to the relationship. There is more than boyish charm and nerdy good looks. There is cake.

gluten-free peanut butter chocolate cupcakes from frannycakes

More precisely, there is moist chocolate cake, velvety chocolate buttercream, surprise peanut butter centers. This is a serious cupcake. Appropriate for any situation in which a cupcake needs to love you back. Like the time when the aforementioned boy decides you are not the girl of his dream, you know it’s ok because you have this cupcake.

A magic gluten-free cupcake that loves you.

gluten-free double chocolate peanut butter cupcakes from frannycakes

Gluten-free Double Chocolate Peanut Butter Cupcakes
Author: Mary Fran Wiley
Prep time: 1 hour
Cook time: 25 mins
Total time: 1 hour 25 mins
Serves: 30
This is a recipe for winning at life or at least for winning at dessert (or a bake sale or office party).
Ingredients
  • For the cupcakes
  • 63 grams (1/2 cup + 3 tablespoons) cocoa
  • 1 cup boiling water
  • 3 large eggs
  • 1 tablespoon vanilla
  • 235 grams (2¼ cups plus 2 tablespoons) GF AP flour*
  • 1 teasponn xanthan gum**
  • 300 grams (1½ cups) granulated sugar
  • 15 grams (1 tablespoon) baking powder
  • 5 grams (3/4 teaspoon) salt
  • 227 grams (2 sticks) butter, softened.
  • Filling
  • 170 grams (1 1/2 cups) confectioners’ sugar
  • 135 grams (1/2 cup) creamy peanut butter
  • 26 grams (2 tablespoons) butter, at room temperature
  • 1/2 teaspoon vanilla extract
  • For the Frosting
  • 8 large egg whites (30g each–total 225g, or 1 cup)
  • 400 grams (2 cups) granulated sugar
  • 560 grams (5 sticks) of unsalted butter, softened but cool, cut into cubes
  • 30 ml (2 tablespoons) pure vanilla extract
  • ¼ tsp salt
  • 400 grams (about 2 cups of discs) high quality chocolate
  • 1 teaspoon vanilla extract
Instructions
Bake the cupcakes
  1. Preheat the oven to 350 degrees Fahrenheit. Prepare the cupcake tins with papers & grease the tops.
  2. In a medium bowl, whisk together the boiling water and cocoa til smooth. Let sit for a couple minutes to come to room temperature.
  3. In a second bowl, lightly beat together the eggs, ¼ of the cocoa mixture and the vanilla.
  4. In the bowl of a stand mixer, combine the flour, sugar, baking powder and salt and stir on low to combine.
  5. Add butter and the remaining cocoa mixture and mix on low speed until all ingredients are moistened. Increase speed to medium for a minute and a half to develop structure.
  6. Scrape down the sides of the bowl and add the cocoa & egg mixture in 3 batches, beating for about 30 seconds after each addition.
  7. Use a scoop and fill the tins ½-2/3 full. You should end up with exactly 30 cupcakes.
  8. Bake for 20-25 minutes. If you are baking with multiple pans in the oven at once, rotate them halfway into baking.
  9. The cake should spring back when lightly pressed, or a toothpick inserted into the center should come out clean.
  10. Cool in the pans for about 5 minutes, and then move to a cooling rack until completely cool.
Make the filling
  1. While the cupcakes are baking, make the filling.
  2. In the bowl of an electric mixer fitted with the paddle attachment, or using a handheld mixer, beat together the sugar, peanut butter, butter, and vanilla at medium speed. The dough should end up slightly crumbly.
  3. Roll the dough into 30 balls, about 1 teaspoon each. Set aside.
For the frosting
  1. While the cakes cool, make the frosting.
  2. Combine the egg whites and sugar in a small pot until they reach 140 degrees fahrenheit.
  3. Transfer to a clean stand mixer bowl. Using the whisk attachment, beat until light and fluffy (soft peaks).
  4. Switch to the paddle attachment and add the butter one chunk at a time until it is all combined.
  5. Melt the chocolate in the microwave on half power, heating it first for 30 seconds, and then in 15 second intervals after that, always stirring after each burst of heat. Once melted, let the chocolate cool so that it is still melted but just warm, not hot – you don’t want it hot so that it melts the butter, and then add it to your frosting, beating and scraping down the sides so you have a velvety and evenly mixed buttercream.
Assemble the cakes
  1. Remove the centers from the cupcakes using a cupcake corer, melon baller or pairing knife.
  2. Place one peanut butter ball in each cake. Top with the tops of the centers so there is cake on top of the peanut butter. You just want the top 1/4 inch or so of the removed center.
  3. Pipe a generous swirl of buttercream on each cupcake.
Notes
*I test all recipes using Cup4Cup Gluten-Free All-Purpose flour and it is by far my favorite. If you cannot find it where you live, Jules Nearly Normal flour is a close second. [br]**Omit if your blend contains xanthan gum, guar gum or expandex.
3.2.2124


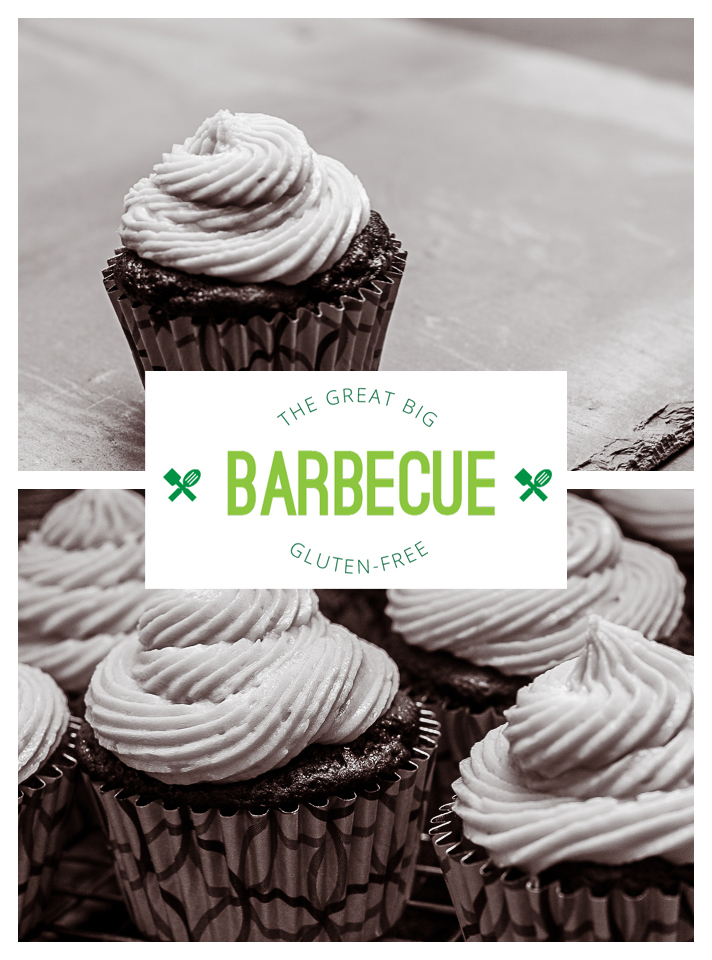
gluten free chocolate cupcakes with vanilla buttercream for the Great big Gluten Free Barbecue

Great Big Gluten-Free Barbecue

I love summer, and all it entails. Festivals. Evening concerts with friends. Barbecues every weekend.

I really love a good barbecue. The friends, the food, maybe a cold gluten-free beer or a margarita.

gluten free chocolate cupcakes with vanilla buttercream for the Great big Gluten Free Barbecue

But the part I love the most? That they are special even when they are last minute. They can be fancy affairs with sandals and dresses. They can be celebrations for just making it through the week. Or they can be celebrations of great love.

vow renewal

Just last week I invited the whole dang family over to celebrate my parents and godparents 35th wedding anniversary. And we had a barbecue. Complete with potato salad, jicama salad and a grape salad. There was meat on the grill and several types of sangria. The whole thing was gluten-free. And it was a dang good cookout. People were just there, celebrating and relaxing. Being family and enjoying some good food.

I want everyone to be able to have a cookout like that, for any occasion.

So, I gathered some blogger friends and planned a virtual barbecue.

There are main dishes, desserts and even some sangria. I brought some gluten-free vanilla on chocolate cupcakes. My friends brought the rest, and we wanted to invite you to the party.

Thanks for dropping in!

greatbigglutenfreebarbecue

Pam from I’m A Celiac made Slow Cooker Pork BBQ
Taylor from Gluten-Away made Gluten-Free BBQ Burgers
Cindy from Vegetarian Mamma made Eggy Potato Salad
Cara from Cara’s Cravings made Fudgesicles (recipe review from the Great Vegan Bean Book)
Betsy from Gluten Free Betsy made Old School Potato Salad
Melissa from Stockpiling Moms made GF Strawberry Pretzel Salad
Alissa from Breaking Up with Captain Crunch made GF Pasta Salad  and DIY Sorta Sangria
Iris from The Daily Dietribe made Coleslaw
Alison from A Girl Defloured made Strawberry Basil Paletas
Mel from GeekilyGF made Peanut Butter Ice Cream Sandwiches
Erica from Celiac and the Beast dishes barbecue survival advice with Don’t Burn Bridges Or The Burger: Gluten Free BBQ

gluten free chocolate cupcakes with vanilla buttercream

Gluten-Free Vanilla on Chocolate Cupcakes
Recipe Type: Dessert
Author: Mary Fran Wiley
Prep time: 45 mins
Cook time: 25 mins
Total time: 1 hour 10 mins
Serves: 24
The cake recipe is adapted from The Cake Bible – a book every baker should own.
Ingredients
  • For the cupcakes
  • 85 grams (3/4 cup + 3 tablespoons) unsweetened cocoa
  • 1 1/2 cups (354 mL) boiling water
  • 3 large eggs
  • 1 1/2 teaspoons vanilla extract
  • 300 grams (2 cups + 1T) gluten-free all purpose flour*
  • 1/2 teaspoon xantham gum**
  • 434 grams (2 cups firmly packed) light brown sugar
  • 11 grams (2 1/4 teaspoons) baking powder
  • 4 grams (3/4 teaspoon) baking soda
  • 5 grams (1/4 teaspoon) salt
  • 237 grams (2 sticks) butter, softened
  • For the Frosting
  • 2 sticks (225 grams) butter, softened
  • 675-900 grams (6-8 cups) confectioner’s sugar
  • 2 teaspoons vanilla extract or 1 tablespoon vanilla bean paste
  • 1/2 cup (118 mls) milk
  • pinch of salt
  • food coloring
Instructions
  1. Whisk together the boiling water and cocoa until smooth. Cool to room temperature.
  2. Preheat oven to 350 degrees Fahrenheit.
  3. In a medium bowl, whisk together the eggs, the vanilla and 1/4 of the cocoa mixture.
  4. In the bowl of a stand mixer, combine all the dry ingredients and mix for 30 seconds – just long enough to create a uniform mixture.
  5. Add the butter and remaining cocoa mixture to the dry ingredients. Mix on low until the dry goods are moistened. Increase the speed to medium and beat for 1 1/2 minutes. Scrape down the sides.
  6. Add the egg mixture in 3 parts, mixing for 30 seconds on medium after each addition and scraping down the sides.
  7. Fill the cupcake tins 2/3 full and bake for 15-20 minutes. Cakes are done when they bounce back after being tapped gently with a finger or a tester comes out clean.
  8. In the bowl of a stand mixer combine the butter, 450 grams (4 cups) of the sugar, the milk and the vanilla.
  9. Beat on medium for 3-5 minutes.
  10. Gradually add the remaining sugar 1 cup (115 grams) at a time, beating for 2 minutes after each addition.
  11. When the frosting is firm enough to pipe, stop adding sugar and add the salt and color. If the frosting is not pipable with all the sugar, put it in the fridge for 10 minutes – it means your butter was a little too soft.
  12. Pipe a generous amount of frosting on each cupcake when they are completely cool.
Notes
*This recipe was tested using Cup4Cup Gluten-Free all purpose flour, but will work with your preferred blend as long as you measure by weight. **Omit if using a blend that already includes xantham gum.
3.2.2310


Snack it to me: Cherry Cordial Snack Mix

This post is part of Snack It To Me Week– a week full of recipes for my favorite snack mixes. The posts are: Fairy Berry Gluten-Free Trail MixSour Patched Gluten-Free Trail MixCherry Cordial Gluten-Free Snack Mix, Mango Lassi Trail Mix, Apricocious Trail Mix, Raisinably Delicious Snack Mix, Happy Endings Trail Mix, My go-to prepared snacks.

Chocolate should be a food group. And, in my professional opinion, it should be the base of the pyramid.

I mean, it is full of anti-oxidants and theobromine. It has been purported to do everything from boost your mood to decrease your appetite. Small studies have found that it is good for your heart, your skin and for diabetes prevention.

I even read that it can help make you smarter.

That is a whole heck of a lot of promises for any food to deliver on.

And to think something healthy was lurking in my love of desserts.

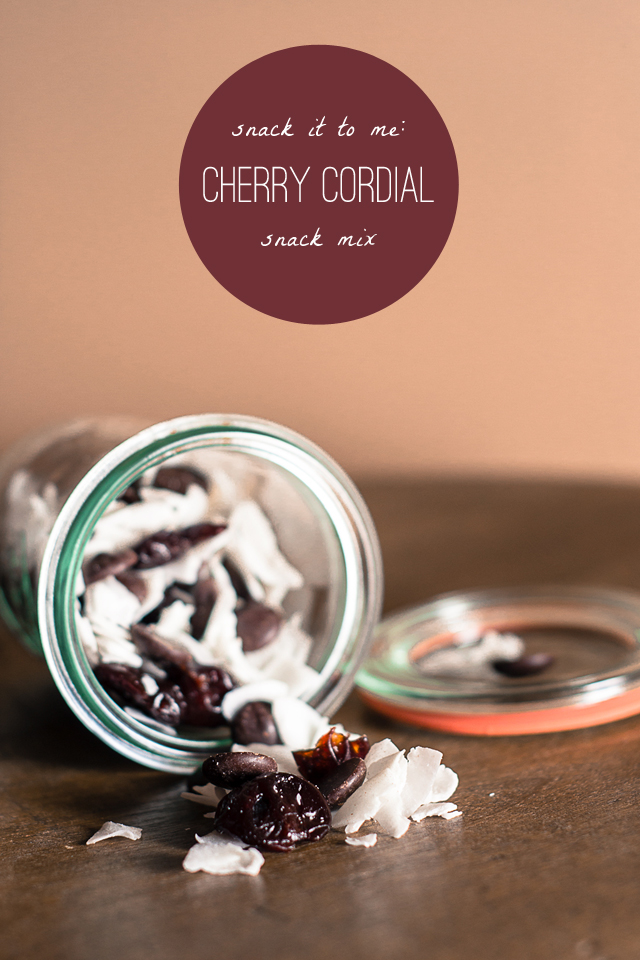
I am pairing it with dried cherries and coconut flakes today for a gluten-free trail mix that is a great sweet treat for the 3pm blues. Or the 10am blues. Or a last minute conference call. We can call this an all-occasion snack. But only if you don’t skip the chocolate.

cherrycordial

Snack it to me: Cherry Cordial Snack Mix

Recipe Type: Snack
Author: Mary Fran Wiley
Prep time: 5 mins
Total time: 5 mins
Serves: 4
This recipe was inspired by one of my day’s favorite treats: chocolate covered cherries. Those intensely sweet sugar-asked cherries died bright red and dipped in chocolate.
Ingredients
  • 100 grams high-quality chocolate calets (they look like slightly larger, flatter chocolate chips) or your favorite brand of semi-sweet chocolate chips
  • 100 grams dried cherries
  • 50 grams unsweetened dried coconut flakes
Instructions
  1. Weigh out ingredients and stir to combine in a medium mixing bowl.
  2. Store in an air tight container at room temperature for up to one month.
3.2.1337


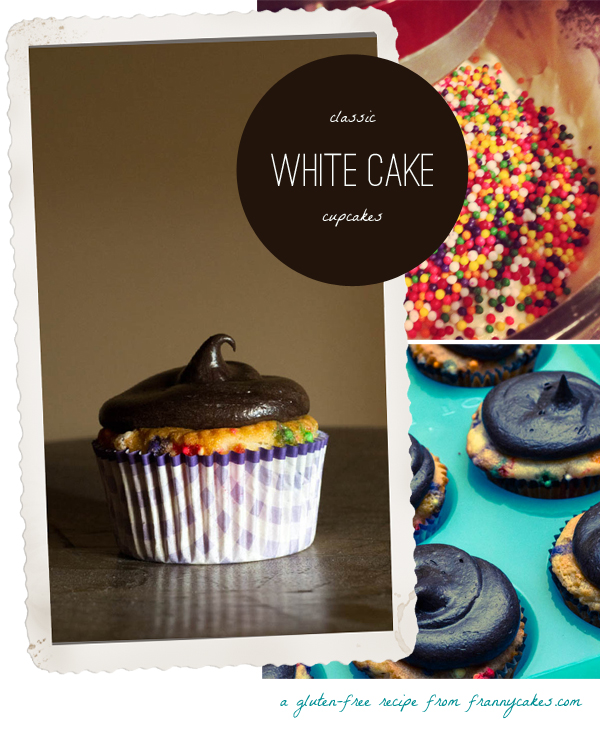
gluten free white cupcake recipe

A very happy birthday treat

gluten free white cupcake recipe

Let’s celebrate.

There are always excuses not to. Maybe there is no money. Maybe you are sad. Maybe you are sick. Maybe you are just grumpy & miserly and don’t ever want to have fun (it’s ok, sometimes even I feel that way).

I have as many reasons as the next guy to not want to celebrate. I can’t find the strength to get to the gym. Real pants make me want to cry. An ill-timed night out with friends can ruin my life for a month. But those are the absolute wrong things to focus on. They can give you grey hair before your time. And we all know that would just lead to more fretting.

And you know, girls just wanna have fun.

So really, let’s celebrate.

Have a party. I mean, heck, it was a birthday after all.

We can throw a little party with a few dozen cupcakes.

Cupcakes with chocolate frosting.

And maybe a few sprinkles thrown in the batter for good measure.

And maybe some balloons. Balloons are good for a birthday.

Happy 32nd birthday Kurt!
Balloons are always appropriate

It is good to celebrate.

And don’t forget to smile, it’ll do you good. And maybe eat a cupcake. Because cupcakes are theraputic.


Gluten Free White Cupcakes

Recipe Type: Dessert
Cuisine: American
Author: Mary Fran Wiley
Prep time: 20 mins
Cook time: 50 mins
Total time: 1 hour 10 mins
Serves: 48
My favorite white cake recipe made into cupcakes with a simple chocolate frosting. Add GF sprinkles to the batter for a “funfetti” feel. This is adapted from the Cake Bible’s White Velvet Cake recipe. This recipe makes 48 cupcakes, a 4-layer 8″ cake or a 3 layer 9″ cake.
Ingredients
  • 1 1/2 cups (360 ml) milk at room temperature
  • 7 large (210 grams) egg whites (pasteurized are fine), at room temperature
  • 1 large egg, at room temperature
  • 1 1/2 tablespoons vanilla extract
  • 460 grams ( 3 1/4 cups) gluten free all purpose flour*
  • 2 teaspoons xantham gum**
  • 450 grams (2 1/4 cups) granulated sugar
  • 7 grams (1 teaspoon) salt
  • 1 1/2 sticks (170 grams) butter, at room temperature and cut into cubes
  • 85 grams (6 tablespoons) vegetable shortening
  • 1 cup gluten-free sprinkles (optional)
  • 1 Recipe Easy Chocolate Frosting (below)
Instructions
  1. Preheat oven to 350°F. Line 2 cupcake tins with papers (if you have 4, by all means line them all), grease the tops of the pans and set aside.
  2. In a small bowl, mix together 1/2 cup of the mil, the egg whites, egg and vanilla extract.
  3. In the bowl of a stand mixer fit with the paddle attachment, combine the dry ingredients including the sugar on low speed for 30 seconds.
  4. Add butter & shortening and mix on low speed for 30 seconds. Add the remaining milk and stir untill just moistened. Increase the speed to medium and mix for a minute and a half.
  5. Scrape down the sides of the bowl and add the egg/milk/extract mixture in 3 groups, scraping down the sides before each addition.
  6. Using a large ice cream scoop, divide the batter evenly among the cupcake papers, making sure that none of them are more than 2/3 full (or you could have a little bit of a mess).
  7. Bake 2 trays at a time for 20-25 minutes, until a toothpick inserted into the center comes out clean.
Notes

*I use Cup4Cup gluten free flour in my kitchen, and it is my favorite, but I have also had good experiences with the following: Jules Nearly Normal Flour, Better Batter All-Purpose flour or King Arthur Flour’s Gluten Free All Purpose Blend.

**If your blend has xantham gum or expandex in it, you can omit this.

3.1.09
Easy Chocolate Frosting

Recipe Type: Dessert
Cuisine: American
Author: Mary Fran Wiley
Prep time: 20 mins
Cook time: 10 mins
Total time: 30 mins
An easy chocolate frosting that you can adapt to be as firm or as soft as you like.
Ingredients
  • 340 grams (1 1/2 cups) powdered sugar
  • 150 grams (1 3/4 cups) cocoa (I used Hershey’s Special Dark Cocoa, the dark helps cut the sweetness a little bit)
  • 1 cup milk or cream
  • 225 grams (1 cup or 2 sticks) butter
  • 565 grams (2 1/2 cups) powdered sugar
  • 2 teaspoons vanilla extract
Instructions
  1. In a large bowl, whisk together the first amount of powdered sugar and the cocoa.
  2. Bring the cream to a simmer in a small saucepan. Stirring constantly so the milk does not scald. Whisk this into the powdered sugar mixture. Let cool to room temperature, about 20 mins.
  3. Beat soft butter, vanilla extract and salt until creamy. Add the 2½ cups of powdered sugar and mix slowly until incorporated. With mixer on low, add the chocolate mixture a spoonful at a time.
  4. If the frosting is too loose, add up to an additional half cup of powdered sugar.
  5. This makes enough to frost a layer cake or put a good amount on 48 cupcakes (see photo for how much I used per cupcake)
3.1.09

Spice up your life! (A recipe for gluten-free spiced brownies)

It is really easy to get stuck in a routine.

Wake up. Get coffee. Get on the train. Read 30 pages in a novel. Walk a few blocks. Finish coffee. Get to the office. Pour another cup of coffee. Answer emails. Do design-y stuff. Walk a few blocks. Get on the train. Catch up on twitter. Go home. Eat dinner. Do blog-y stuff. Go to bed.

Lather, rinse, repeat.

Routine is comfortable, familiar. Known.

I have to say, I like my little routine. I read 9 novels this summer and I only read while on the train. Ok, I might have developed an unhealthy dependence on coffee. (Blame Mammacakes. I started sneaking sips of her coffee when I was 4 and she would leave a mug on the table). But the routine is mine.

But it is just that. A routine. Like a treadmill (the world’s most torturous piece of gym equipment).

Sometimes, you just have to do this:

(Yes. Really. A Spice Girls video.)

Maybe that means ordering a latte when you normally order a chai.

Maybe that means just going for it , whatever it happens to be. A new job. A date . A new cooking technique. Ordering something other than the usual.

A good friend told me that I need to just take a day and go for it. Do something I normally wouldn’t. Have fun just because I can. Shake things up to see where the pieces fall. Not a calculated risk. No weighing pros and cons. Just making things happen.

So, here’s to spicing things up.

Let’s start by spicing up some chocolate decadance.

gluten free mexican spiced brownies

At my super fabulous day job (yes, I am going to keep rubbing in how much I love it), we do fun things. Like brewing (gluten-free) beer and taco potlucks.

Last week, we had one of those potlucks. And I forgot to sign up. Because, really, would you expect me to bring anything other than dessert?

A concerned coworker asked if I was going to participate. Of course I was going to. I asked him what he wanted. His answer? Mexican Spiced Brownies.

It was the perfect excuse to make a new variation on one of my favorite treats (I even have my go-to gluten-free brownie recipe memorized) .

Fudgy bits of chocolate heaven, with a kick. They were such a hit at the potluck, all I got was that little corner of a brownie. I blame [my coworker] Shellie. (She swears that ice cream eaten with the brownies makes them even better).

gluten free mexican spice brownies being eaten

Gluten-Free Mexican Spiced Brownies
#ratingval# from #reviews# reviews
Print
Recipe Type: Dessert
Author: Mary Fran Wiley
Prep time: 15 mins
Cook time: 35 mins
Total time: 50 mins
Serves: 16
Oh baby. Decadent, fudgy brownies with a kick. Please and thank you.
Ingredients
  • 310 grams (11 ounces) dark chocolate, chopped
  • 230 grams (8 ounces/ 2 sticks) butter, chopped in 1 inch cubes
  • 1 tablespoon vanilla extract
  • 1 teaspoon salt
  • 10 grams (2 tablespoons) cocoa powder
  • 300 grams (1 1/2 cups) granulated sugar
  • 110 grams (1/2 cup) firmly packed brown sugar
  • 5 eggs
  • 150 grams (1 1/4 cups) gluten-free all-purpose flour like Cup4Cup*
  • 1/2 teaspoon chipotle
  • 1/2 teaspoon paprika (spicy if you have it)
  • 1 teaspoon cinnamon
  • 5 grams (1/2 teaspoon) fresh, finely grated ginger
Instructions
  1. Pre-heat the oven to 350 degrees Fahrenheit. Grease and line a 9×13 pan with parchment paper.
  2. In a medium pot over low heat, melt the butter and chocolate and salt.
  3. Once melted, remove the pot from the stove and stir in the vanilla, cocoa powder and sugars.
  4. In a sperate bowl, whisk together the gluten-free flour, cinnamon, ginger, chipotle and paprika.
  5. Add the eggs to the melted chocolate mixture in 2 groups, stirring to incorporate. As soon as the eggs are mixed in, add the flour in 2 groups.
  6. Be careful not to over-mix the batter. You want to incorporate as little air as possible into the batter or else you will end up with a brownie that is less chewy and more cake like.
  7. Pour the batter into the prepared pan and bake for 35-40 minutes. They are better a little under done than to be over cooked.
Notes

I use Cup4Cup flour or Jules’ Nearly Normal Flour when I use all-purpose flour. If you want to make your own bend for this recipe, use 10 grams ground flax meal, 40 grams sorghum flour, 20 grams brown rice flour, 20 grams white rice flour, 30 grams tapioca starch, 30 grams sweet white rice flour

2.2.8

This post is linked to: Slightly Indulgent Tuesday


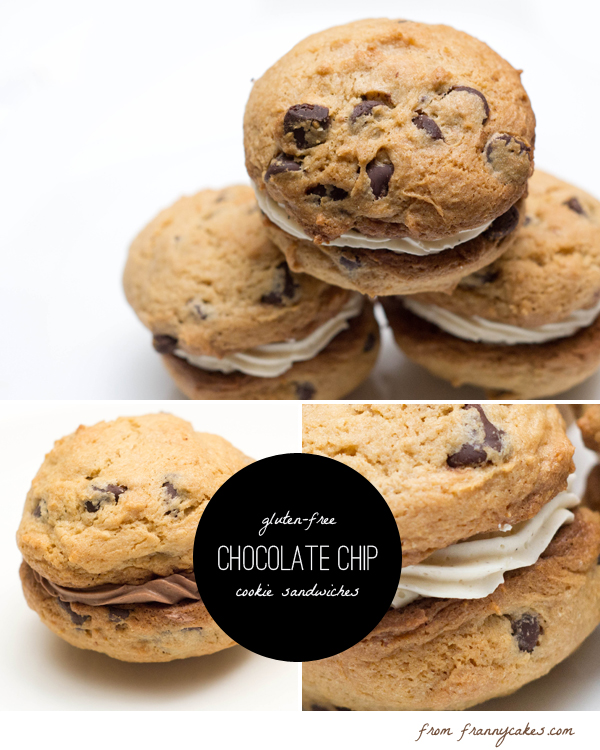
gluten free chocolate chip cookie sandwiches

Birthdays deserve special treats

gluten free chocolate chip cookie sandwiches

Birthdays really do deserve special treats.

Not boring, normal things.

Not something that you make to cheer yourself up when you are feeling blue. (Don’t tell me you never baked to make yourself feel better).

Birthdays deserve a little extra something.

A chocolate chip cookie might be a classic, but it is not what birthdays are made of.

It was almost a challenge. I promised my friend Matt a treat for his birthday. But it couldn’t be a normal treat, he already has had gluten-free birthday cake doughnuts and a red velvet cake.

But, he asked for chocolate chip cookies.

I couldn’t just bake cookies. That is too simple. Too easy. Not a big enough challenge. Not enough opportunity to impress people with ma skillz. (No, that is not a typo. I am trying to be cool. How is it working?)

more cookie sandwiches

Cookie sandwiches on the other hand are a much more exciting treat. Almost like an ice cream sandwich that doesn’t melt. Brilliant for when you have to commute with these bad boys to the city.

These were quite the hit with Matt & his coworkers. (And the extras were a hit with mine). So next time you need to impress someone who asks for just a chocolate chip cookie, this could be your answer.

Birthdays deserve special treats
#ratingval# from #reviews# reviews
Print
Recipe Type: Dessert
Author: Mary Fran Wiley
Prep time: 60 mins
Cook time: 45 mins
Total time: 1 hour 45 mins
Serves: 24
What is better than chocolate chip cookies? Chocolate chip sandwich cookies. Like an ice cream sandwich that doesn’t melt. It is brilliant. They do take a couple hours from start to finish, but you can make the frosting while the cookies bake – as long as you let the cookies cool completely before piping on the frosting.
Ingredients
  • 1 recipe [url href=”http://frannycakes.com/recipes/gluten-free-chocolate-chip-cookies-a-classic-treat/”]Gluten-Free Chocolate Chip Cookies[/url] using tablespoon sized scoops
  • 4 large egg whites (30g each–total 120g, or 1/2 cup)*
  • 200 grams (1 cups) granulated sugar
  • 280 grams (2.5 sticks) of unsalted butter, softened but cool, cut into cubes
  • 15 ml (1 tablespoon) pure vanilla extract
  • 1/4 tsp salt
  • 150 grams (about 3/4 cups of discs) high quality chocolate
  • 1 1/2 teaspoon vanilla bean paste
Instructions
  1. Bake the cookies, using tablespoon sized drops of cookie dough.
  2. While the cupcakes are baking, make the frosting. If this process intimidates you, Sweet Apolita made a pretty sweet tutorial.
  3. Combine the egg whites and sugar in a small pot until they reach 140 degrees fahrenheit.
  4. Transfer to a clean stand mixer bowl. Using the whisk attachment, beat until light and fluffy (soft peaks).
  5. Switch to the paddle attachment and add the butter one chunk at a time until it is all combined.
  6. Remove half of the frosting and set aside. Melt the chocolate in the micorwave on half power, heating it first for 30 seconds, and then in 15 second intervals after that, always stirring after each burst of heat. Let the chocolate cool a wee bit – you don’t want it hot so that it melts the butter, and then add it to half your frosting.
  7. Set this frosting aside. Add the vanilla bean paste to the reserved half of the frosting.
  8. When the cookies are completely cool, pipe frosting onto half of the cookies, topping with a similarly shaped partner cookie.
2.2.8


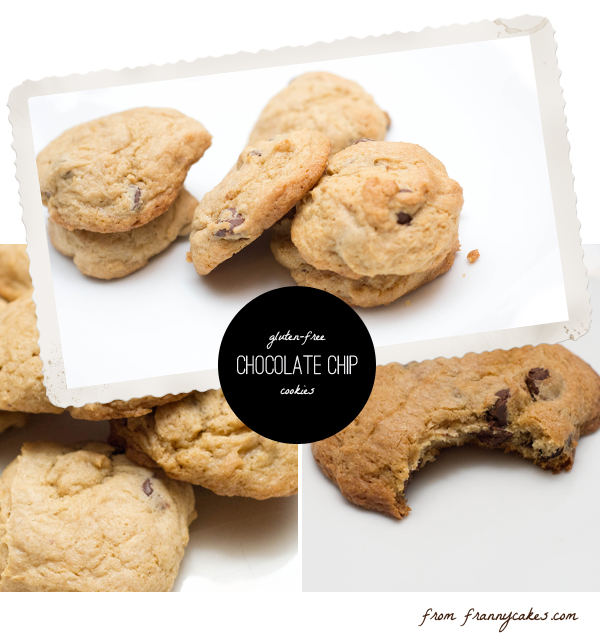
gluten free chocolate chip cookies

Gluten-free chocolate chip cookies, a classic treat

gluten free chocolate chip cookiesLittle black dresses. Peep-toe pumps. Red lipstick. Cucumber sandwiches. Sunday Roasts. French vanilla anything. Chocolate chip cookies.

I am a fan of classic things.

I have a go-to red lipstick. A perfect pair of pumps. Almost all of my dresses are little black dresses. I know how to swing dance and salsa. I can waltz and cha cha. (I cannot for the life of me do the Cha Cha slide.) I still wear Chanel No. 5 whenever I put on a suit.

When I need cheering up? Breakfast at Tiffany’s. Some Celine Dion. (Ok, fine, and maybe some 90’s pop)

Classics endure.

Like brownies, Sunday roasts and chocolate chip cookies. All things that are always a good choice.

Yes, there happen to be 2 other recipes for gluten-free chocolate chip cookies on frannycakes (one a birthday cake cookie with chocolate chips, the other a toffee chocolate-chip cookie), but neither of them is just a classic chocolate chip cookie.

Gluten-free chocolate chip cookies, a classic treat
#ratingval# from #reviews# reviews
Print
Recipe Type: Cookie
Author: Mary Fran Wiley
Prep time: 20 mins
Cook time: 15 mins
Total time: 35 mins
Serves: 36
Ingredients
  • 350 (2 1/2 cups) grams gluten-free all purpose flour*
  • 1 teaspoon xantham gum**
  • 1 teaspoon baking soda
  • 1/4 teaspoon salt
  • 215 grams (1 cup, firmly packed) dark brown sugar
  • 50 grams (1/4 cup) granulated sugar
  • 225 grams (2 sticks or 1 cup) cold butter, cut into cubes
  • 2 large eggs
  • 1 tablespoon vanilla extract
  • 350 grams (2 cups) semi-sweet chocolate chips
Instructions
  1. Prepare cookie sheets with parchment paper, but do not grease them.
  2. In a medium bowl whisk together the gluten-free flour, xantham gum if using, baking soda, and salt.
  3. In the bowl of a stand mixer, blend the sugars at medium speed.
  4. Add the cold butter and mix to form a grainy paste, scraping down the sides of the bowl. You are not looking for light and fluffy, you just want to mix until they are evenly combined.
  5. Add eggs and vanilla extract and mix at medium speed just until blended. Scrape down the sides of the bowl and do not over mix.
  6. Add the flour mix in 2 parts with the mixer at a low speed just until mixed. Then stir in the chocolate chips until just combined
  7. Drop by rounded tablespoons onto prepared cookie sheet, two inches apart.
  8. Place the cookie sheet in the freezer while the oven preheats.
  9. Preheat oven to 375° F. (Or 300° F. for a flatter, more spread out cookie).
  10. Bake 12-15 (20-22 for the cooler temperature) minutes until golden. Transfer cookies immediately to a wire rack to cool.
Notes

*This recipe works best with Cup4Cup flour from Williams-Sonoma. It will work with other blends that are not bean-based and do not have leaveners already added. Better Batter or Jules Nearly Normal Flour will work well here. You could also use your favorite home made blend.
**Xantham gum is only necessary if your blend does not include a binding agent such as xantham gum, guar gum or expandex.

2.2.8


wednesday wisdom

Wednesday Wisdom: A better gluten-free chocolate cake

Here’s a tip to make your fabulous GF chocolate cake even better.  When you are greasing and flouring the pan to prevent your cake from sticking, substitute cocoa powder for your GF flour.  The cocoa will add a little more chocolate-y flavor, and the color will blend right in with your dark cake.  You won’t end up with little clumps of white or tan flour on top of your cake.  You can even take it one step further by dusting your finished cake with powdered sugar mixed with cocoa powder.  It’s an easy, but elegant, way to finish off a cake instead of using frosting.

gluten free raspberry filled chocolate cupcakes

Remarkable life. Whiz-bang cupcakes.

I’ve spent a lot of time doing what is expected.

Playing it safe.

Being nice.

I always thought that I was nice. And that I should be nice. I thought that it was exactly right. Recently, someone told me that they didnt think nice was the right word to describe me. Someone else said that I was better when I wasn’t being nice.

So.

I am going to not be nice. Since that isn’t the right word anyway. And since it is kind of a dirty word, let’s not use it any more.

Nice. Passionate. Caring. Full of heart. Those are better words.

They describe the person I am. The person I want to be. The journey I am on.

I am going to make mistakes. Say things I shouldn’t. Do things that I might think better of later.

I am going to keep listening to the silly pop music that makes me happy. I am owning my Spice Girls ringtone (oh yes, I totally rock that). So, call me. Maybe?

I am going to use my heart more than my head. I want to see where it is going to take me.
your feet will bring you to where your heart is... positive 13

I am going to stop and smell the flowers, particularly when they are left in the bathroom in a public place.

I want to do things. See things. Make things. Change things.

I am going to do as much as I can. Some things I should, some I shouldn’t.

I don’t want a small life. In any way. I want to be epic. (Kind of like my summer has been).

I am going to keep making cupcakes. The kind with real sugar, and butter and eggs. I’ve said it before, cupcakes are therapy. And don’t you forget it. And I am going to keep feeding them to others so that I can maintain my girlish figure.

Speaking of that girlish figure, I am going to keep swimming when I can. Walk when it is possible and not beat myself up over the size of my pants.

I am going to be silly and splurge on crazy shoes (YOLO!). Be it shoes with red bottoms because, frankly, if you don’t buy them today, tomorrow you will have a much more practical use for that money or shoes with 5″ heels because that seems sensible. I am going to make no apologies for getting something that makes me happy.

I am going to go on dates with boys. I might end up kissing a few frogs (the world tells me this is going to happen). Maybe I’ll get a prince (the world says I should dream about this moment). Maybe I already did. Maybe I messed that up. Maybe I didn’t.

Maybe one day, my hair will be pink. And maybe I’ll get a tattoo.

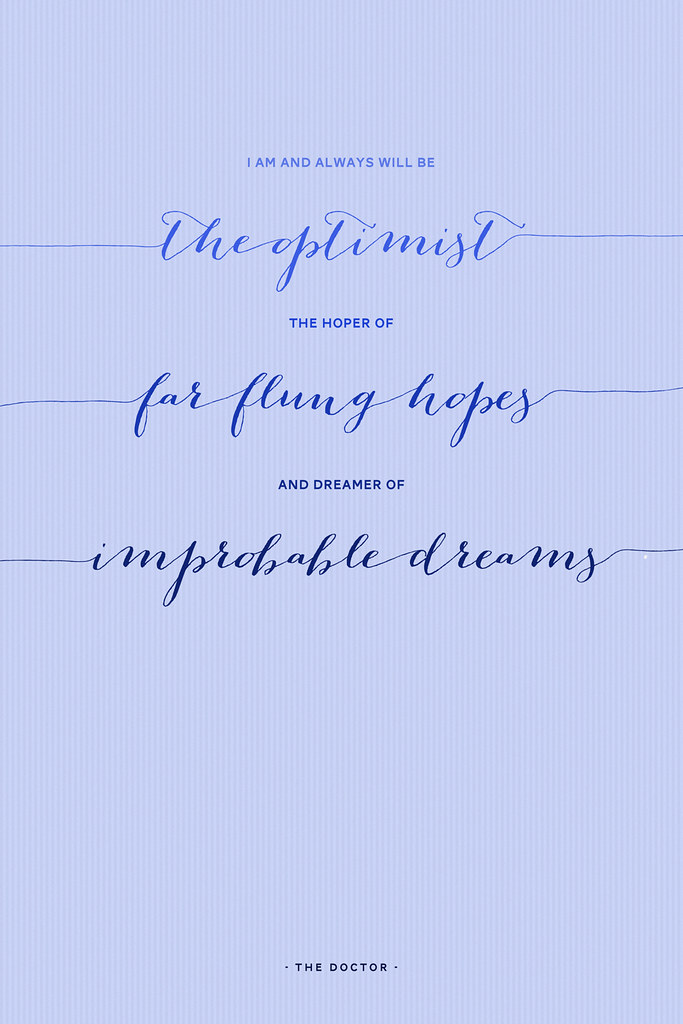
I am going to live. Live passionately & fully. Be optimistic. Be a dreamer. Make no apologies for anything. Be me.

I will always be the optimist. Positive #18

What I am most definitely not going to do is be nice. I am not going to apologize for being me. I am not going to do something just to make someone feel better. I am not going to cave or change just to make someone happy. I’ve done that plenty. It isn’t who I really am, or even who I want to be.

Here’s to being more than nice. Here’s to living more than just a nice life. Here’s to good things.

Before I get to the cupcakes I know you want, I want to make sure that you know about Leggings Solidarity Day! I am asking everyone I know to wear leggings, tights, shorts, skirts – (mostly leggings though!) in support of invisible illness awareness. (You know, since I have a kind of major one). Also, if you haven’t seen it, the quotes pulled in from above are from a personal design project of mine. Making posters with positive thoughts. If you have any suggestions for positive quotes, email them to me!

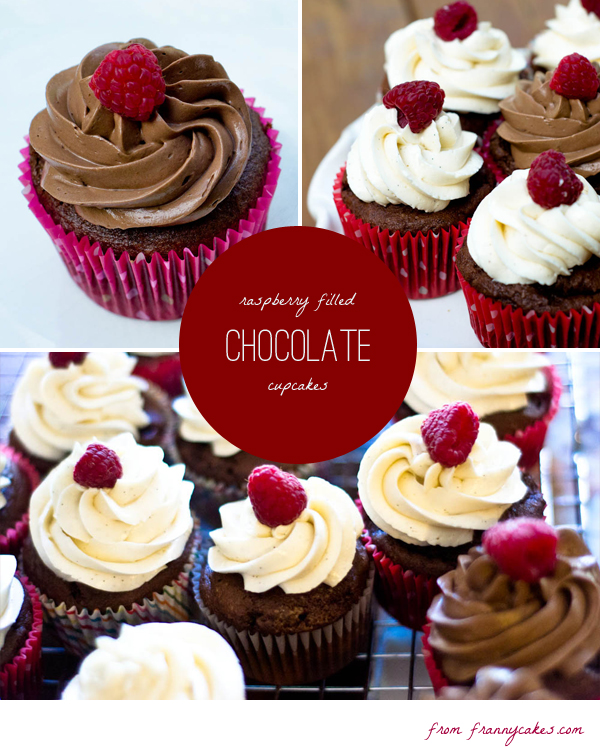
gluten free raspberry filled chocolate cupcakes

The Whiz-Bang Cupcakes

(Or cupcakes to make an impression). These cupcakes were epic. Well, that’s what I told Dan they were. He asked for something chocolate and fruity. They took about 6 hours from start to finish (with lots of resting, showering an cleaning mixed in). Dan has had both my cupcakes and Mammacakes’ cupcakes. I had to make them extra special.

Chocolate cupcakes. Filled with a tart raspberry jam. Topped with two kinds of merengue buttercream and finished off with a fresh raspberry. This is what I call winning.

Gluten-free chocolate cupcakes with raspberry and swiss merengue buttercream
#ratingval# from #reviews# reviews
Print
Recipe Type: Dessert
Author: Mary Fran Wiley
Prep time: 90 mins
Cook time: 20 mins
Total time: 1 hour 50 mins
Serves: 30
The cake part of the recipe is adapted from Perfect All-American Chocolate Butter Cake from The Cake Bible by Rose Levy Beranbaum.
Ingredients
  • For the cupcakes
  • 63 grams cocoa (1/2 cup + 3 tablespoons)
  • 1 cup boiling water
  • 3 large eggs
  • 1 tablespoon vanilla
  • 235 grams (2 1/4 cups plus 2 tablespoons) GF AP flour*
  • 300 grams (1 1/2 cups) granulated sugar
  • 15 grams (1 tablespoon) baking powder
  • 5 grams (3/4 teaspoon) salt
  • 227 grams (12 tablespoons) butter, softened.
  • For the Frosting
  • 8 large egg whites (30g each–total 225g, or 1 cup)**
  • 400 grams (2 cups) granulated sugar
  • 560 grams (5 sticks) of unsalted butter, softened but cool, cut into cubes
  • 30 ml (2 tablespoons) pure vanilla extract
  • 1/4 tsp salt
  • 300 grams (about 1 1/2 cups of discs) high quality chocolate
  • 1 tablespoon vanilla bean paste
  • For Assembly
  • 1/2 pint jar of raspberry jam or preserves
  • 30 fresh raspberries
Instructions
  1. Preheat the oven to 350 degrees Fahrenheit. Prepare the cupcake tins with papers & grease the tops.
  2. In a medium bowl, whisk together the boiling water and cocoa til smooth. Let sit for a couple minutes to come to room temperature.
  3. In a second bowl, lightly beat together the eggs, 1/4 of the cocoa mixture and the vanilla.
  4. In the bowl of a stand mixer, combine the flour, sugar, baking powder and salt and stir on low to combine.
  5. Add butter and the remaining cocoa mixture and mix on low speed until all ingredients are moistend. Increase speed to medium for a minute and a half to develop structure.
  6. Scrape down the sides of the bowl and add the cocoa & egg mixture in 3 batches, beating for about 30 seonds after each addition.
  7. Use a scoop and fill the tins 1/2-2/3 full. You should end up with exactly 30 cupcakes.
  8. Bake for 20-25 minutes. The cake should spring back when lightly pressed, or a toothpick inserted into the center should come out clean.
  9. Cool in the pans for about 5 minutes, and then move to a cooling rack until completely cool.
For the frosting
  1. While the cupcakes are baking, make the frosting. If this process intimidates you, Sweet Apolita made a pretty [url href=”http://sweetapolita.com/2011/04/swiss-meringue-buttercream-demystified/”]sweet tutorial[/url].
  2. Combine the egg whites and sugar in a small pot until they reach 140 degrees fahrenheit.
  3. Transfer to a clean stand mixer bowl. Using the whisk attachment, beat until light and fluffy (soft peaks).
  4. Switch to the paddle attachment and add the butter one chunk at a time until it is all combined.
  5. Remove half of the frosting and set aside. Melt the chocolate in the micorwave on half power, heating it first for 30 seconds, and then in 15 second intervals after that, always stirring after each burst of heat. Let the chocolate cool a wee bit – you don’t want it hot so that it melts the butter, and then add it to half your frosting.
  6. Set this frosting aside. Add the vanilla bean paste to the reserved half of the frosting.
Assemble
  1. When the cupcakes are cool, remove the cupcake centers (I used a cupcake corer), and pipe in the raspberry filling. Replace the cupcake tops.
  2. Pipe the frosting on the cupcakes – I did half of the cupcakes in chocolate, half in vanilla, but you can get creative and use both on each cupcake if you want.
Notes

*I prefer Cup4Cup as a pre-made blend. Please don’t use a bean based flour.
**You can use the pasteurized whites if you prefer, since you cook the eggs anyways, but it will be slightly less fluffy.

2.2.8

This post is linked to Slightly Indulgent Tuesday on Simply Sugar & Gluten Free.