Home » Food » Page 6

Category: Food

Food. Eaten. Made. Discussed. All gluten-free.

Perfectly Moist Gluten-Free Banana Bread

In case you missed the news in Relish, I am moving! I lined up a couple of guest posts to keep the content coming while I pack up, move and unpack it all again 🙂 Today’s post is from Willow of Will Cook for Friends.

Gluten Free Banana Bread from Willow at Will Cook for Friends on FrannyCakes

Hello everyone! Pleased to meet you – I’m Willow. I am so excited to be guest posting here in Mary Fran’s space, and sharing this delicious banana bread with you!

Now, I’ve eaten a lot of banana bread in my day. I mean, a lot. (Is it possible to have too much banana bread? I don’t think so.) One of my earliest childhood memories was sitting at the dining room table with my mother, eating slice after slice of warm banana bread with her. By the time everyone else in the house had figured it out, most of the loaf was gone. I’m like a banana bread magician – now you see it, now you don’t!

(Actually, now that I think about it, I’m also an ice cream magician. And a pie magician. Mm, pie…)

Now that I’m all grown up, making banana bread is one of my favorite ways to treat myself. It’s quick and easy to pull together, and since it’s packed with bananas and nuts, it’s easy to convince myself that it’s good for me. Which, let’s face it, it’s good for the soul, so… it counts.

Gluten Free Banana Bread from Willow at Will Cook for Friends on FrannyCakes

Even though I don’t adhere to a strictly gluten-free diet, I love to make gluten-free recipes whenever I can, and this banana bread has definitely become one of my favorites. To be completely honest, I like it even more than its traditional counterpart. The hardest part of making regular banana bread is not over-mixing the ingredients, which can lead to a tough, dense bread. When you’re making it gluten-free, there’s no fear of over-mixing, and the bread turns out moist and tender every time. Plus it opens the door to using more nutrient-dense flours, like oat and almond flour, which helps me feel a little less guilty when I eat half the loaf while typing up a blog post.

Err… yeah.

Gluten Free Banana Bread Recipe by Willow Arlen on FrannyCakes

When it comes to making banana bread, the riper your bananas are, the better. We’re talking brown-speckled and verging on mushy. Whenever I buy a bunch of bananas, I get a couple more than I think I’ll need for just snacking and smoothie making. When the extras start to get overripe, I peel them, put them in a zip-top bag, and throw them in the freezer. Then when I’ve got enough frozen bananas to make a loaf, I just pull them out, let them thaw, and mash. They’ll turn brown and kind of slimy after being frozen (appetizing, right?) but don’t worry, that’s exactly how you want them. Once they’re mashed and mixed into the batter, they give the perfect level of sweetness and moisture.

I may or may not be hoarding a secret stash of overripe bananas in my freezer for this very purpose. You never know when the urge for banana bread will strike!

Perfectly Moist Gluten-Free Banana Bread
Recipe Type: Breakfast
Author: Willow Arlen
Ingredients
  • 1 cup (130g.) sweet sorghum flour, plus a little extra for the pan
  • ½ cup (45g.) gluten-free oat flour
  • ½ cup (56g.) almond flour
  • 1 tsp. Psyillium husk powder
  • 1 ½ tsp. Baking powder
  • ½ tsp. Baking soda
  • ½ tsp. Fine grain sea salt
  • 4 large bananas, very ripe* (about 2 cups mashed)
  • ½ cup light brown sugar, packed
  • 2 large eggs
  • ½ cup milk, or dairy-free substitute
  • 1 TBSP white vinegar
  • 2 TBSP melted coconut oil
  • 1 tsp. vanilla extract
  • 1/2-1 cup pecans or walnuts, roughly chopped, or chocolate chips or other add-ins (optional)
  • *thawed, if frozen.
Instructions
  1. Preheat oven to 350 degrees F. Lightly grease a 9×5 inch loaf pan, and sprinkle about a TBSP of gluten-free flour into it (any of the flours will work). Tip the pan to all sides until the bottom and sides are coated in flour, then turn the pan upside down over the sink and tap out any excess. Set aside.
  2. In a bowl, whisk together all of the flours, psyillium husk powder, baking powder, baking soda, and salt.
  3. In a large bowl, mash together the bananas, brown sugar, and eggs. Add the milk, vinegar, coconut oil, and vanilla extract, and mix until well combined.
  4. Add the dry ingredients to the wet ingredients, and mix until there are no dry spots left. Add the nuts, chocolate chips, or other add-ins if using, and fold them in.
  5. Pour the batter into your prepared loaf pan, and bake for 55-60 minutes, or until a toothpic inserted in the center comes out mostly clean, but still moist. Remove from the oven and let cool at least 30 minutes before removing from the pan.
  6. Enjoy!
3.2.2310


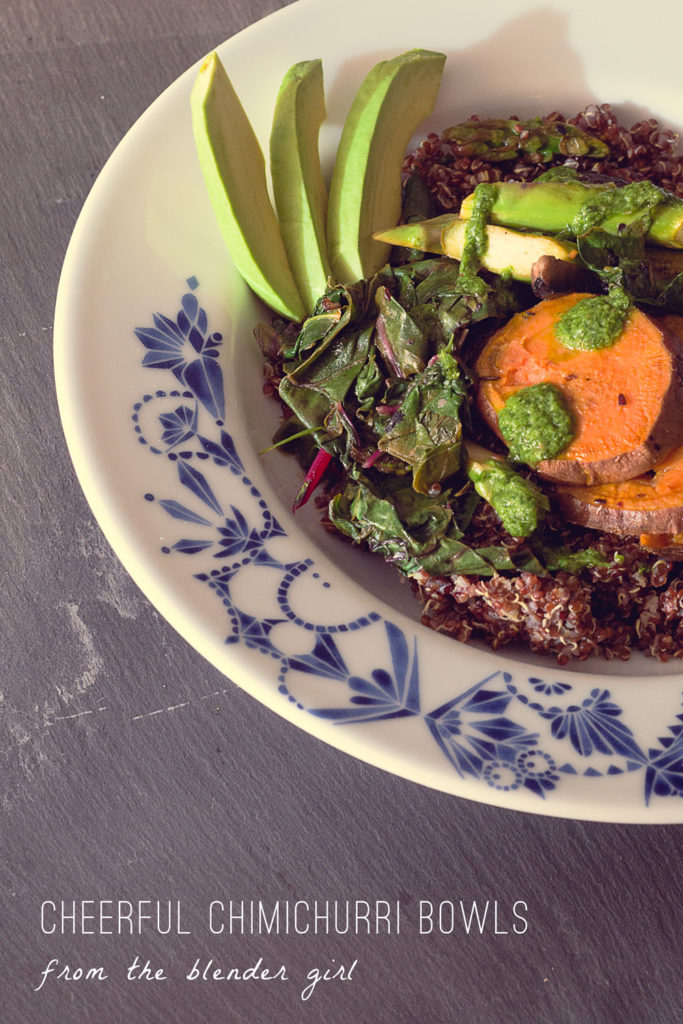
Cheerful Chimichurri Bowl from The Blender Girl by Tess Masters | FrannyCakes

Cooking the Books: The Blender Girl

the blender girl cookbook review

[box type=”info”]I was not compensated in any way for this post, but I do consider Tess a friend. The cookbook is great, and I wouldn’t write about it if I didn’t love it.[/box]

I am never going to be a raw-food enthusiast or a vegan. It is really not ever going to happen – you know, with my love of butter and macarons and maybe even bacon. But I do love all kinds of foods – brussells sprouts, green beans fresh from the garden and carrots are a few of my favorite things. It’s all about balance because, for the most part, I want to eat better and have the chance to indulge on those cakes I so dearly love.

So, I have been collecting cookbooks with a healthier focus lately. I know how to make a killer cake and I can whip up pancakes or brownies from memory, and I can whip up a dinner from the random things in my pantry. But, and this is a big but, I tend to get in a rut. I buy the same vegetables week after week and my go-to dinners are always delicious. They aren’t as exciting as they could be.

Or, there is the breakfast connundrum. I know I need to eat it. I know that Fruity Pebbles are really not the best choice for a strong breakfast and I am struggling with the concept of greens for breakfast. (If you follow me on Instagram you know that I have been slowly adding greens to my smoothies but I have yet to declare kale smoothies a favorite food. It’s all about the baby steps).

This book, much like Brassicas, makes veggies and green beverages sexy. The photos hook you. The recipe names just sound delicious. The writing keeps you engaged. (Ok, most people don’t read cookbooks cover to cover like I do, but that is besides the point.) You might just start to believe that intense green smoothies taste good.

I can hear Tess in every recipe head note – friendly and passionate with just a dash of kooky. In The Blender Girl, Tess’ notes about health and ingredients come off as smart suggestions – the kind your best friend might make if she was a nutritionist or raw vegan belnder expert. She walks the line between confidently talking about nutrition/ her dietary preferences and diet evangelism. I almost believe I could be a vegan. Almost.

Cheerful Chimichurri Bowl from The Blender Girl by Tess Masters | FrannyCakes


While I am not turning into a raw vegan on an alkaline diet, I am working green smoothies into my mornings and I appreciate a good chimmichuri. When a recipe calls for a soaked date, I will probably substitute some local honey. If I can’t find maple syrup, I might just use agave nectar. It is quite possible that I will never embrace green powder or confuse cashew cream for the real deal. It’s all good with this cookbook. There are often substitutions listed so that you can use foods that fit your diet, taste or budget. If there aren’t any listed, you should go for it anyway. Cooking is about passion and making yourself happy.

So far, I have made the Chia Choo-Choo, Cheerful Chimichurri Bowls, Papaya Pleasure, and Rosewater and Cardamom Lassi. All of them have lived up to what I was imagining after reading the recipes. The book is perfect for anyone looking for creative ways to add fruits and veggies to their diet.

The Rating

Author: Tess Masters
Title: The Blender Girl
Format: paperback, full color photos
Stars: 5/5*
Buy it or Forget it: Buy it, buy it, buy it.
Must try recipes: Every one in the book? I might be addicted to the Chia Choo Choo, Cheerful Chimichurri Bowls and Rosewater Cardamom Lassi
*Read more about my cookbook review criteria.

Make something


Cheerful Chimichurri Bowl from The Blender Girl by Tess Masters | FrannyCakes

The recipe requires a few pans and some coordination in the kitchen for all of the moving parts, but the results are delightful. You could substitute whatever veggies you happen to have on hand or that are in season where you live in place of the ones used in the recipe. You could grill the veggies outside in the summer and make the quinoa in a rice cooker. The star of the recipe is the chimichurri. A vibrant herb-based sauce much like pesto or pistou but without the nuts or cheese, chimichurri is a great alternative to those sauces for people with dairy or nut allergies. It is also fabulous on grilled steak or fish.

Cheerful Chimichurri Bowls from The Blender Girl
Recipe Type: Entree
Author: Tess Masters
Prep time: 10 mins
Cook time: 45 mins
Total time: 55 mins
Serves: 6
This awesome vegetarian entree is one of my favorites from the book. It is easy to put together, and the ingredients can be swapped out based on what you have on hand. Plus, you can make this dish in under an hour, and there is no wasted time.
Ingredients
  • Sauce
  • 3/4 cup (180 ml) olive oil
  • 1 cup (50g) finely chopped flat leaf parsley, plus more to taste
  • 2 tablespoons finely chopped tarragon, plus more to taste
  • 2 tablespoons finely chopped mint, plus more to taste
  • 1 teaspoon dried oregano, plus more to taste
  • 1/2 cup finely chopped green onions (white and green parts), plus more to taste
  • 4 cloves garlic, plus more to taste
  • 2 tablespoons freshly squeezed lemon juice, plus more to taste
  • 2 tablespoons freshly squeezed lime juice, plus more to taste
  • 1/2 teaspoon red pepper flakes, plus more to taste
  • 3/4 teaspoon natural salt, plus more to taste
  • 1 1/2 teaspoons red wine vinegar, plus more to taste
  • Bowls
  • 4 large sweet potatoes, cut in to large chunks
  • olive oil
  • 10 cloves of garlic, peeled
  • Natural salt
  • Red pepper flakes
  • 2 1/2 cups (475g) quinoa
  • 4 large portobello mushrooms, stemmed and cut into large slices
  • 1 brunch asparagus, ends snapped off
  • freshly squeezed lemon juice
  • 2 bunches rainbow chard, stalks removed and leaves roughly chopped
  • 2 avocados, pitted, peeled and thickly sliced
Instructions
Make the sauce
  1. In a blender, combine all the chimichurri ingredients and blend on high for 30 to 60 seconds – you want the herbs well pureed. Taste and tweak the flavors to your liking.
Make the bowls
  1. Preheat your oven to 400 degrees Fahrenheit.
  2. Toss the sweet potato, a generous pour of olive oil (1/4-1/2 cup) and 8 cloves of the garlic with a healthy pinch each of salt and pepper flakes. Spread in a single layer on a baking sheet lined with parchment paper. Bake for about 45 minutes, when the sweet potatoes are tender.
  3. Meanwhile, in a dutch oven (or any oven-proof pot with a lid), combine the quinoa with 5 cups of water, a teaspoon of salt and a tablespoon of olive oil. Bring to a boil over high heat and then reduce heat to medium and simmer for 5-10 minutes or until the water has reduced to below the level of the quinoa. Place the lid on the pot and transfer the quinoa to the oven to bake for 30-40 more minutes alongside your veggies.
  4. In one bowl, toss the mushrooms with olive oil, coating them well. (The original recipe calls for 1/4 cup, but I used half that). In a separate bowl, toss the asparagus with 2 tablespoons of olive oil, 2 tablespoons of lemon juice and 1/4 teaspoon salt.
  5. in a large frying pan, over medium high heat, sautĂ© the mushrooms for about 10 minutes – until tender and cooked through. Remove from the pan and place on a plate lined with paper towels. SautĂ© the asparagus in the pan next. They should cook for about 5 minutes – you want them to still have a little bite. Once cooked, place them on the plate with the mushrooms.
  6. Add the chard, a tablespoon of olive oil, two tablespoons of lemon juice and a pinch of salt and pepper flakes for about 2 minutes – until just wilted.
  7. This should all finish up cooking right about the time your sweet potatoes and quinoa are ready to eat. Dish up the quinoa and veggies and top with about 1/4 cup of the chimichurri and a couple slices of the avocado in each bowl.
3.2.2310


relish 16 | april 2014 | frannycakes picks gluten-free treats

Relish 15: Fools rush in

relish 16 | april 2014 | frannycakes picks gluten-free treats

Relish is a compendium of things to enjoy greatly and that add a little flavor to your gluten-free life. Sometimes we get a little foolish.

Spring is full of fresh starts and new beginnings. Ok, and the start of patio season. Pedicure season. Beach walking season.

Oh yeah, I said beach walking season.

In a bittersweet turn of events, one of my dearest friends is moving to Indianapolis, and needed to sublet her place. I just happened to be in the market for a city apartment. I’m only in it for the vintage built-ins and the proximity to the beach. I can spend lazy Saturdays gazing at the lake and finding a nice piece of sand for reading and writing.

This was one of those decisions that I didn’t think much about – it just felt right. And it had a fire place. Oh, and a good friend with a love of red wine that might just trump mine. Sure, I’m rushing in. Starting fresh. And moving forward.

Did you miss it?

I hand-lettered an inspirational phrase on a post-it note every day in April. You can check out the project and see all the notes on the Chronic Positivity Project.

Just eat it!

My friends make the most delicious things. I very much want them to adopt me.

relish 16 | april 2014 | frannycakes picks gluten-free treats

I was spoiled last week with a wood-fired gluten-free pizza topped with romanesco sauce and ramps. It might just be my new favorite sauce, and Meg at Beard and Bonnet breaks it down (01) for you. Beth from Tasty-Yummies might just find me outside her house with a bag of groceries so that she can make me this Sweet Potato & Kale Coconut Curry (02). (I’m not that crazy, I’d call first 🙂 ). Before I wrote a food blog, I had no idea that there were people, *cough* Melissa *cough*, who didn’t know how to roast veggies. Cindy at Vegetarian Mamma has a great, easy to follow recipe for one of my favorite vegetables (03). And life isn’t complete without the occasional cocktail. This Grapefruit, Thyme & Lillet cocktail (04) from Willow at Will Cook for Friends is going into my summer drink rotation.

Get yourself a little something

Reading cookbooks helps you become a better cook. You learn different techniques, see flavor combinations you might have never thought of and discover foods that are new to you.

relish 16 | april 2014 | fabulous gluten-free cookbooks

My friends keep writing awesome cookbooks, and two of them came out this month. First up, Tess from The Blender Girl, released her first cookbook of the same name (01). It is filled with so much more than just smoothies and it will teach you all sorts of things you can make with your blender. I reviewed Brassicas by Laura Russell (02) earlier this month, and it was just fabulous. You’ll fall in love with leafy green things on every page.

If you follow the food world, Shauna and Daniel Ahern from Gluten-Free Girl and the Chef just won a James Beard Award (basically food-world Oscars) for last year’s Gluten-Free Girl Every Day (03). If you don’t have a copy, go order one now. It is a must-own.And to round out all this healthy stuff, if you don’t own cupcake wars triple threat Kyra Bussanich’s Sweet Cravings (04), go buy a copy, make me the Persian Love Cakes and send them to me for my birthday.

May the Fourth be with you.

As you live long and prosper with the odds ever in your favor. Ok, I’m a bit of a nerd… but May is really going to be awesome. It is Celiac Awareness Month, and Erica at Celiac and the Beast is giving away some pretty fabulous prizes every day. But it is about more than just prizes. Celiac has caused some pretty nasty complications for some of the people I love the most in this world. It is about raising awareness of Celiac and gluten-related disorders. Teaching others so that they don’t have to fall back on the “gluten allergy” explanation when trying to order a meal at a restaurant. It is showing that kids getting bullied on TV for what they can and cannot eat is a bad, bad precedent. Or that the comic from the New York Times that mocked people following a gluten-free lifestyle by calling them “annoying” just isn’t ok. It’s about coming together as a community and showing support.

I told you that I am moving up top to prep you for some news. For the next couple of weeks, this space is going to be filled with the voices of some friends as they help me keep you filled with inspiration for some delicious gluten-free treats. Because three weeks is not nearly enough time to pack up everything and get ready to move.

Here’s to a May full of advocacy and fresh starts!

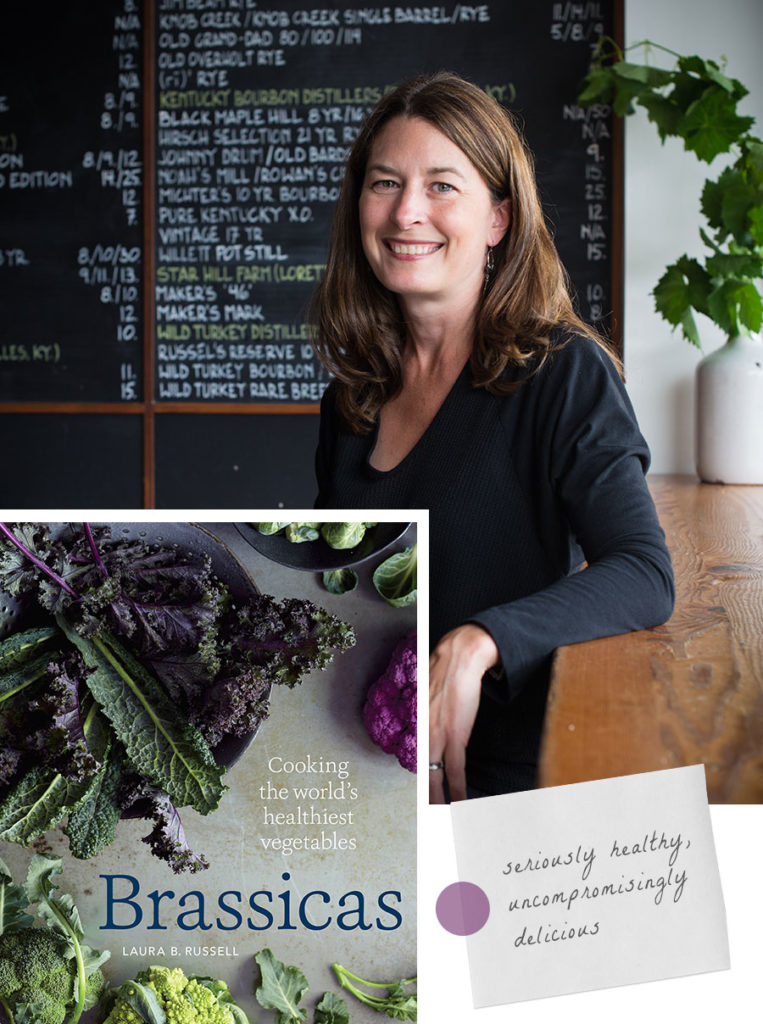
a review of brassicas by laura russell

Cooking the Books: Brassicas by Laura Russell

a review of brassicas by laura russell

[box]Two disclaimers: First, a copy of Brassicas was provided by Ten Speed Press free of charge for this review. Second, I consider Laura a friend, but I would not have written about the book if I didn’t love it.
Jump to the recipe for Charred Brussels Sprouts with Fig Glaze[/box]

Vegetables are beautiful. I seem them all the time on Pinterest. Looking just a little bit sexy and tempting…and then I see a macaron. I have this problem. You all know about it. I love dessert. If candied kale were a thing, I probably would have jumped on that band wagon ages ago. Probably around the same time I decided that cupcakes were an acceptable coping mechanism.

It’s why this blog is mostly of the dessert flavor.

But I’ve been branching out lately. I even made Gluten-Free Kale & Sweet Potato Lasagna. So, when my friend Laura Russell (the brilliant writer behind the Gluten-Free Asian Kitchen), told me she was writing a cookbook about vegetables, I was tentatively excited. I mean, we’re talking veggies. And she had to go and choose the healthiest type of veggies – brassicas, which incidentally, is the title of the lovely cookbook that comes out on April 8th.

Spicy Kale Stir Fry from Brassicas by Laura Russell

There are no recipes for candied kale or broccoli brownies in this book. (I am actually relieved by this – the whole avocado / black beans in brownies trend freaks me out). And it is downright amazing. That’s right. I said that about a cookbook all about vegetables. Freaking amazing. I want to make and eat everything in the cookbook kind of amazing.

When the book first arrived, I opened it and left it on my desk at work. At least three coworkers paged through it at my desk when they came to see me – before I even got to look. There is currently a waiting list of friends who want to borrow it because they can’t buy it yet. The book itself is gorgeous. Rich, slightly moody photos of vegetables making you want to saunter into your kitchen and get to cooking. The book has chapters on kale, broccoli, root brassicas and leafy brassicas.

There is a handy-dandy chart in the back to help you identify and adapt the recipes no matter if you are gluten-free, soy-free, nut-free, egg-free, vegetarian, vegan or fish/shellfish free. Most of the recipes are naturally gluten-free or say right in the recipe notes how to make the recipe without an gluten-containing ingredients. Which is excellent, because when I am making dinner, I need it all spelled out for me – it’s nothing like making cupcakes (those I can do blindfolded with one hand tied behind my back).

This cookbook might just get me to eat my vegetables with a bit more zeal. Let’s be clear though – this is not your mamma’s diet food. This is not a lose weight in three weeks kind of book. This is a see how wonderful and complex these ingredients are kind of book. This is an explore that crazy looking UFO veggie kind of book. This is a make your friends jealous when you Instagram your dinner kind of book.

The Rating

Author: Laura Russell Title: Brassicas: Cooking the world’s healthiest vegetables
Format: hard cover, full color photos
Stars: 5/5*
Buy it or Forget it: Buy it, Instagram your dinner and fall in love with vegetables
Must try recipes: Charred Brussels Sprouts with Pancetta and Fig Glaze, Spicy Kale Stir Fry
*Read more about my cookbook review criteria.  

Let’s get cooking

The best part of cookbooks? Trying new recipes! I made the Spicy Kale Stir Fry last week and ate it for three meals straight. Then I made these Brussels sprouts, and I decided that the recipe really was only 2 servings – my dinner and leftovers for lunch.

making charred brussels sprouts with fig glaze

Due to my dad’s pork allergy, I made this recipe using turkey bacon in place of the pancetta. It was still incredibly delicious, but I can only imagine how good it would be as written. That might just be the best part of this cookbook – the recipes can work as a framework for a dish, rather than being a roadmap that has to be followed to the letter.

This recipe might be love.

charred brussels sprouts with fig glaze from brassicas by laura russell

Cooking the Books: Brassicas by Laura Russell
Recipe Type: Vegetable
Author: Laura Russell
Prep time: 10 mins
Cook time: 15 mins
Total time: 25 mins
Serves: 4
“NOTHING TASTES BETTER with Brussels sprouts than cured pork, which is why I unapologetically offer you recipes that flavor sprouts with both pancetta and bacon. Here, the salty pancetta plays well with the sweetness from the fig jam, and you can finish the dish with a drizzle of balsamic vinegar to add a tangy note (see variations). I found fig jam near the grocery store’s cheese counter (not in the jams and jellies aisle), but you could also try apricot or peach jam instead. You may want to add a touch more jam than I suggest, but strive for a subtle sweetness rather than a cloying, sticky mess.”
Ingredients
  • 3 tablespoons olive oil (divided)
  • 3 to 4 ounces pancetta, diced
  • 1 1/2 pounds Brussels sprouts, trimmed and halved (or quartered if large) through the stem end (about 6 cups)
  • 1/4 teaspoon kosher salt
  • 2 tablespoons fig jam
  • 1 tablespoon water
  • 1/4 teaspoon freshly ground black pepper
Instructions
  1. In a large (12 inches or wider) frying pan, heat 1 tablespoon of the oil over medium heat. Add the pancetta and cook, stirring occasionally, for about 3 minutes, until crisp. Using a slotted spoon, transfer the pancetta to a small bowl. Return the pan to medium-high heat and add the remaining 2 tablespoons oil. Add the Brussels sprouts, keeping them in a single layer as much as possible. Having a few extra sprouts is fine, but if they are mounded in a pile, they will not brown or cook evenly. If necessary, use a larger pan, cook them in two batches, or pull out the extra for another use. Stir in the salt. Cook, stirring occasionally, for about 10 minutes, until the Brussels sprouts are tender and well browned—even charred in spots. If the sprouts are browning too quickly, lower the heat to medium.
  2. Add the fig jam and the water and stir until the jam melts and coats the Brussels sprouts. Add the reserved pancetta and the pepper and stir to combine. Taste and add additional salt or pepper if needed. Serve warm.
  3. variations
  4. For a sweet, salty, tangy version, add a drizzle (a teaspoon or less) of balsamic vinegar at the end. Aged balsamic is an especially good choice. Although I prefer pancetta here (I like its unsmoked rich pork flavor), you can use bacon in its place.
Notes
Reprinted with permission from Brassicas: Cooking the World’s Healthiest Vegetables: Kale, Cauliflower, Broccoli, Brussels Sprouts and More by Laura B. Russell. Copyright © 2014 by Laura B. Russell. Published by Ten Speed Press, an imprint of the Crown Publishing Group, a division of Random House, Inc. All rights reserved. No part of this excerpt may be reproduced or reprinted without permission in writing from the publisher
3.2.2265


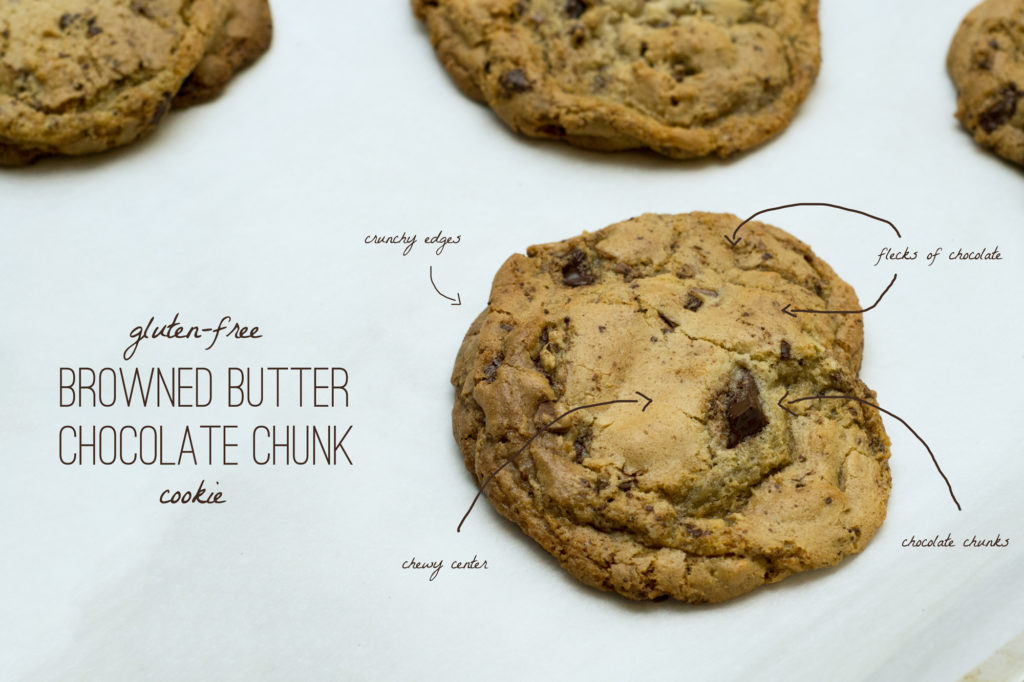
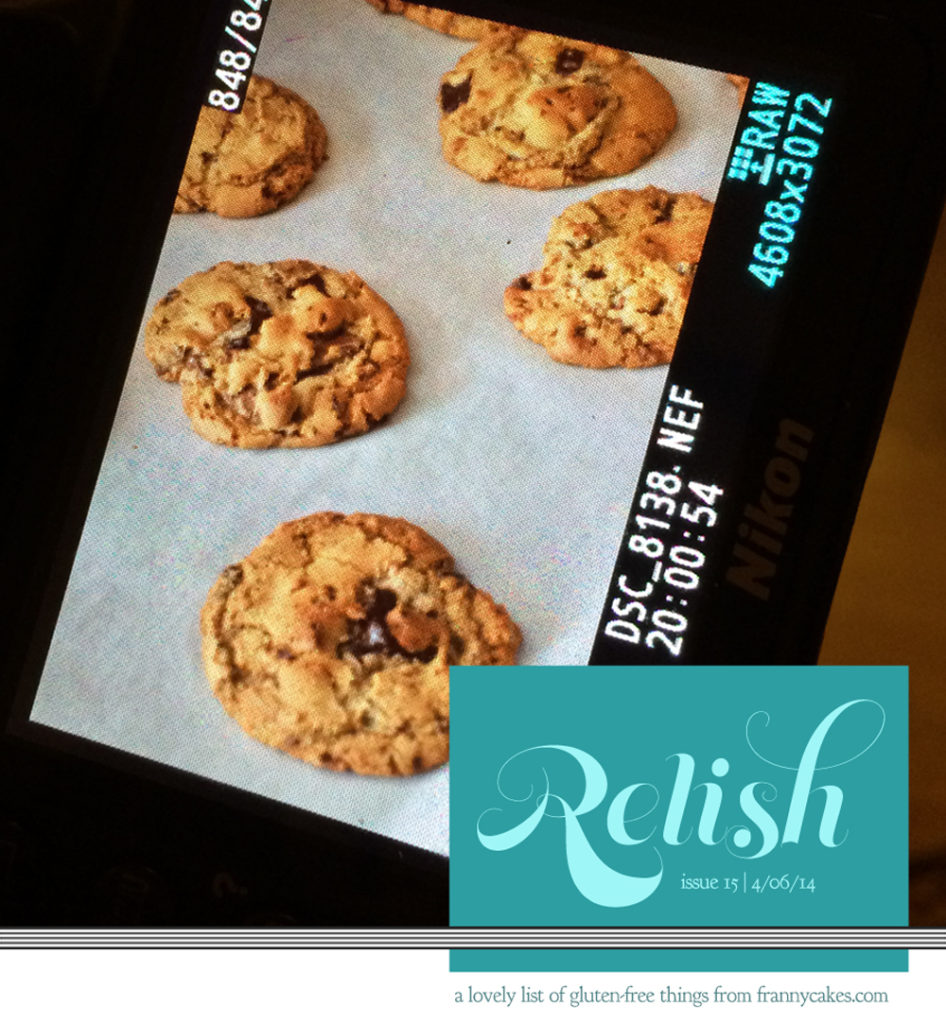
gluten-free brown butter chocolate chunk cookies

Gluten-free brown butter chocolate chunk cookies

There is something to be said for the magic of a gluten-free chocolate chip cookie. They have strange and wonderful powers.

I’m serious. It doesn’t matter if you are a crunchy cookie lover, or a ooey-gooey center devotee. The magic is there in all kinds.

making gluten-free chocolate chip cookies

When you take them out of the oven, and they are still so hot they might just burn your mouth, they draw you in. The caramelized sugars and melty chocolate tug at your senses until you cave and take a bite.

A good gluten-free chocolate chip cookie can turn a bad day around.

gluten-free brown butter chocolate chunk cookies

These particular cookies are crunchy and chewy (which in my mind makes them perfect), but that isn’t what makes them special. First, we use browned butter to add a layer of complexity to the flavor of the cookies. Then, we chop up a chocolate bar rather than using chips. When you chop the chocolate yourself, you get little shards of chocolate. When you add those to the cookie batter, you get a bit of chocolate in every bite.

I call for chilling the dough, or scooping the cookies onto baking sheets and popping those in the freezer before baking. This controls the spread of the cookie, and gives the sugar and flour some time to absorb the liquids and fats. It also slows the baking a bit, creating the crunchy outside and maintaining a chewy interior.

If you want to save them for later, or if you are a single lady and just want one or two cookies at a time, scoop the batter onto a cookie sheet, fitting as many on to the sheet without them touching and freeze for several hours. Once frozen, put them in a ziplock bag, label them with the baking temp & time and put the bag back in the freezer. You can take out a couple at a time and bake them as you want them, so you can always have a fresh cookie.

Gluten-free brown butter chocolate chunk cookies
Recipe Type: Dessert
Author: Mary Fran Wiley
Prep time: 25 mins
Cook time: 30 mins
Total time: 55 mins
Serves: 24
Ingredients
  • 2 sticks (225g /8 ounces) unsalted butter
  • 360 (a scant 2 1/2 cups) grams gluten-free all-purpose flour blend*
  • 1 teaspoon xantham gum**
  • 1 teaspoon kosher salt
  • 1 teaspoon baking soda
  • 55 grams (approximately 1/4 cup) sugar
  • 285 grams (approximately 1 1/4 cups) light brown sugar
  • 1 whole egg
  • 1 egg yolk
  • 2 tablespoons whole milk
  • 1 1/2 teaspoons vanilla extract
  • 12 ounces high-quality semisweet chocolate baking bars, roughly chopped
Instructions
  1. Line 3 baking sheets with parchment paper.
  2. To brown the butter, place it into a saucepan over medium heat. It will melt, then begin to foam and slowly the color will change from golden to light brown. As soon as the scent starts to turn nutty, remove it from the heat and pour it into the bowl of your stand mixer.
  3. In a medium bowl, whisk together the gluten-free flour, xantham gum (if it is not in your flour blend), salt and baking soda.
  4. In the bowl of your stand mixer, add the sugar and brown sugar to the browned butter and cream them together for 1 minute using the paddle attachment. Add the egg, egg yolk, milk and vanilla extract and mix until well combined.
  5. Slowly add the flour mixture, scraping down the sides of the bowl to make sure you have a well-mixed batter.
  6. Stir in the chocolate chunks and any shards of chocolate you created while chopping.
  7. Scoop 2-ounce balls of dough 3″ apart on a cookie sheet (you can fit about 8 balls of dough per sheet). Place the dough in the freezer for 20-30 minutes. When there is about 10 minutes of freezer time left, preheat your oven to 375 degrees.
  8. Bake the cookies for 13-15 minutes. If you bake 2 sheets at once, rotate them halfway through baking.
Notes
*[b]I use Cup4Cup Gluten-Free All Purpose flour[/b] because I find it to be the best. If you prefer to blend your own flours, the following is a good mix: 310 grams (approximately 2 cups) brown rice flour, 35 grams (approximately 1/4 cup) cornstarch, 15 grams (approximately 2 tablespoons) tapioca flour[br]**[b]If your blend includes xantham gum[/b], you can leave it out.
3.2.2310


relish 15 | march 2014 | frannycakes picks gluten-free treats

Relish 15: March to a different beat

relish 15 | march 2014 | frannycakes picks gluten-free treats

Relish is a compendium of things to enjoy greatly and that add a little flavor to your gluten-free life. And it’s even better with a pinch of love.

Winter in Chicago is officially over, and, knock on wood, the snow has made a graceful exit for the season. Spring is here and that means brighter produce, longer evenings and plenty of rain.

Chow time

Food is starting to get a bit more vibrant as the seasons change.

relish 15 | march 2014 | frannycakes picks gluten-free treats

Pea Risotto (01) from Vegetarian Mamma is a delightful spring dinner when there is still a bit of bite to the wind. Life isn’t complete without a cocktail, and I’ve become quite a gin fan lately. The Scotsman’s Holiday (02) from Dine x Design is on my list for next weekend. Produce gets kicked up a notch in this recipe for Roasted Sweet Potatoes with Strawberries (03) from The Tomato Tart. And when all else fails, some Gluten-Free Buttermilk Pancakes from A Girl Defloured make a perfect comfort meal any time.

Air Mail

Life is better when presents come in the mail. It is even better when the contents of those presents are a surprise. I get everything from art supplies to snack mixes.

relish 15 | march 2014 | frannycakes picks gluten-free treats

As a designer, I often miss the hands on creativity that I used to have time for, and my Art Snacks box (01) allows me to try out new art supplies that I probably wouldn’t have bought for myself. To keep myself feeling pretty, I subscribe to BirchBox (02). They send a box of deluxe-sized cosmetic samples each month so I can try out new products before I buy them. When it come to food, there seems to be an ever-growing list of gluten-free subscription boxes, but my favorite is the G-Free Foodie box (03). Each month you get a box of gourmet gluten-free treats, and you can get paleo, GF DF and other allergen friendly boxes. Finally, I get a graze box (04) every week. Each box contains 4 snacks, and you can customize what snacks you get by letting them know how you like the different treats. If you click on the link, you’ll get your first box free.

What’s on deck

The Gluten & Allergen Free Expo is going to be in Chicago this week, and I can’t wait to see old friends, make new ones and try all the new products. I am also working on a project for the month of April on the Chronic Positivity Project called #onapositivenote . You can follow along on Instagram.

Win tickets to the 2014 Chicago GFAF Expo!

GFAF Expo Preview

When I went gluten-free buying products was a nightmare – you never knew if what was in the box was edible or not. Then, four years ago, my friend Melissa told me about some sort of wonderland. You could try all the food before you bought it. And it was all the good stuff.

These days I make a point of making it to several GFAF Expos each year, and there is one coming up in Chicago on April 12 & 13, 2014. I can’t wait to see old friends, like Jay & Andrea from Red Apple Lipstick , Whitney from Bakery on Main or the girls from Rudi’s.

Because I love you so much, I have 5 passes to the expo to give away!

Leave a comment below to win! Winners will be announced on April 8, 2014!

Win tickets to the 2014 Chicago GFAF Expo!


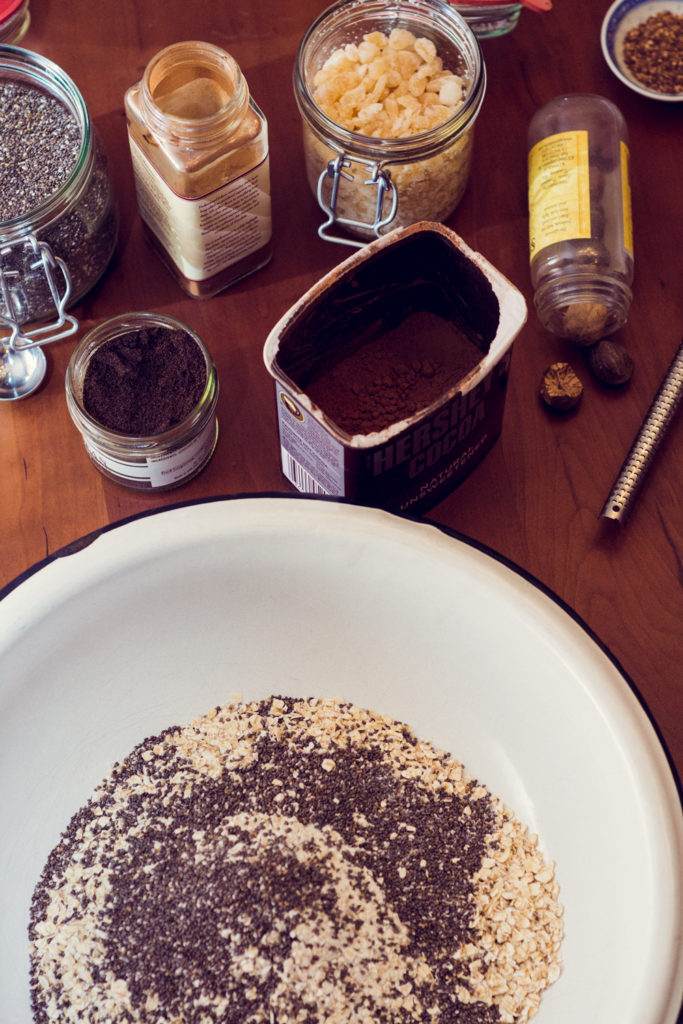
ingredients for home made gluten-free instant oatmeal from frannycakes

Homemade Gluten-Free Instant Oatmeal

After the crushing revelation that Shamrock Shakes are not green smoothies, and that lattes and gluten-free doughnuts (sorry, Do-Rite) are not actually parts of a complete breakfast, I was left at a loss for what to start with as fuel for my days.

I eat breakfast in the office most days, due to a 2+ hour commute and a stomach that is even less of a morning person than the rest of me. So, I need something that transports easily and can be prepared with just a microwave and a spoon. Oh, and it has to be something my coworkers couldn’t mock me for, like they do for my love of Fruity Pebbles.

home made gluten-free instant oatmeal from frannycakes

The perfect solution? Instant oatmeal. The problem? It adds up pretty quickly and none of the grocery stores around me stock packets of the gluten-free variety. Oh, and the buckets of extra sugar they add to make it taste good…

What’s a girl to do? Make it at home!

It costs a whole heck of a lot less, can pack a nutritional punch, can be made in batches of any size and comes in an infinite number of flavors. So far I’ve made Dirty Chai, Chocolate Chocolate Chip, Honey Ginger (my favorite), Maple Raisin, and Mocha.

how to make home made gluten-free instant oatmeal from frannycakes

I found a lot of recipes that included powdered milk, presumably to up the creaminess factor, but it is an ingredient most people don’t keep on hand. (And by most people I mean me). When I was creating my base recipe, it was important to keep things as simple as possible. I didn’t want to add dairy to something that should be vegan and dairy free (even Quaker Instant Oatmeal is dairy free) and I most definitely didn’t want to tell people to get an ingredient they otherwise wouldn’t keep in their pantry.

As I experimented, I found that simply grinding some of the oats made the oatmeal as creamy as its store-bought cousins. I couldn’t believe it was that simple. I also added chia seeds, which you could forgo if you don’t keep them on hand, for some protein and added vitamins.

ingredients for home made gluten-free instant oatmeal from frannycakes

Homemade Gluten-Free Instant Oatmeal
Author: Mary Fran Wiley
Prep time: 10 mins
Cook time: 2 mins
Total time: 12 mins
Serves: 6
You can scale this recipe up or down to suit your breakfast needs
Ingredients
  • 175 grams (2 cups) + 35 grams (6 tbsp) gluten-free instant oats, divided
  • 76 grams (6 tbsp) sugar*
  • 3/4 tsp salt
  • 30 grams (3 tbsp) chia seeds
  • Mix-ins (optional, see suggestions below)
Instructions
  1. Grind the smaller amount of oats in a food processor or spice mill.
  2. Combine all ingredients in a large bowl, a stir to make sure the ingredients are evenly dispersed.
  3. If you want to make all your baggies the same flavor, add your mix-ins now.
  4. Divide your ingredients evenly amongst 6 snack-sized plastic zip bags. If you want to add different flavors, you can add them to each baggie.
  5. To prepare, empty the baggie with your oat mixture into a bowl or mug. If you want to make it in a microwave, add a scant half cup of water and heat for 1:30- 2mins. Stir well and allow to cool slightly. If you hate the microwave, you can add a scant half cup of boiling water and let it sit until the oats are tender, about 3 minutes.
Notes
[i]These are suggestions per serving, so to make the whole recipe the same, you would have to multiply these amounts by 6.[/i][br][br][b]Dirty Chai[/b][br]1 tsp espresso powder[br]1/2 tsp cinnamon[br]1/8 tsp nutmeg[br]1/8 tsp cardamom [br]1/4 tsp dried lemon peel[br]1 tsp granulated honey (optional)[br][br][b]Ginger Honey[/b][br]2 tsp granulated honey [br]1 tbsp crystalized ginger[br][br][b]Mocha[/b][br]1 tsp espresso powder[br]2 tsp cocoa powder[br]1 tbsp brown sugar
3.2.2265


Housewares 2014: Cookware & Gadgets

I would voluntarily live in 75% of the booths at the International Home & Housewares Show. Seriously, the kitchen accoutrements there had me swooning (after I recovered from cooking with Curtis Stone).

International Home & Housewares Show 2014 Picks from FrannyCakes

First up, from Mr. Stone, is one enviably gorgeous Go With the Flow Oil Can.  It’s functional art! Since it is opaque, the oil inside will not deteriorate from exposure to light, no matter how sunshine-y your kitchen is. The nozzle is designed to keep the pour nice and slow (no accidental doubling of the oil in your skillet or on your salad!) and to stop drips.

Oil cans like this are also so much easier to manage in the kitchen when you buy your olive oil from Costco…

It comes in 2 sizes, 16 and 24 oz and starts at $59.95 retail. You can buy your own from Amazon*.

I am not sure how people live without Dutch French ovens, mine is one of my most-used pots (MammaCakes still has hers from when she got married). I think Le Creuset had me in mind when they picked out Palm as their latest color. The modern green feels friendly and this dutch oven is something you’ll still have when your kids are getting married themselves.

It comes in a variety of sizes (and colors) on the Le Creuset website for around $360 or you can get it on Amazon for a steal!

This next one isn’t so much a cooking tool as it is a kitchen necessity. As someone who loves spices, I find it particularly hard to keep them all in an orderly fashion in the cabinets because of all the different sizes and shapes of the bottles. Youcopia has designed a few genius organizing tools, my favorite just happens to be their Chef Edition Spice Rack and you can get it on Amazon for $39.99.

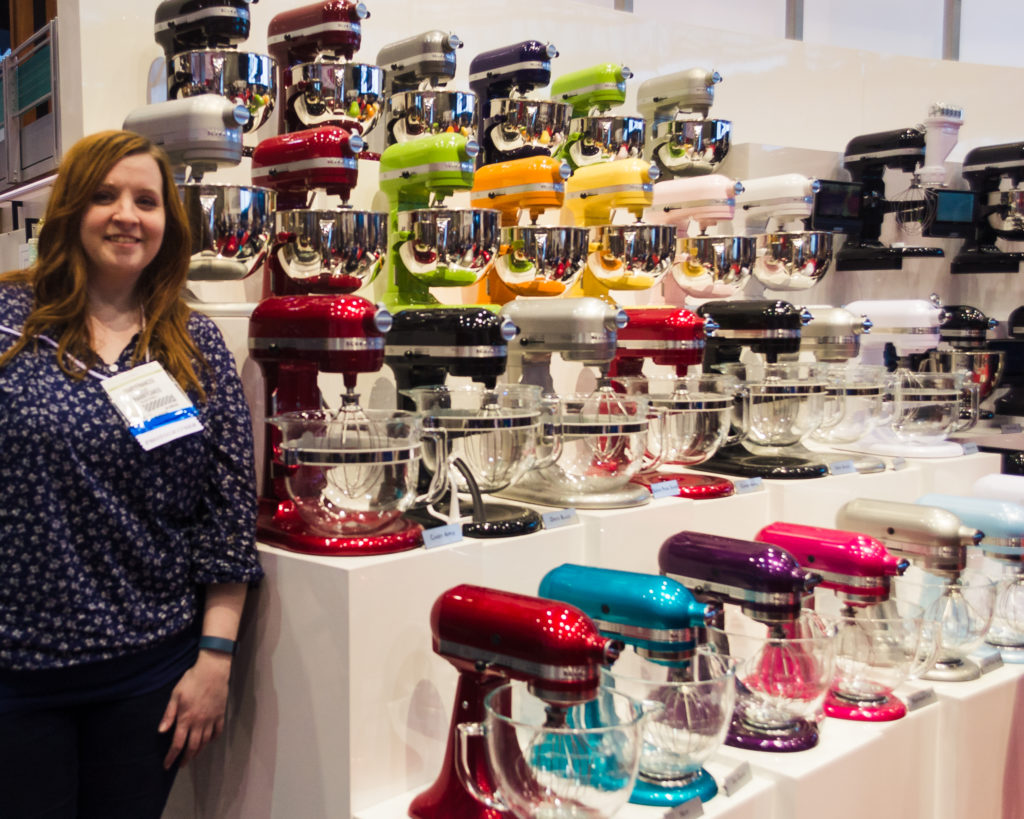
KitchenAid is going to be taking over my entire kitchen soon, I am sure of it. I might still be using Old Faithful, the stand mixer my mom got when she got married 30 years ago, but I keep eying the new models. And they have fashion accessories now! These new ceramic bowls are simply beautiful and they fit perfectly into that dream kitchen I have been pinning cabinets for…

They are microwave and dishwasher safe and will be available starting in June for a suggested retail of $79.99.

Any knife that stars in a comic book must be pretty epic, and thus a must-have. The Shun Blue line was designed with chef & butcher extraordinaire (the dude won Top Chef Masters), Chris Cosentino. The blue steel is sandwiched between stainless steel, and the blades are made with Shun’s commitment to precision and quality. The knives are an investment and range in price from $225 to $350, but an investment that you only have to make once.

I like a little humor in my kitchen, particularly with my wine, so when I saw this wine aerator from Fred & Friends, I might have giggled a bit. (Although, I was kind of hoping it actually was a straw…). All those other wine aerators are a bit to proper for me. It isn’t available quite yet, but I am pretty sure my cousins are getting these for Christmas this year (last year they got Crafting with Cat Hair, so I am keeping up the tradition of excellent gift giving).

Last, but certainly not least, is the Weston Roma 3-in-1 Grater. I have my fair share of cheese graters and choppers, but this one replaces several tools and doesn’t leave you at risk of grating off your knuckles (I’ve done that one too many times with my Microplane…). It’s a good looking and ergonomic tool that can replace a couple of other graters and choppers in your cupboards. You can order it directly from Weston for $29.99.


Housewares 2014: Highlights

Read about my favorite new appliances, new kitchen gadgets and new cookware from the show in upcoming posts. 

Outside of being a web designer, I dearly love being in the kitchen. Part of that is the tools and gadgets that I get to use in the kitchen, so every year, I go to the big industry event, The International Home & Housewares Show to check out what cool things my kitchen needs this year.

It’s pretty much a kid in a candy store situation.

I mean, last year I met Stephanie Izard, Buddy Valastro (Cake Boss) and Fabio Viviani. This year it was Chris Cosentino, Jean Layton (ok, she was in town for ICPA, but it counts) and Curtis Stone.
Highlights from the International Home & Housewares Show 2014

If I didn’t spend all day walking around the trade show, I wouldn’t have run in to my favorite clients (they make seriously awesome air purifiers) from my day job. Or had Mammacakes tell a Curtis Stone and his demo audience that I didn’t use to know how to cook. (It’s true. I hated cooking in high school, but I’ve always loved baking).

I got to see new product announcements, and had the joy of the most random pre-show product to try. (Seriously, why would a food blogger write about a personal travel bidet?)

But really, who would have thought to make spherical ice cubes? Or mix & match soda makers? Or knives with a more natural grip? Or Muffin Tops?

Highlights from the International Home & Housewares Show 2014

I’m not going to lie, I am still giddy about cooking with Curtis Stone, but the other finds are pretty darn awesome too.

Big trends this year were color – booth after booth was full of products injecting color into boring kitchen gadgets, technology – everything from computerized everything to all in one cookers and better product engineering.


This year is going to be a good one in the kitchen. Stay tuned for my best in show picks!