Home » French

Tag: French

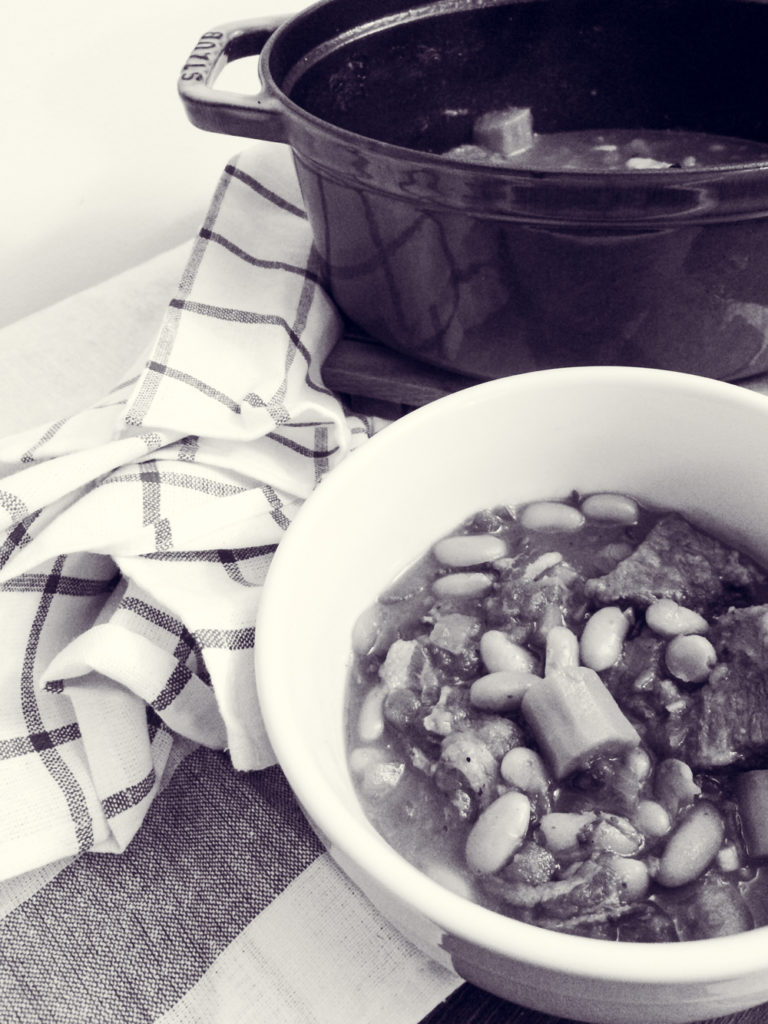
Gluten-Free Cassoulet

Single Lady Supper: Gluten-Free Beef Cassoulet

It’s no secret that my baking chops beat out my cooking skills in just about every way. From the flavors I prefer to the certainty and precision that a cake requires, baking is something that I just sort of get. Although that probably has more to do with the fact that I would rather eat a cupcake than a steak.

It’s too bad you can’t live on cupcakes.

Gluten-Free Cassoulet

But that’s why there are things like stew. Or in this case, cassoulet – which really is just a specific type of stew that includes white beans and usually pork or duck.

You see, you don’t really need a recipe for stew (or cassoulet). You just need to know what order to cook the ingredients. And you need to let it be.

You start with a dutch oven and get it nice and hot.

You cook some bacon or sausage to get things going.

You sear your meat.

You sauté your aromatics.

You deglaze.

You add your other ingredients and get them all cooking.

You top it off with some herbs, cover it, put ‘er in the oven…

And you wait.

You don’t rush. You don’t stir the pot. You don’t increase the heat.

You let your kitchen warm up and fill your house with the scent of a hearty dinner.

You congratulate yourself for a grown-up dinner that is healthy, hearty and perfect for this unseasonably cold weather that has come our way.

Gluten-Free Cassoulet

This recipe makes a small batch of stew. It fed me for one dinner and two lunches, although I did add some cooked sorghum to stretch it when I brought it in for lunch. If you want to make this for a family, simply double just about everything. If you hate cannellini beans, use chickpeas. If you hate rosemary, use tarragon. No red wine? Give up and make macaroni and cheese and then get your butt to the store. Just use stock. No dutch oven? Cook your meat in a skillet, but once you deglaze it, add all your ingredients to an oven-safe dish.

The rules for dishes like cassoulet (and any stew for that matter) aren’t quite as rigid as those for something like a macaron. So go ahead and make one – I promise it is worth the wait.

Gluten-Free Beef Cassoulet
Recipe Type: Stew
Cuisine: French
Author: Mary Fran Wiley
Prep time: 15 mins
Cook time: 2 hours
Total time: 2 hours 15 mins
Serves: 2-4 servings
The trick to a great stew is caramelizing the meat and deglazing the pan before letting that baby cook for a few hours. Cassoulet is traditionally made with pork and sausage for the meat, but I went with ingredients that I had on hand. We can call it traditional-ish.
Ingredients
  • 1/2 lb beef (most stores sell packages labeled for stew already diced, but any tougher cut of beef will work)
  • 2 tablespoons gluten-free flour (an all purpose blend, corn starch, sorghum or potato starch would be best)
  • 1 tablespoon olive oil
  • 2-3 slices of bacon
  • 3 cloves of garlic
  • 1 small onion
  • 1 large carrot, peeled and cut into chunks
  • 1 cup diced tomatoes (about half a can)
  • 1 cup cannellini beans (about half a can)
  • Assorted fresh herbs for a bouquet garni – I used Thyme, rosemary, parsley and a bay leaf tied with cotton string
  • 1 cup red wine
  • Enough stock or water to cover the meat and other ingredients
  • Salt & pepper to taste (How much salt you need will be determined by what liquid you use and if it already contains salt. Start with a generous pinch if you use water or salt-free broth)
Instructions
  1. Heat the oven to 325 degrees Fahrenheit.
  2. Toss your beef with the flour and a generous pinch of salt and pepper.
  3. Prep your other ingredients: chop your bacon into 1/2″ pieces, dice your beef into 2″ cubes, mince your garlic and peel and dice your onion.
  4. Tie your herbs together into a bouquet
  5. Add the olive oil to a small dutch oven over medium heat and cook the bacon until it is crispy. Remove with a slotted spoon and set aside.
  6. Brown the beef on all sides. You don’t need to cook it through (in fact you don’t want to), you just want to caramelize the outside of the meat.
  7. Remove the beef from the pan and set aside.
  8. Sautee your garlic and onions until the onions become translucent.
  9. Pour the red wine into the pan to deglaze all those lovely bits of meat clinging to the bottom of the pan.
  10. Add the beef and bacon back to the pan along with the carrot, tomatoes and cannellini beans.
  11. Pour in the stock until the ingredients are covered and bring to a boil.
  12. Add the bouquet garni and cover the dutch oven.
  13. Place it in the oven and cook for 2 hours.
3.2.2807


NaBloPoMo November 2014

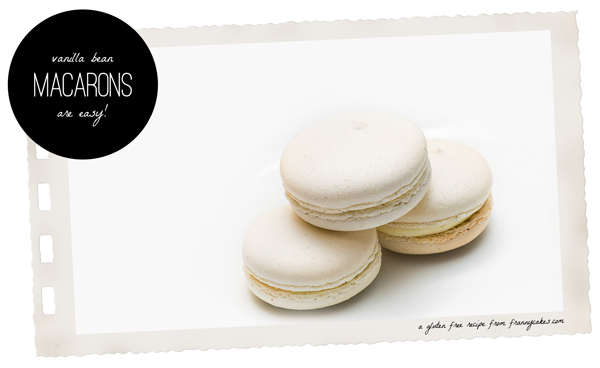
gluten-free vanilla bean macarons

Culinary Bucket List: Vanilla Bean Macarons

gluten-free vanilla bean macaronsThere are some things I have always wanted to try but have been slightly (or not so slightly) intimidated by. Now that FrannyCakes has matured a little bit, I want to start tackling these items one by one.
I have been waiting for this moment for a while. The moment where I sucked it up and attempted a macaron. No, not a macaroon. A macaron. One o. The snooty french sandwich cookie that dreams are made of.

If you have never had one, you need to get your hands on one ASAP. Hopefully you live near a bakery or patisserie that makes these and does it safely/ without cross contamination.

collage of gluten-free macarons

Because they are heaven in cookie form. Nutty, chewy clouds. With a pop of flavor in the middle. Seriously. I am in love.

With a cookie.

And I am OK with that.

Now, once you have fallen under the magic spell of macaron love, you, intrepid baker, will want to make some yourself. I am going to beg you to do one thing. Do not google macaron recipes. So very many are filled with “essential tips” that are totally not essential. Or they will convince you that there are some sort of pastry gods who dole out rare moments of success.

The internet is afraid of macarons. And it is mostly uncalled for. Sure, if you mess up, it will most likely make ugly cookies. But I am pretty dang sure that sugar, almonds and egg whites will taste good no matter what deformed shape they have taken.

But I know a few things that might help you stay on the good side of those pastry gods.

  1. Prepare a mise-en-place. This is a very, very basic step. And one I skip way more often than I should admit to. When making something like macarons, timing and precision is key, so having your ingredients measured out and ready to go when you need them increases your chances of success. Plus, it is just a good habit to get in to. (It helps keep things neat and easy to clean!)
  2. Weigh your ingredients. I can’t believe I still need to tell you all that this is better. But it is. Weights are more precise and more consistent than the volume measurements that American bakers are more familiar with. In this recipe I even weigh the eggs because a slight variation can have unintended consequences.
  3. Use an oven thermometer. Most ovens aren’t really the temperature that they say they are. You will be amazed at how dramatically your baking improves from simply getting your oven set properly.
  4. Be patient and precise. Reread the recipe until you are comfortable with the progression of steps. Pour slowly, stir carefully. There is no rushing in macronage! Also, separating your eggs carefully so you don’t break the yolks is quite important!
  5. Use a stable merengue as a base. Sure these are a French cookie, but that doesn’t mean that you need to make a French merengue. Swiss merengue (cooking egg whites & sugar into a syrup and then beating) and Italian merengue (beating a sugar syrup into egg whites) produce a more stable merengue than just egg whites and sugar beat in a mixer (French Merengue). Do a little extra work and be handsomely rewarded.
  6. Start with a basic flavor/color and then move on. Additional flavor components and colorings add more variables to the mix. Wait to add them until you are comfortable with your technique.
Gluten-Free Vanilla Bean Macarons

Recipe Type: Cookie
Cuisine: French
Author: Mary Fran Wiley
Prep time: 35 mins
Cook time: 25 mins
Total time: 1 hour
Serves: 18
Oh, magical, temperamental cookie. Read the advice above, and remember that according to Chef Keller, these improve if you freeze them for a day! (Even though they are kind of awesome right out of the oven…)
Ingredients
  • 212 grams (1 3/4 cups + 2 1/2 tablespoons) almond meal
  • 212 grams (1 3/4 cups + 1 tablespoon + 2 teaspoons) confectioners’ sugar
  • 82 (1/4 cup plus 1 1/2 tablespoons) egg whites
  • 90 grams egg whites (1/4 cup plus 2 tablespoons) egg whites (yes, you need both quantities, divided)
  • 1 vanilla bean, slit open
  • 236 grams granulated sugar (1 cup plus 3 tablespoons), plus a pinch (about 5 grams)
  • 158 grams (2/3 cup) water
  • Your favorite buttercream flavored with vanilla bean or vanilla bean paste.
Instructions
  1. Cut 2 sheets of parchment paper to fit your cookie sheets. Trace 2 1/4 inch circles with a fine point marker like a Sharpie approximately 1 inch apart in alternating rows of 3 & 4. Turn the parchment paper over and lay it on your sheet pans/ cookie sheets.
  2. Preheat the oven to 350°F (convection) or 400°F (standard).
  3. Place the almond flour in a food processor and pulse to grind it as fine as possible. This is really not an optional step unless your almond meal is ultra fine. Most isn’t, and skipping this step can leave you with lumpy macarons. (Although the flavor won’t be bad)
  4. Sift the almond flour and powdered sugar into a large bowl and whisk together. If you have more than a couple of tablespoons of almonds remaining in the sifter, re-grind the flour in the food processor. Create a mound in the bowl with the almond flour mixture, then make a 4-inch well in the center, leaving a layer of the flour at the bottom. Pour in the 82 grams | 1/4 cup plus 1 1/2 tablespoons egg whites and combine with a spatula, stirring until evenly distributed and paste-like. Scrape the seeds from the vanilla bean into the bowl and mix until they are fairly well distributed. Set aside.
  5. Place the remaining 90 grams (1/4 cup plus 2 tablespoons) of the egg whites into the bowl of a stand mixer fit with a whisk attachment. In a small saucepan, combine the 236 grams (1 cup plus 3 tablespoons) granulated sugar and the water and heat over medium-high heat until the syrup reaches 203°F/110°C, stirring only until the sugar is dissolved and the mixture is clear.
  6. While the syrup continues to cook, add the pinch of sugar to the egg whites, turn the mixer to medium speed (a 5 or 6 on my mixer), and whip to soft peaks. If the whites reach soft peaks before the syrup reaches 248°F/12o°C, reduce the speed to the lowest setting, just to keep them moving.
  7. When the syrup reaches 248°F/120°C, remove the pan from the heat. Turn the mixer to medium-low speed, and slowly add the syrup, pouring it between the side of the bowl and the whisk. Do not panic when the meringue deflates.
  8. Increase the speed to medium and whip for 5 minutes, or until the whites hold stiff, glossy peaks. Although the bowl might still be warm to the touch, the meringue should have cooled; if not, continue to whip until it is cool.
  9. In the bowl with the almond mixture, fold in one-third of the meringue, then continue adding merengue to the almonds little at a time (you might not use them all – I used about 90% each time I have made these. You can pipe the left over plain merengue out when you are done and make little pavlova shells) until when you fold a portion of the batter over on itself, the “ribbon” slowly moves. The mixture shouldn’t be so stiff that it holds its shape without moving at all, but it shouldn’t be so loose that it dissolves into itself and does not maintain the ribbon; it is better for the mixture to be slightly stiff than too loose. So go slowly! Take your time! You want to make sure that your mixture does not have any ribbons of plain merengue, where there are no almonds or your shells could crack.
  10. Transfer your mixture to a pastry bag fit with a 1/2-inch plain tip. Hold the bag upright about a half inch above the center of one of the traced circles and pipe out enough of the mixture to fill in the circle. Lift away the pastry bag and repeat, filling the remaining circles on the first pan.
  11. Next (and this is important!) Lift up the sheet pan and firmly (but not too hard) tap the bottom of the pan to the spread the batter evenly and smooth any peaks left by the pastry bag (there will be some, and if that doesn’t make them go away, wet your fingertip and tap them down).
  12. If you are using a convection oven, which I recommend, bake the shells for 8 to 10 minutes. You want to cook them until the tops are shiny and crisp. If you are using a standard oven, place the sheet pan in the oven and then immediately lower the oven temperature to 325°F, and bake for 9 to 12 minutes, again, until the tops are shiny and crisp.
  13. Set the pan on a cooling rack, and if using a standard oven, preheat it to 350°F again.
  14. Pipe the remaining meringue mixture into the circles on the second sheet pan and bake as directed above. Let cool completely.
  15. Pipe a buttercream (or ganache) filling onto one half of the shells and pair them with a matching half. Be gentle when sandwiching them together, you could accidentally smush them.
Notes
Please don’t try to convert this recipe to volume. Just get a scale and weigh. You will be happy that you did. You will need a candy thermometer. Again, this isn’t really optional if you want success. Finally, don’t skip the tracing out of circles step. It makes it so much easier to get consistently sized cookies. Which makes matching them up easy peasy.
3.2.1337


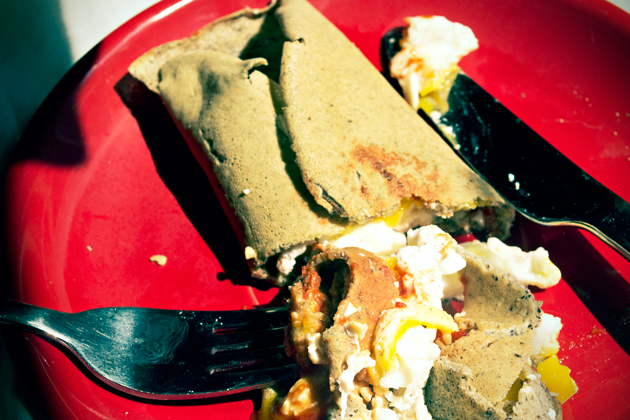
savory buckwheat crepe with poached egg, chevre and home made ketchup

Buckweat Crepes

buckwheat crepe with blueberry syrupMy friend, Sabina and I met under awkward circumstances. She was hired to do the job I was doing as temp to hire. When the other french speaker in the office and I first met her, we thought she had been brought in to speak spanish. I really wanted to hate her. But she was sweet, and funny. And, she spoke french.

We spent lunches speaking in french so no one could understand us complaining about our boss. French words would slip into our English conversations and vice versa. She is also the one who gave Blondie his nickname. It was at lunch one day and the name just kind of stuck.

One sunday afternoon, when we were no longer working together, we decided to meet up for crepes at this little creperie in the suburbs. It is a fantastic little place, and if you ever have reason to be in that part of the Chicago suburbs, you should go.

But they have a gluten-free menu. And they make crepes from buckwheat. I found out while talking to the chef that the buckwheat isn’t a strange ingredient in Brittany, it is actually a traditional way to make a savory crepe.

savory buckwheat crepe with poached egg, chevre and home made ketchup

Sabina ordered her crepe complete, and I had mine with ratatouille. Then we had a dessert version with Nutella. The earthy, nutty flavor of the buckwheat stood up to the complex flavors of the savory fillings and was complemented by the nutty chocolate of the Nutella.

I had to make them for myself because even when I go to visit Blondie, the creperie is a bit of a drive.


I made some galletes de sarrasin for breakfast this morning and filled them with a poached egg, chevre and some home-made ketchup. Then I had a second with blueberry ginger syrup. It was a good Sunday.

Galettes de Sarrasin – Buckwheat Crepes
#ratingval# from #reviews# reviews
Print
Recipe Type: Breakfast
Author: Mary Fran Wiley
Prep time: 5 mins
Cook time: 30 mins
Total time: 35 mins
Serves: 6
These crepes have an earthy and nutty flavor.
Ingredients
  • 120 grams (1 cup) buckwheat flour
  • 3 eggs, lightly beaten
  • 1 ½ cups water
  • teaspoon salt
Instructions
  1. Combine the eggs and water and then add the flour and salt. Make sure everything is well mixed.
  2. Cover and let rest for at least 1 hour. (I put mine in the fridge over night).
  3. Heat a small skillet over high heat. You want the pan very hot.
  4. Once the pan is hot, add a small amount of butter (a thin slice) to the pan. Once it is melted, take a paper towel and swirl the butter around. (You can use tongs to hold the paper)
  5. Lower the heat to medium-high. Pour about 1/6 cup of batter and tilt the pan to coat the bottom with the batter. You need to move quickly to do this.
  6. Cook the crepe for 1-2 minutes. Once the shine is gone from the batter being wet, it is ready to flip.
  7. Cook for an additional minute or so on the second side.
  8. Stack the crepes on a plate in a warm oven until you are ready to serve.
Notes

Add a teaspoon of sugar if you want to make sweet crepes. If you don’t like that strong of a buckwheat flavor, you can swap out some of the buckwheat for sorghum or brown rice flour.
If you have extra, you can freeze them on a cookie sheet for about half an hour and then stack them in freezer bags. You will then be able to eat them one at a time.

Google Recipe View Microformatting by Easy Recipe
1.2.4


Gluten Free French Lemon Cake

GF French Lemon Cake

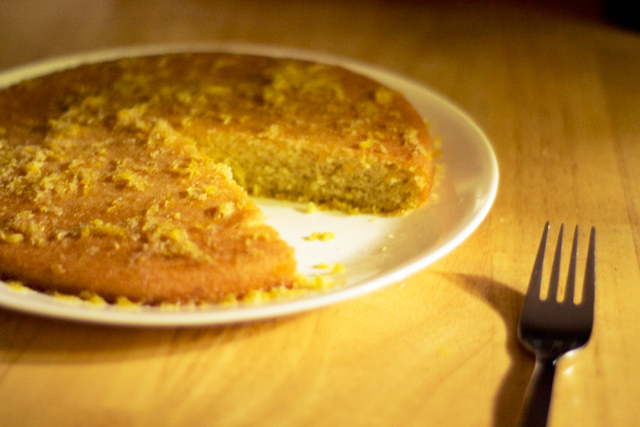
Gluten Free French Lemon Cake with lemon rum syrupWe had a cooking unit in my high school french class and everyone was given a more or less traditional French food to cook. I had to make this lemon cake.
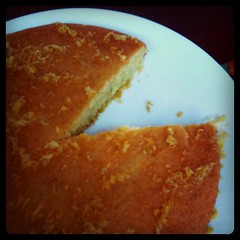
A year later, in college, I had my dad find the recipe, type it up and email it to me so that I could impress the other girls in the dorm. In European fashion, it was by weight and I definitely made it by eyeballing it.

Lemon cake for Bastille day Two years ago, I went back to the yahoo email address I used back then to find it, but I didn’t make it – this whole gluten-free baking thing was a bit too scary for me.

I dug it out yesterday because today is Bastille day and a French treat was in order.

It is a bright, lemony cake with a delicate crumb. There is absolutely no need for any gums or even flax in this cake – you want it to disintegrate into lemony goodness  in your mouth.


GF French Lemon Cake with Lemon Rum Glaze
#ratingval# from #reviews# reviews
Print
Recipe Type: Dessert
Author: Mary Fran Wiley
Prep time: 10 mins
Cook time: 20 mins
Total time: 30 mins
Serves: 8
The original recipe was given to me as a handout in my high school French class by Mme. Czarnecki. I have made it gluten-free and changed a few things to make it even better than the original.
Ingredients
  • 150 grams (3/4 cup) sugar, divided (75 grams for the cake, 75 for the syrup)
  • 2 eggs
  • 4 tablespoons (60 grams/ 1/2 stick) VERY soft butter
  • 5 grams (1 teaspoon) baking powder
  • 30 grams (1/4 cup) sweet white sorghum flour
  • 30 grams (1/3 cup) brown rice flour
  • 30 grams (1/3 cup) sweet white rice flour
  • 30 grams (1/4 cup) tapioca starch
  • 5 grams (1 Tablespoon) ground flax
  • 1/4 teaspoon salt
  • 5 lemons (3 zests for cake, 2 zests and juice from 3 lemons in syrup)
  • 3/8 cup (6 Tablespoons) dark rum
Instructions
  1. Preheat oven to 350 degrees.
  2. Place eggs & half the sugar (75 grams or 3/8 cup) sugar in the bowl of a mixer and beat for about 30 seconds.
  3. Add the butter, flours, baking powder, salt and zest from 3 of the lemons.
  4. Mix well. The batter should be thick and look creamy.
  5. Pour into a greased 8 or 9 inch round pan. Bake for 15-20 minutes.
  6. While cake is baking, combine remaining sugar (75 grams or 3/8 cup), the juice of 3 lemons and the rum in a sauce pan. Bring to a simmer and stir regularly while the cake is baking.
  7. Remove cake from oven and let cool for 5 minutes.
  8. Invert over a cake plate and pour syrup over cake while still warm.
  9. If you can wait, the lemon flavor will intensify over night, but the cake can be enjoyed immediately.
Notes

You can replace all flours with 1 cup GF all-purpose flour, such as Jules’ Nearly Normal Flour.

You cannot make this cake without the rum. In high school we used rum extract because of laws and such, but with real rum it is 1,000 times better.

Google Recipe View Microformatting by Easy Recipe
1.2.4


chocolate rice pudding | riz au chocolat

Chocolate Rice Pudding

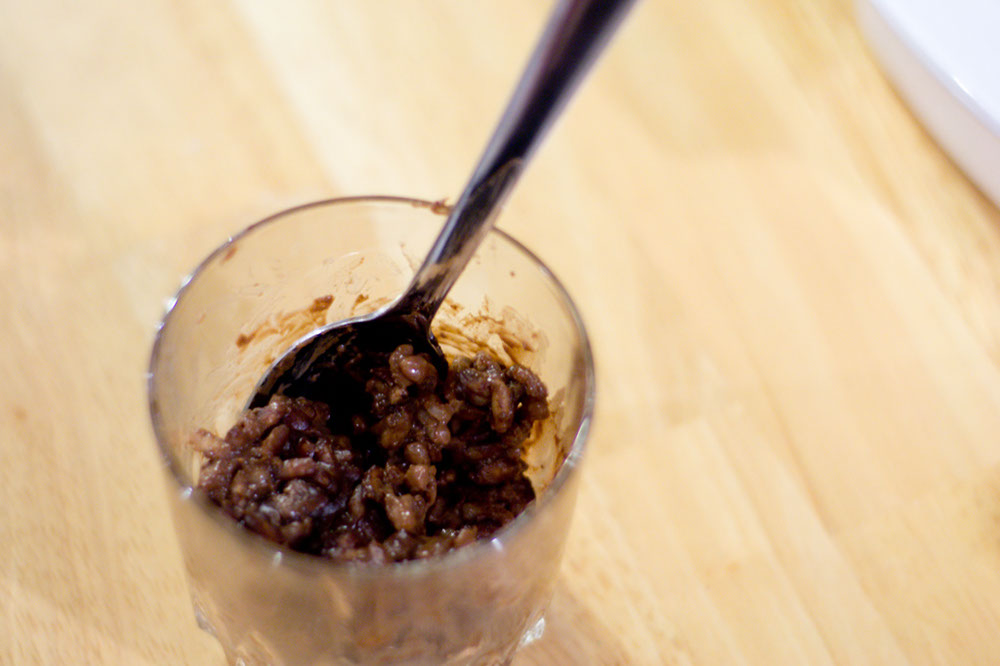
chocolate rice pudding | riz au chocolatApparently, today was National Chocolate Pudding day. I wish I had known before 4 o’clock today, or I would have invented the most amazing chocolate pudding that you had ever eaten. But, as is frequently the case, when I need it, I was out of milk, eggs and butter. But I could not let the day go with out celebration.
I remembered a post from Joy the Baker from earlier this week where she made a risotto rice pudding. The method was perfect for the ingredients that I had in my fridge after 4 days away. The risotto rice lets off a lot of starch, so there is no need for eggs or flour to make a creamy pudding. It is simple, easy and almost cathartic to make.

(After some googling, I found that chocolate rice pudding is a traditional French dessert, I no longer feel super creative).

Chocolate Rice Pudding
#ratingval# from #reviews# reviews
Print
Recipe Type: Dessert
Author: Mary Fran Wiley
Prep time: 5 mins
Cook time: 35 mins
Total time: 40 mins
Serves: 6
A delicious chocolate and rice pudding.
Ingredients
  • 1 cup arborio or sushi rice
  • 2 tablespoons
  • 3 cups milk (non-dairy works fine)
  • 1/2 cup (3 oz) roughly chopped bitter sweet chocolate
  • 1 teaspoon vanilla extract
  • salt
Instructions
  1. Heat the milk in a medium sauce pan.
  2. In a second pan, saute the rice in the oil over medium-low heat for about 2 minutes. The rice will become translucent.
  3. Slowly add the milk a little at a time, waiting until the previous milk is almost absorbed. Stir constantly. This process is similar to making risotto and takes about 30 minutes.
  4. Once the milk is absorbed, add the chocolate, vanilla and salt.
  5. Keep stirring for about 5 more minutes.
Notes

If you use regular milk (or an unsweetened variety of non-dairy milk), you will most likely need to add sugar. Between 1/8 & 1/4 cups should be plenty. Add this in at the end with the chocolate, vanilla and salt.

Google Recipe View Microformatting by Easy Recipe
1.2.4


Socca Gluten Free Chickpea Crepe

Socca with sage brown butter

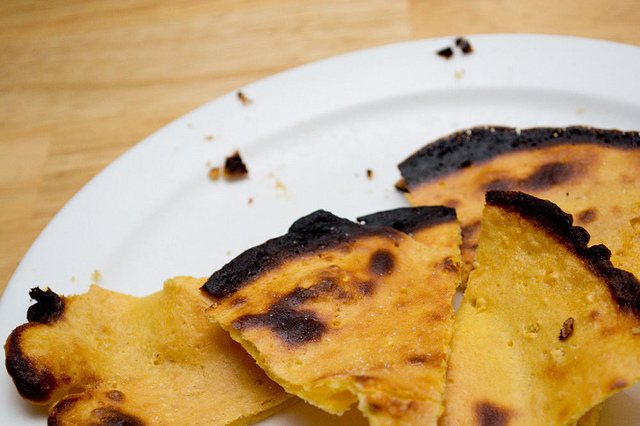
Socca Gluten Free Chickpea CrepeThis is winning. Crunchy & creamy. Smoky & herby. A giant plate of yum. And it is fairly healthy, naturally gluten free and French. Maybe it is good because it is French (call it Farinata or Popodum and it just isn’t going to be as delicious). And, it is healthy. The whole recipe has about 1200 calories (until you add the butter) and makes about 6 servings.

Somehow when I was in Nice I didn’t eat this. I didn’t learn what this was until last summer and I didn’t make it for the first time until February. And then I let the chickpea flour hide in the back of my cabinet until I found it during my spring cleaning.

Socca cut in squaresNow, I know some purists will tell you to eat it plain. And that is all fair and good. The flavor of the chickpeas stands out. Have a glass of white wine and munch on this on your porch while chatting away with an old friend. The next time you make it, have it for dinner with sage brown butter. Or hummus. Or feta and roasted peppers. If you can’t have beans (I’m looking at you, Dad), make it with quinoa or millet flour. Maybe even buckwheat. Skillet crepes. From the oven. Smoky. Crispy. Simple.

Oh, and make sure you use the French name, Socca. You will sound sophisticated that way.

Socca with sage brown butter
#ratingval# from #reviews# reviews
Print
Recipe Type: Side
Author: Mary Fran Wiley
Prep time: 5 mins
Cook time: 40 mins
Total time: 45 mins
Serves: 6
This is a traditional Provencal (or Italian) dish. This is the result of experimenting with various methods and seasoning. I took a cue from David Lebovitz and added cumin.
Ingredients
  • 250g (2 cups) Chickpea (garbanzo/gram/besan) flour.
  • 2 – 2 1/2 cups water
  • 1/4 teaspoon cumin
  • 1/4 teaspoon salt
  • 1 tablespoon + 4 tablespoons olive oil
  • Sea salt for topping
  • 4 tablespoons butter
  • 2 tablespoons chopped fresh sage
Instructions
  1. Whisk together chickpea flour, 2 cups of water, salt, cumin and 1 tablespoon of the olive oil until smooth. If the batter is too thick, add more water.
  2. Heat oven to 500 degrees farenheit with rack as high as it will go.
  3. Put 1 tablespoon olive oil in a seasoned cast iron skillet and heat in the oven for 5 minutes.
  4. Once skillet is hot, remove it from the oven and pour in about 1 cup of the batter.
  5. Put it in the oven and turn the temperature to broil (high broil if your oven has it). After about 5 minutes, the socca will be dry around the edges and will have started to blister and get dark in places. Remove it from the oven, it should come right out. If it still stuck, give it a few more minutes.
  6. Repeat this step until each socca is cooked. Sprinkle cooked socca with sea salt.
  7. Once socca are cooked, melt butter in a heavy bottomed skillet. Add sage once melted. Cook until the butter is turning brown and smells fragrant and nutty.
  8. Drizzle over socca when served.
Notes

Your batter should be pretty thin, if it is too thick, add more water. You want it to be about the consistency of crepe batter, maybe a little thinner.

Be creative here, the gluten isn’t what holds these together, so any strongly flavored, whole grain flour should work. Also, you can add herbs directly to the batter if you would like.

Google Recipe View Microformatting by Easy Recipe
1.2.4