Home » gluten free » Page 6

Tag: gluten free

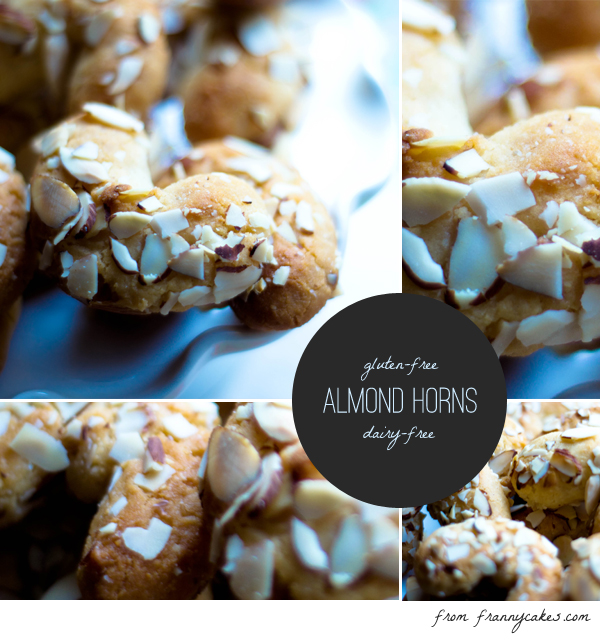
gluten free almond horns (they are also dairy free!)

Some days are hard and you just want a cookie (a recipe for gluten-free almond horns)

Do you ever have a day like that? When the whole world seems determined to get you. I have these cookies for you if you ever have a bad day. Chewy, and delightfully crunchy, these are a traditional pastry that are naturally gluten & dairy free (but be careful, some people put flour in theirs, so always ask if someone brings them to you…)

Read more

Wednesday Wisdom: Making Your Own Gluten-Free Flours

One thing is true about living gluten-free, it can get expensive. Especially if you’re a baker. You can easily pick up a store bought cake mix or whip up some cookies out of a box (which will set you back $5 per package, at least), but sometimes it’s fun to play, to experiment, to create from scratch.

But gluten-free, specialty flours are also costly. Luckily, with one, cheap little kitchen appliance, you can whip up your own gluten-free flours in no time. All you need is a (clean) coffee grinder.

It’s true that some flours are best store bought (or milled using a grain mill for a finer texture – think brown rice, sorghum, coconut), but for others, you can simply grind them up in a coffee grinder and bam, you’ve got flour. My favorite homemade flours are: quinoa, millet and amaranth.

The process is simple. Add these grains (or seeds in quinoa’s case), either raw or toasted (which I highly recommend for quinoa to remove its bitter taste) to your coffee grinder, grinding until you have a fine, flour like powder. Now, depending on your grinder, you may need to sift the flour to remove the coarse grains, but the result will be an effortlessly, light, homemade gluten-free flour. Easy-peasy and budget friendly!

Alyssa is the quinoa-obsessed girl behind the gluten-free blog, Queen of Quinoa. Check her out at: www.queenofquinoa.me or connect with her on: Facebook | Twitter | | Pinterest

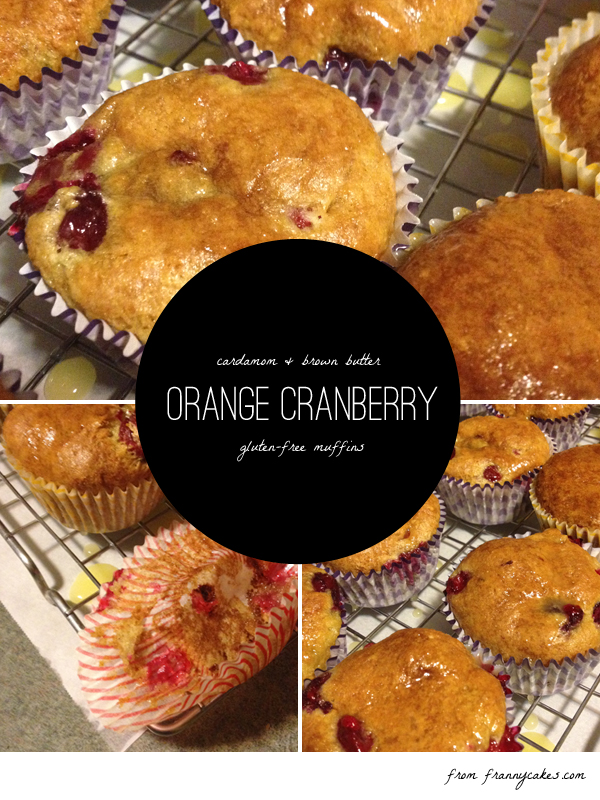
gluten free orange cranberry muffins

Gluten-free cranberry orange muffins

gluten free orange cranberry muffinsThere really is no excuse for using cranberries and oranges in the heat of summer.

They are most decidedly winter fruits. And it is technically still summer. Technically.

But the kids are back in school, and white pants are out of season. So it is almost ok. If I lived in Australia, it would be the perfect time of year for these.

You see, I might have mentioned that I wanted to make some orange cardamom muffins. Something light & citrusy for my 2 hour commute to and from work. Nothing fancy pants, just good, bright flavors.

Well, someone heard orange cranberry rather than orange cardamom, and pulled a bag of cranberries out of the freezer for me. It didn’t register that they weren’t out for something Mamacakes was baking until they were completely thawed. It was a use or waste situation.

So, I decided to layer some flavors. Brown butter. Orange. Cranberry. Cardamom.

These might be my new favorite muffins. Oh, and the extra bonus part? No mixer required.

Cranberry Orange Gluten-Free Muffins with Cardamom and Brown Butter
#ratingval# from #reviews# reviews
Print
Recipe Type: Breakfast
Author: Mary Fran Wiley
Prep time: 15 mins
Cook time: 20 mins
Total time: 35 mins
Serves: 12
These were inspired by Joy the Baker’s [url =”http://joythebaker.com/2009/07/browned-butter-blueberry-muffins/”]Browned Butter Blueberry Muffins[/url]. But these are better (sorry Joy!) because they are gluten-free and they are cranberry-orange.
Ingredients
  • 100 grams (7 tablespoons) unsalted butter
  • 1/3 cup orange juice
  • 1 large egg
  • 1 large egg yolk
  • 1 teaspoon vanilla extract
  • 1 teaspoon orange extract (if you have it, if not it is ok to leave this out)
  • 210 grams (1 1/2 cups) gluten-free all purpose flour*
  • 150 grams (3/4 cup) sugar
  • 1 1/2 teaspoons baking powder
  • 1/2 teaspoon baking soda
  • 3/4 teaspoon salt
  • 1 teaspoon cardamom
  • 150 grams (2 cups) fresh or froze then thawed cranberries
  • for the glaze
  • 1/2 cup orange juice
  • 115 grams (1 cup) powdered sugar
Instructions
  1. Preheat the oven to 375 degrees with a rack in the upper third of the oven.
  2. Line a cupcake tin with paper liners.
  3. In a small sauce pan over medium heat, melt the butter and keep cooking until it starts to brown on the bottom, stirring frequently. You will notice the butter starts to smell nutty. It is a pretty quick turn from brown to burnt once the butter starts to brown, so watch it carefully. Once it is golden brown, remove it from the heat.
  4. Whisk together the juice, egg, egg yolk, vanilla extract and orange extract (if using).
  5. In a separate bowl (a medium sized mixing bowl is perfect), whisk together the gluten-free all purpose flour, sugar, baking powder, baking soda, salt and cardamom.
  6. Add the juice mixture and the butter to the flour and stir until combined. Then, stir in the cranberries.
  7. Divide evenly into your muffin tin (I used a large ice cream scoop and got 16 muffins rather than 12).
  8. Bake for 18-20 minutes, they are done when a toothpick inserted into the center comes out clean.
  9. Cool in the tin for 15 minutes.
  10. Remove from the tin and move to a metal cooling rack that is sitting on top of parchment or newspaper.
  11. Whisk together the orange juice and powdered sugar, spoon it onto the warm muffins. Some will spill over, and that is ok.
Notes

*Personally, my favorite gluten-free all purpose blend is the [url href=”http://cup4cup.com/”]Cup4Cup[/url] available from Williams-Sonoma. You could also use Jules’ Nearly Normal Flour, Better Batter or the King Arthur Flour Gluten-Free blend. A bean based flour will not work in these muffins.

2.2.8


Wednesday Wisdom: Nutrition Deficiencies on a Gluten-Free Diet

Once you’ve started on your gluten-free diet and have it under control, it’s important to be aware of deficiencies you are at risk for by eliminating gluten from your diet.  Any time you remove a whole food group from your diet, it can leave you at risk for missing out on proper nutrients typically obtained from that food. Items that contain gluten (wheat, barley, and rye) are important for their fiber and other nutrients.

Getting adequate fiber in the diet is essential for multiple of reasons, including maintaining regular bowel movements, prevention of colon cancers, sustaining low cholesterol levels, managing your weight, and supporting a diverse and thriving community of good bacteria in your gut. These beneficial bacteria manufacture vitamins, help protect you from foodborne illness, and stimulate the production of immune cells that boost your resistance to other infections.

Many gluten-rich foods are fortified with other nutrients such as folic acid, iron, vitamin D, calcium, zinc, magnesium, and other B vitamins. These nutrients are essential for energy production, nervous system function, proper growth of a fetus during pregnancy, red blood cell production and oxygenation of blood cells, bone strength, metabolic support, and immune function.

Your physician can monitor your levels of these nutrients with blood work and supplements can help when needed. Just remember to eat a variety of items especially your fruits, vegetables, nuts (almonds are awesome), and lean meats to make up for losses from fortified gluten-rich foods. To replace the gluten items, use fiber-rich foods that are naturally gluten-free such as sweet potatoes, quinoa, brown rice, certified gluten-free oats, beans, and fun items like popcorn! You can even add seeds such as chia, pumpkin, flax and sunflower to add fiber, flavor and some healthy omegas.

Wednesday Wisdom: Getting Started on a Gluten-Free Diet

When people ask me how to go about starting a gluten-free diet, I always tell them to keep it simple. My favorite foods are naturally gluten free—fruits and vegetables, rice, beans, nuts, seeds, seafood and poultry—foods that don’t require a label. Packaged products are fine occasionally, but you need to be a diligent label reader. Even the most minimally processed foods can contain gluten.


Ideally, home cooking should be part of every gluten-free lifestyle. When you cook, you know exactly what’s on your plate and what’s going in your body. Try one new recipe a week to build up your repertoire. There are plenty of gluten-free bloggers and cookbook authors out there ready to help!

Laura is the “Gluten Freedom” columnist for the Oregonian and author of The Gluten-Free Asian Kitchen. Find her blog, “Notes from a Gluten-Free Kitchen”, at http://www.laurabrussell.com/

gluten free raspberry filled chocolate cupcakes

Remarkable life. Whiz-bang cupcakes.

I’ve spent a lot of time doing what is expected.

Playing it safe.

Being nice.

I always thought that I was nice. And that I should be nice. I thought that it was exactly right. Recently, someone told me that they didnt think nice was the right word to describe me. Someone else said that I was better when I wasn’t being nice.

So.

I am going to not be nice. Since that isn’t the right word anyway. And since it is kind of a dirty word, let’s not use it any more.

Nice. Passionate. Caring. Full of heart. Those are better words.

They describe the person I am. The person I want to be. The journey I am on.

I am going to make mistakes. Say things I shouldn’t. Do things that I might think better of later.

I am going to keep listening to the silly pop music that makes me happy. I am owning my Spice Girls ringtone (oh yes, I totally rock that). So, call me. Maybe?

I am going to use my heart more than my head. I want to see where it is going to take me.
your feet will bring you to where your heart is... positive 13

I am going to stop and smell the flowers, particularly when they are left in the bathroom in a public place.

I want to do things. See things. Make things. Change things.

I am going to do as much as I can. Some things I should, some I shouldn’t.

I don’t want a small life. In any way. I want to be epic. (Kind of like my summer has been).

I am going to keep making cupcakes. The kind with real sugar, and butter and eggs. I’ve said it before, cupcakes are therapy. And don’t you forget it. And I am going to keep feeding them to others so that I can maintain my girlish figure.

Speaking of that girlish figure, I am going to keep swimming when I can. Walk when it is possible and not beat myself up over the size of my pants.

I am going to be silly and splurge on crazy shoes (YOLO!). Be it shoes with red bottoms because, frankly, if you don’t buy them today, tomorrow you will have a much more practical use for that money or shoes with 5″ heels because that seems sensible. I am going to make no apologies for getting something that makes me happy.

I am going to go on dates with boys. I might end up kissing a few frogs (the world tells me this is going to happen). Maybe I’ll get a prince (the world says I should dream about this moment). Maybe I already did. Maybe I messed that up. Maybe I didn’t.

Maybe one day, my hair will be pink. And maybe I’ll get a tattoo.

I am going to live. Live passionately & fully. Be optimistic. Be a dreamer. Make no apologies for anything. Be me.
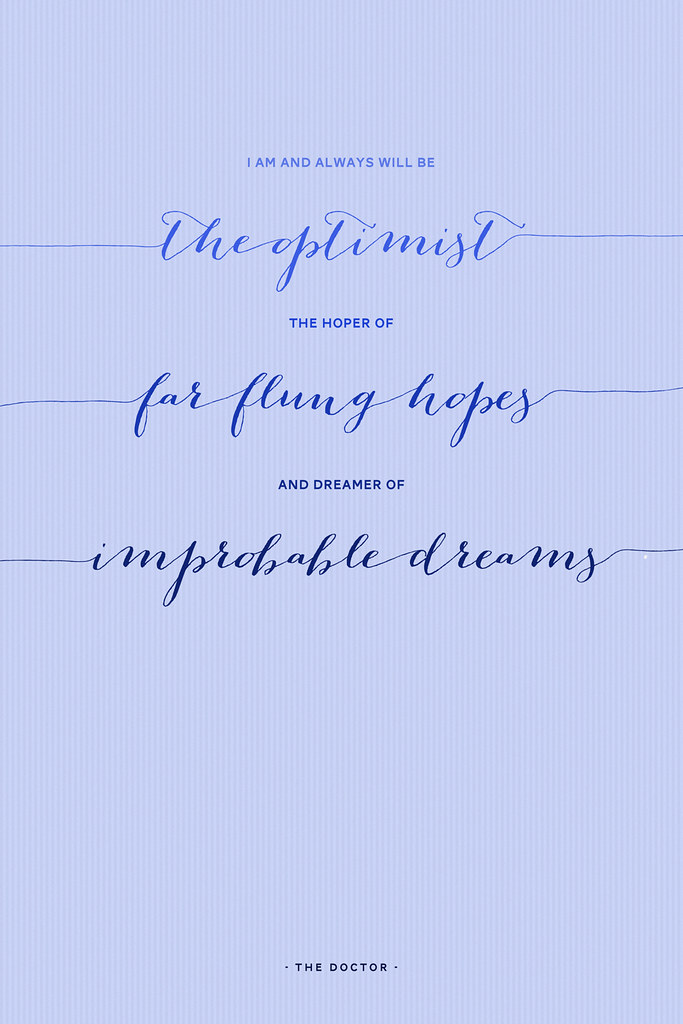
I will always be the optimist. Positive #18

What I am most definitely not going to do is be nice. I am not going to apologize for being me. I am not going to do something just to make someone feel better. I am not going to cave or change just to make someone happy. I’ve done that plenty. It isn’t who I really am, or even who I want to be.

Here’s to being more than nice. Here’s to living more than just a nice life. Here’s to good things.

Before I get to the cupcakes I know you want, I want to make sure that you know about Leggings Solidarity Day! I am asking everyone I know to wear leggings, tights, shorts, skirts – (mostly leggings though!) in support of invisible illness awareness. (You know, since I have a kind of major one). Also, if you haven’t seen it, the quotes pulled in from above are from a personal design project of mine. Making posters with positive thoughts. If you have any suggestions for positive quotes, email them to me!

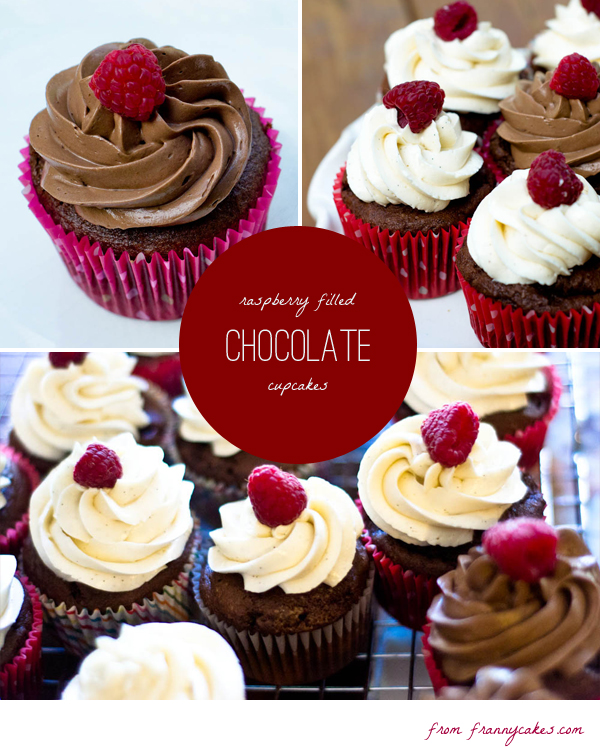
gluten free raspberry filled chocolate cupcakes

The Whiz-Bang Cupcakes

(Or cupcakes to make an impression). These cupcakes were epic. Well, that’s what I told Dan they were. He asked for something chocolate and fruity. They took about 6 hours from start to finish (with lots of resting, showering an cleaning mixed in). Dan has had both my cupcakes and Mammacakes’ cupcakes. I had to make them extra special.

Chocolate cupcakes. Filled with a tart raspberry jam. Topped with two kinds of merengue buttercream and finished off with a fresh raspberry. This is what I call winning.

Gluten-free chocolate cupcakes with raspberry and swiss merengue buttercream
#ratingval# from #reviews# reviews
Print
Recipe Type: Dessert
Author: Mary Fran Wiley
Prep time: 90 mins
Cook time: 20 mins
Total time: 1 hour 50 mins
Serves: 30
The cake part of the recipe is adapted from Perfect All-American Chocolate Butter Cake from The Cake Bible by Rose Levy Beranbaum.
Ingredients
  • For the cupcakes
  • 63 grams cocoa (1/2 cup + 3 tablespoons)
  • 1 cup boiling water
  • 3 large eggs
  • 1 tablespoon vanilla
  • 235 grams (2 1/4 cups plus 2 tablespoons) GF AP flour*
  • 300 grams (1 1/2 cups) granulated sugar
  • 15 grams (1 tablespoon) baking powder
  • 5 grams (3/4 teaspoon) salt
  • 227 grams (12 tablespoons) butter, softened.
  • For the Frosting
  • 8 large egg whites (30g each–total 225g, or 1 cup)**
  • 400 grams (2 cups) granulated sugar
  • 560 grams (5 sticks) of unsalted butter, softened but cool, cut into cubes
  • 30 ml (2 tablespoons) pure vanilla extract
  • 1/4 tsp salt
  • 300 grams (about 1 1/2 cups of discs) high quality chocolate
  • 1 tablespoon vanilla bean paste
  • For Assembly
  • 1/2 pint jar of raspberry jam or preserves
  • 30 fresh raspberries
Instructions
  1. Preheat the oven to 350 degrees Fahrenheit. Prepare the cupcake tins with papers & grease the tops.
  2. In a medium bowl, whisk together the boiling water and cocoa til smooth. Let sit for a couple minutes to come to room temperature.
  3. In a second bowl, lightly beat together the eggs, 1/4 of the cocoa mixture and the vanilla.
  4. In the bowl of a stand mixer, combine the flour, sugar, baking powder and salt and stir on low to combine.
  5. Add butter and the remaining cocoa mixture and mix on low speed until all ingredients are moistend. Increase speed to medium for a minute and a half to develop structure.
  6. Scrape down the sides of the bowl and add the cocoa & egg mixture in 3 batches, beating for about 30 seonds after each addition.
  7. Use a scoop and fill the tins 1/2-2/3 full. You should end up with exactly 30 cupcakes.
  8. Bake for 20-25 minutes. The cake should spring back when lightly pressed, or a toothpick inserted into the center should come out clean.
  9. Cool in the pans for about 5 minutes, and then move to a cooling rack until completely cool.
For the frosting
  1. While the cupcakes are baking, make the frosting. If this process intimidates you, Sweet Apolita made a pretty [url href=”http://sweetapolita.com/2011/04/swiss-meringue-buttercream-demystified/”]sweet tutorial[/url].
  2. Combine the egg whites and sugar in a small pot until they reach 140 degrees fahrenheit.
  3. Transfer to a clean stand mixer bowl. Using the whisk attachment, beat until light and fluffy (soft peaks).
  4. Switch to the paddle attachment and add the butter one chunk at a time until it is all combined.
  5. Remove half of the frosting and set aside. Melt the chocolate in the micorwave on half power, heating it first for 30 seconds, and then in 15 second intervals after that, always stirring after each burst of heat. Let the chocolate cool a wee bit – you don’t want it hot so that it melts the butter, and then add it to half your frosting.
  6. Set this frosting aside. Add the vanilla bean paste to the reserved half of the frosting.
Assemble
  1. When the cupcakes are cool, remove the cupcake centers (I used a cupcake corer), and pipe in the raspberry filling. Replace the cupcake tops.
  2. Pipe the frosting on the cupcakes – I did half of the cupcakes in chocolate, half in vanilla, but you can get creative and use both on each cupcake if you want.
Notes

*I prefer Cup4Cup as a pre-made blend. Please don’t use a bean based flour.
**You can use the pasteurized whites if you prefer, since you cook the eggs anyways, but it will be slightly less fluffy.

2.2.8

This post is linked to Slightly Indulgent Tuesday on Simply Sugar & Gluten Free.


Ratio Rally: Angel Food Cake

This post is part of the Gluten-Free Ratio Rally, a group of gluten-free bloggers inspired and empowered by Ruhlman‘s Ratio and started by Shauna at Gluten-Free Girl. We get together each month and post many different takes on the same theme. This month that theme is Gluten-Free Angel Food Cake and the rally is being hosted by Caleigh from Gluten Free[k].

Today is about finding and celebrating joy.

Because it is here. In every day. Even when it hurts to put on real pants. And some days, I need to remind myself of it.

Joy is seeing art exhibits and taking tours in French of the Art Institute with my aunt.

finding joy in the little things

Joy is my cat telling me it is time to go to bed by sitting on my chest so I can no longer see the computer screen. And then refusing to move until i go to sleep.

Joy is how I feel when I step of the train in the Loop and the promise of a good day is hanging in the air.

Joy is a hug sent via email from a friend on the opposite side of the world. And a phone call from that same friend at exactly the wrong time because someone can’t do math.

This is what I am focusing on today.

And sometimes, all you need is a little cake to bring it to you.

The ratio

3 parts egg whites: 3 parts sugar: 1 part flour (the lighter the better).

Not going to lie, I love angel food cake. And there is a recipe that we have used often in our house – one that is gluten free just because it is. The one from the back of the Swan’s Down Potato Starch. It is quite lovely, and it means, dear readers, that this is a fairly flexible cake. Add cocoa or ground chocolate in place of some of the flour for a chocolate cake. Use potato starch or arrowroot because that is what you happen to have. You will still end up with a magical, light cake.

Well, as long as you resist the urge to brush the warm cake with the earl grey syrup. Because I did not. And I melted my cake. And I know better. At least it still tastes good.

The flavors

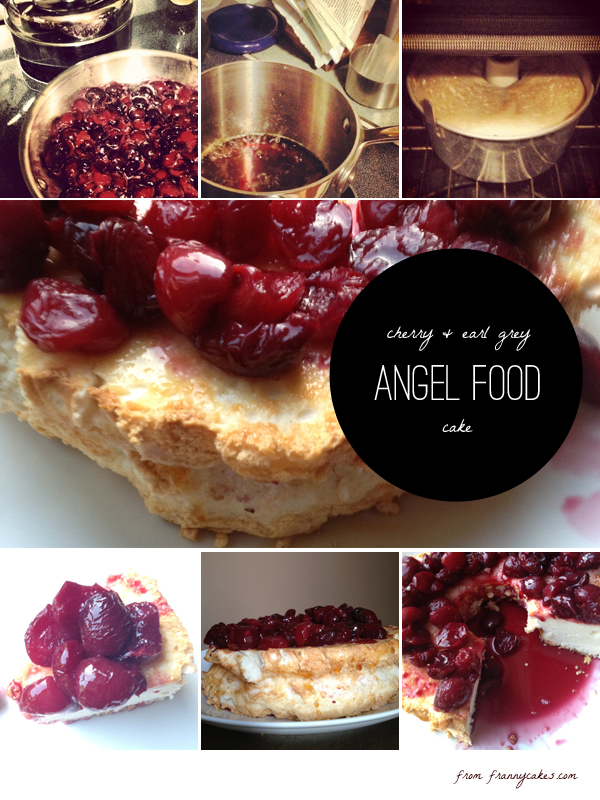
Rainier cherries pan roasted with cointreau. Earl grey syrup. Orange extract in the cake. I would say, dear friends, that this is one sophisticated cake. The cointreau and the orange extract in the cake help pull the bergamot flavors to the forefront in the tea syrup. The tea itself gives a complex background for the oh-so-sweet cherries.

I whole heartedly suggest that you try the cake with all of these components. Sure, the cake on its own with fresh berries and home made whipped cream would be a perfectly simple dessert. But this my friends, is a rockstar dessert.

This is not your mom’s tired angel food cake.

This is not the Styrofoam textured cake that you can buy at the grocery store (yes, the filled with gluten kind).

This is a melt-in-your-mouth cake. A curl your toes with delight cake. This is the cake you want to make when you are trying to impress someone with your mad skills but can’t pipe frosting for the life of you. Or if you think you aren’t an accomplished baker.

[toggle title_open=”The others!” title_closed=”See the other posts from this month’s rally” hide=”yes” border=”yes” style=”default” excerpt_length=”0″ read_more_text=”Read More” read_less_text=”Read Less” include_excerpt_html=”no”]The others

Adina | Gluten Free Travelette made Cacao Spice Angel Food Cake
Angela | Angela’s Kitchen made Grilled Lemon Angel Food Cake with Lemon Curd and Berries
Aunt Mae | Honey From Flinty Rocks made  Angel Food Cake with Lemon Glaze
Caleigh | Gluten Free[k] made Almond Angel Food Stars
Caneel | Mama Me Gluten Free made Angel Food Cake “Pudding” with Fresh Cherry Sauce
Charissa | Zest Bakery Saffron Angel Food Cake (and didn’t post a link!)
gretchen | kumquat made caramel macchiato angel food cake
Heather | Discovering the Extraordinary Coconut Lime Angel Food Cake Roll
Jonathan | The Canary Files made Lavender Angel Food Cupcakes
Pete & Kelli | No Gluten, No Problem made Caramel Peach Angel Food Cake
TR | No One Likes Crumbley Cookies made Peach Angel Food Cake

[/toggle]
Gluten Free Angel Food Cake with Early Grey & Cherries
#ratingval# from #reviews# reviews
Print
Recipe Type: Dessert
Author: Mary Fran Wiley
Prep time: 20 mins
Cook time: 50 mins
Total time: 1 hour 10 mins
Serves: 12
Make just the cake, or make it with all the components. Either way you will have an excellent cake.
Ingredients
  • Syrup
  • 1 cup boiling water
  • 3 earl grey tea bags
  • 200 grams (1 cup) sugar
  • Cake
  • 350 grams (1 3/4 cup) granulated sugar, divided
  • 175 grams (1 1/4 cup) gluten-free all purpose flour*
  • 350 grams (12) egg whites
  • 1 teaspoon cream of tartar
  • 1 tablespoon lemon juice
  • 1/4 teaspoon salt
  • 1 teaspoon vanilla
  • 1 teaspoon orange extract
  • Cherry topping
  • 450 grams (1 pound) Rainier or other sweet red cherry, pitted and halved
  • 1/4 cup cointreau
  • 1 tablespoon turbinado sugar (or regular sugar if that is all you have)
  • 1/4 teaspoon salt
Instructions
Make the tea
  1. Steep the tea in the boiling water and let sit while you make the batter.
Make the batter
  1. Preheat oven to 350 degrees fahrenheit. Whisk together the flour and half the sugar, set aside.
  2. In the bowl of a stand mixer, whip the egg whites until foamy, about a minute.
  3. Add the the remaining sugar, cream of tartar, lemon juice, salt, vanilla and orange extract to the egg whites.
  4. Increase the speed to medium-high, and beat until soft peaks form.
  5. Now is the time that requires a little patience, fold in the flour/sugar combo 1/3 at a time. You want to make sure that you do not deflate the mixture too much.
  6. Pour batter into a 9 or 10″ tube pan and bake for 30-50 mins. You want a tester inserted into the middle of the cake to come out clean.
Make the syrup
  1. Remove the teabags from the tea. In a small saucepan over medium heat, bring the strong tea and sugar to a boil. Let boil for 5 minutes (you want to end up with about a cup of syrup.
Make the cherries
  1. While the cake is baking, and the syrup is cooking (you do not need to stir it), combine cherries, half the cointreau, the sugar and the salt in a large skillet.
  2. Cook over medium heat until the cherries start to soften. Pour in the remaining cointreau to deglaze the pan and keep cooking until the sauce thickens back up. Stop cooking before the cherries turn to mush.
Assemble
  1. Let the cake cool in the pan on a wire rack for an hour and a half. Resist the urge to brush it with the syrup until it is cool.
  2. When cool, poke some holes in the bottom of the cake and brush with the syrup.
  3. Remove cake from pan, poke the top with holes and brush with syrup again.
  4. Top with cherries and serve. Amaze your friends.
Notes

*If you want to use potato starch or arrowroot, please go by weight and not by volume. You will end up with a little more volume wise.
**If you just want a plain cake, skip the orange extract and replace it with vanilla.

2.2.8


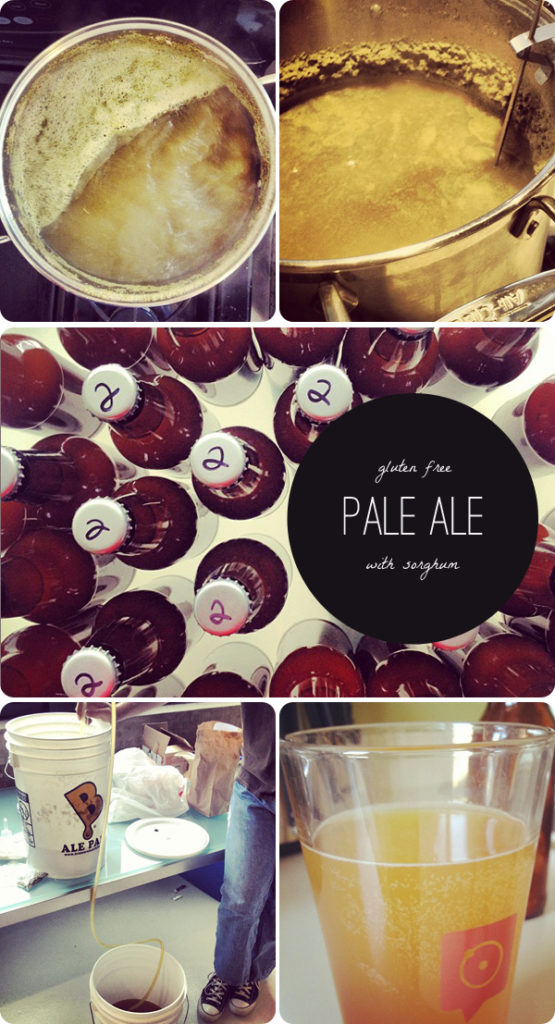
gluten free pale ale | gluten free beer

Prost! Brewing Gluten-Free Beer

It has been a mighty emotional week. I almost feel lighter not having my secret be secret any more.

Next time I tell someone I am recharging, the won’t think that I am laying in a bubble bath with a glass of wine or getting a massage. (Man, I would be so spoiled if that’s what “recharging” meant for me). And my coworkers all know that I am a cyborg. So at least that is sorted.

I feel a little bit freer.

I might have struggled a bit keeping my pain secret, but I don’t know why I was scared to tell the people I work with. Because these people are downright awesome. (And we are hiring an awesome person to join our team).

Read more