Home » Food » Recipes » Page 6

Category: Recipes

gluten-free stuffing for friendsgiving with udi's gluten-free bread

Friendsgiving + Gluten-free Mushroom Stuffing

Udi’s Gluten-Free graciously provided a box of goodies for this year’s friendsgiving celebration.

Friendsgiving is a pretty awesome holiday. Like Thanksgiving, it usually involves a traditional set of dishes like a turkey, cranberry sauce (complete with a debate over whether or not you slice the kind from a can) and stuffing.

gluten-free stuffing at friendsgiving 2013

It also includes the added bonus of being celebrated with the people you choose to involve in your life, not just the ones that are lucky enough to be your family. Often we do not spend holidays with the people we let in to our lives from outside our families, and Friendsgiving is the perfect time to do this.

There is no stress about who makes better stuffing (um, me!) or if you deviated from the family pumpkin pie recipe. There is plenty of laughter and maybe even a few drinks. A lot of fun and ridiculous stories.

This year, I brought a gluten-free mushroom stuffing, my famous apple & sage gluten-free stuffing and some pretty spectacular gluten-free cupcakes. Mostly, I wanted to eat stuffing. (I would argue that it is the best part of any Thanksgiving feast). So, I have to make it. Then I know that it is gluten-free and safe for me to eat.

(Although, this year my friends were pretty great. Someone bought gluten-free animal crackers and someone else made sure the chips & dips were safe for me to enjoy).

gluten-free stuffing recipe

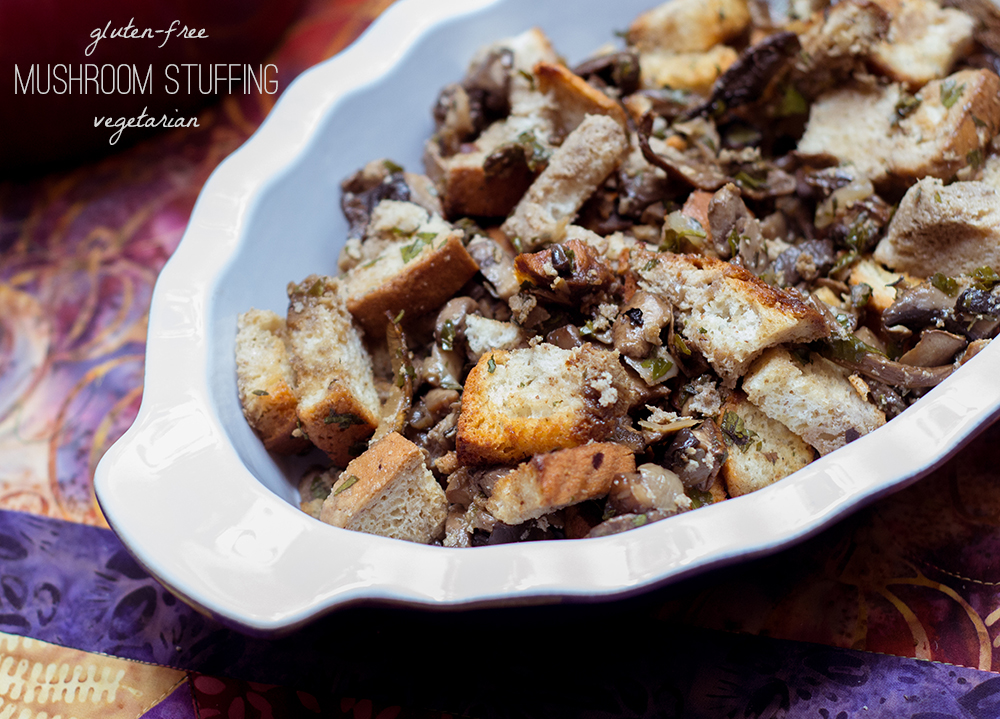
This gluten-free stuffing recipe happens to be vegetarian, but that doesn’t mean it is lacking in the flavor department. A healthy dose of fresh thyme and parsley along with a variety of mushrooms ensure a complex flavor that will satisfy meat eaters and vegetarians alike (as long as you don’t actually stuff it in the bird). Mushrooms + turkey = a match made in heaven. Mushrooms + corn casserole + cranberry sauce = happy vegetarian guests. Mushrooms + gluten-free bread = happy gluten-free you!

This recipe is perfect with Udi’s Gluten-free Multi-Grain bread. It is best if you freeze the bread overnight, as this makes dicing the bread easier. If you don’t have time to freeze the loaf, just tear the slices to keep from smashing the bread.

Gluten-free Mushroom Stuffing
Recipe Type: Side
Cuisine: American
Author: Mary Fran Wiley
Prep time: 20 mins
Cook time: 45 mins
Total time: 1 hour 5 mins
Serves: 12
This recipe was adapted from one in the November/December 2011 Jamie Magazine. We have made it at 2 Christmas dinners, 2 Friendsgivings and 1 Thanksgiving. It has become a family standby – it isn’t even in a magazine anymore. That’s how you know it’s good – it is now just a page clipped and saved in a binder.
Ingredients
  • 1 ounce (30 grams) dried porcini mushrooms
  • 1 1/4 cups (300 ml) boiling water
  • 4 tablespoons (60 ml) olive oil
  • 2 shallots, finely chopped
  • 4 garlic cloves, minced
  • 1 loaf [url href=”http://udisglutenfree.com/products/whole-grain-bread/”]Udi’s Gluten-Free Multi-Grain Bread[/url], frozen over-night if you can*
  • 2-8 ounce packages (about 450 grams) white, crimini or similar mushrooms, roughly chopped
  • 1-8 ounce package portobello mushrooms, roughly chopped
  • A small bunch of (10-12 stems) thyme, leaves picked and stems discarded
  • 3 bay leaves
  • 1/2 bunch of parsley, leaves picked and chopped, stems discarded
Instructions
  1. Pour the boiling water over the dried mushrooms and set aside.
  2. Grease an 11×13 baking dish with olive oil.
  3. Dice the loaf of bread and set aside.
  4. In a large skillet, over medium heat, heat the olive oil. Add the shallot and garlic and cook until translucent and soft, but not yet golden (about 5 minutes).
  5. Drain the porcini, reserving the soaking liquid, and add them along with the other mushrooms, bay leaves and thyme to the skillet. Cook until the mushrooms are softened. At this point, if you are cooking ahead, stop. You want to assemble the stuffing right before putting it in the oven.
  6. Preheat the oven to 350 degrees (if your oven is a little hotter because of other dishes, you can adjust the baking time). While the oven heats, let the mushrooms cool slightly. Remove the bay leaves.
  7. Strain the reserved soaking liquid to remove any grit from the dried mushrooms.
  8. Stir together the mushrooms, the diced gluten-free bread and the parsley. Spread evenly in the baking dish.
  9. Pour the reserved soaking liquid slowly & evenly over the stuffing. You want to moisten the stuffing but not soak it. You may not need all of it (although I always have).
  10. Cover the dish with foil and bake for 35 minutes covered. Remove the foil and bake for an additional 10-15 minutes. You want the bread to start looking nice and golden brown.
Notes
*Freezing the bread makes it easier to cube. If you are using room-temperature bread, it will smush less if you tear it.[br]For added crunch, you can stir in some chopped pecans, hazelnuts or walnuts before baking.
3.2.2124


Gluten-Free Warm Autumn Salad | FrannyCakes

Gluten-Free Warm Autumn Salad

I really don’t know how pumpkin became the official squash of Fall. Is it because it is the orangest? Because it was voted most likely to have a kooky face carved into its side? Is it because that’s what Cinderella’s castle was made from? There was hold over from a little bibbity-bobbity-boo?

Pumpkin isn’t the only squash in town, even if it does have some lingering magic power. (Like the power to make the entire world go bananas for a latte that can be ordered with just three letters).

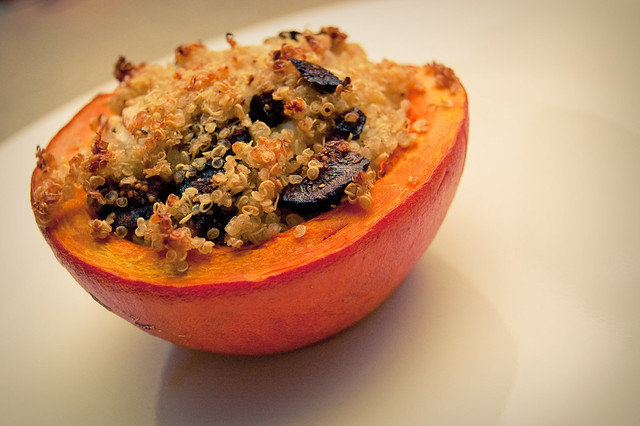
Kuri Squash with Quinoa, Fennel & Fig
(I even stuffed one of those “other” squash back in the day before I wrote FrannyCakes…)

There are kuri squash and spaghetti squash. Butternut and buttercup squash. Delicata and fairytale pumpkin. And so very many more.

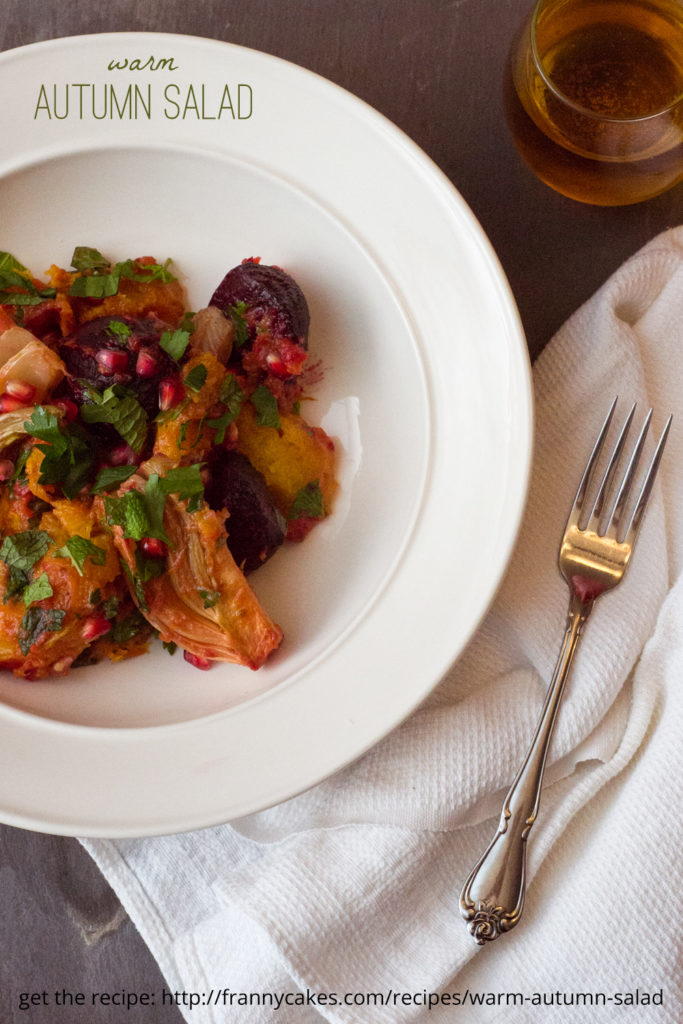
Warm Autumn Salad with Acorn Squash, Beets, Fennel and Pomegranate | Gluten-free, Dairy-Free, Vegan | via FrannyCakes.com

Today, I bring you the humble acorn squash. A green-skinned squash with a yellow-orange flesh, Acorn squash is indigenous to North America and keeps well for several months (so grab some at your local pumpkin farm while the getting is good). It belongs to the same species as zucchini, which makes it more related to summer squashes, even if it is considered a winter squash itself.

This recipe highlights the delicate sweet flavors of the squash, the earthy flavor of the beets and the spice of the fennel. The flavors pop with the addition of pomegranate arils and some fresh herbs.

Warm Autumn Salad with Acorn Squash, Beets, Fennel and Pomegranate | Gluten-free, Dairy-Free, Vegan | via FrannyCakes.com

Gluten-Free Warm Autumn Salad
Recipe Type: Salad
Author: Mary Fran Wiley
Prep time: 15 mins
Cook time: 40 mins
Total time: 55 mins
Serves: 4
This recipe, adapted from Jamie Magazine, is gluten-free, dairy-free and vegan. It is packed full of seasonal flavors and is a perfect sort of comfort food – hearty and healthy.
Ingredients
  • salad
  • 1 acorn squash
  • 4 beets
  • 1 red onion
  • 2 fennel bulbs
  • 2 tsp coriander seeds (1 tsp if all you have is ground)
  • 1 small bunch of mint, leaves picked
  • 1/2 bunch of flat leaf parsley, leaves picked
  • 1 pomegranate
  • 5oz (1 1/4 cups) feta cheese (optional)
  • dressing
  • 2 tbsp red wine vinegar
  • 6 tbsp extra virgin olive oil
  • 1 tsp dijon mustard
Instructions
  1. Preheat the oven to 375 degrees Fahrenheit.
  2. Cut the acorn squash in half and save the seeds to roast later (like pumpkin seeds). Cut each half into quarters, use a sharp knife to peel the pieces away from their skin and arrange in a roasting tray or sheet pan lined with parchment.
  3. Peel beets with a vegetable peeler and halve (small ones) or quarter (large ones) them. You want your pieces of beet to all be about the same size. Place them in the roasting tray. Cut the onion into sixths and tuck between the other vegetables. Remove the fronds from the fennel (if they came with it) and cut each bulb into sixths. Spread around the roasting tray. Drizzle the vegetables with a little olive oil.
  4. Use a mortar and pestle to crush the coriander with a good pinch (1/4-1/2 teaspoon) sea salt and black pepper. Sprinkle over the vegetables and toss to coat.
  5. Roast for about 40 minutes, tossing the vegetables about halfway through. The onions and fennel should be soft and golden and just starting to caramelize. The beets should be easily pierced with a fork. Remove from the oven and allow to cool slightly.
  6. Meanwhile, make the dressing. Combine all the ingredients in a jar with an airtight lid and shake until well mixed.
  7. Toss dressing, roasted vegetables, mint, parsley, pomegranate and feta (if using) to serve.
3.2.2124


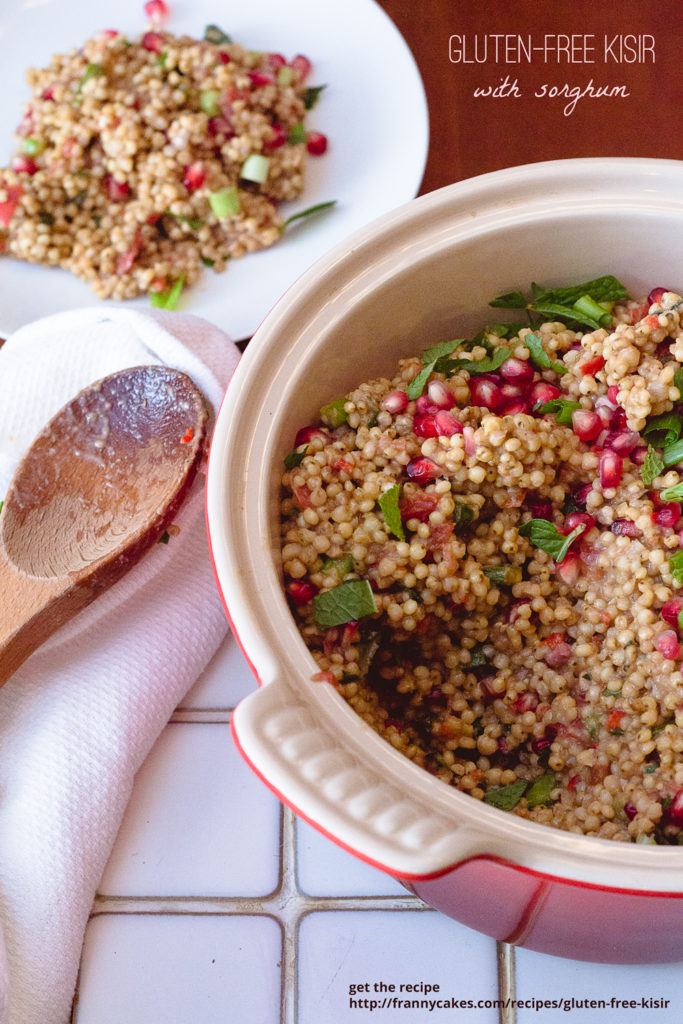
gluten-free kisir with sorghum from frannycakes

Gluten-Free Kisir with Sorghum

There are a couple of very awesome things about this blog post. First, it is pomegranate season and I can get my hands on the fruit at nearly every grocery store and they aren’t going to break the bank. Heck, even Walgreens has fresh pomegranate arils next to the Naked juices and RedBull.

Second, I finally found an excuse to make whole-grain sorghum. Don’t get me wrong, I love me some quinoa on the regular, and rice is a staple in these parts, but sometimes you really need to try something new.

gluten-free kisir with sorghum from frannycakes

When I went gluten-free 8 years ago, it was a nerve-wracking, difficult process. There were so many foods with crazy names – back then quinoa wasn’t a culinary buzzword and no one had any idea how to pronounce it. And if you didn’t have a Whole Foods or an ethnic grocery store nearby, you were not going to find it.

But those foods are now routine and ordinary in my diet. I eat buckwheat soba noodles and black bean spaghetti. I get annoyed when Whole Foods tells me they can’t find a local grower of kohlrabi.

Gah. Something happened to me. I became adventurous when it came to safe foods just so that things stay interesting. Which brings me to sorghum. I have used “sweet” sorghum in my gluten-free baking for a few years now. In flour form it isn’t gritty like rice flour or strongly flavored like teff, amaranth or quinoa flours. So, when I stumbled across this bag of whole grain sorghum when I was grocery shopping, I just had to buy it.

I am told the chewy texture is similar to wheat berries or faro, so it is great for salads. It has a mild nutty flavor but none of the bitterness of quinoa. It works well as a substitute for bulgur/cracked wheat in this recipe, and I suspect it would be equally as delicious in other similar dishes.

gluten-free kisir with sorghum from frannycakes

Combine the nutty sorghum with fresh herbs and pomegranates and you have a delightful salad that is delicious both warm and cold. A perfect dish for in-season pomegranates (yay!) and the wild roller coaster that is a Chicago fall…

Gluten-Free Kisir
Author: Mary Fran Wiley
Prep time: 5 mins
Cook time: 1 hour 15 mins
Total time: 1 hour 20 mins
Serves: 6
Kisir is a Turkish dish typically made from bulgur or cracked wheat, parsley and pomegranate molasses. I made this salad gluten-free by using pearled whole-grain sorghum in place of the bulgur. Sorghum has a texture similar to wheat berries which makes it an excellent choice for this salad. The mild, slightly earthy flavor is the closest of the gluten-free grains in flavor to wheat. The salad can be eaten warm or cold and makes for an excellent alternative to a sandwich for lunch. The time on this recipe looks like a lot, but if you put the grain on to cook and leave the prepping of the rest of ingredients until just before the sorghum is done cooking, you really only have about 15 minutes of active time total. This recipe is adapted from the October 2013 issue of Jamie magazine.
Ingredients
  • 500 grams (3 cups) dry, pearled sorghum*
  • 9 cups water
  • 2 tablespoons pomegranate molasses
  • 1 small, sweet pepper or 1/2 of a large sweet pepper, pureed or finely minced**
  • 1/2 red jalapeño pureed or finely minced**
  • 1 tablespoon tahini
  • 1 heaped teaspoon cumin
  • 1 heaped teaspoon black pepper
  • 1 garlic clove, minced
  • 1 pomegranate, seeds removed
  • 2 tomatoes roughly chopped (about 1/2 inch pieces)
  • 1 cucumber chopped in 1/2 inch dice
  • 1 bunch green onions finely sliced
  • 1 bunch mint, leaves picked and chopped
  • 1 small handful flat-leaf parsley, leaves picked and chopped
Instructions
  1. In a large saucepan over medium-high heat combine the water and the sorghum. Generously salt the water (2 large pinches of sea salt is perfect) and bring the pot to a boil. Once boiling, reduce the heat to maintain a simmer and cover the pot leaving the lid slightly askew. Cook the grains for 55-60 minutes.
  2. About 15 minutes before your sorghum is cooked, chop your vegetables and herbs.
  3. When your sorghum is cooked and the water is mostly absorbed- it will be chewier than quinoa or rice – drain any excess water (if there is more than a couple of tablespoons).
  4. Add the pomegranate molasses, sweet pepper, jalapeño, tahini, cumin, black pepper and garlic to the cooked sorghum. Stir for about 10 minutes, making sure that everything is combined well and that the grain is absorbing the flavors.
  5. Now, add about 3/4 of each of the following: pomegranate seeds, tomatoes, cucumber, green onions, mint and parsley. Stir until you have an even distribution.
  6. Use the remaining herbs and vegetables as a garnish when you transfer the salad to a serving dish.
Notes
* Bob’s Red Mill has recently started selling [url href=”http://www.bobsredmill.com/Gluten-Free-Sorghum-Grain.html”]whole grain sorghum[/url] as part of their Grains of Discovery line. I found it at my local whole foods, but you can also get it from a number of online stores such as Amazon and Vitacost.[br][br]** I just finely minced the peppers. It was easier than pureeing them and the dish works just fine that way.
3.2.2124


how to sculpt fondant roses

Rose Cupcake Toppers

how to sculpt fondant roses

Does Pinterest get you too? I swear, every time I log in I find some beautiful cake or cupcake that I wish I had the skill to make. I dream about all the intricate piping I would do if I could get my hands to obey. The fondant sculptures I would make if I had a reason.

Well, I think I looked at one too many rose-adorned baked goods, and I might have gotten a wee bit obsessed.

It happens, though, right? Pinterest tricks us into trying things we normally wouldn’t.

I caved to their evil master plan and tried something that was just a little bit out there.

(And no, I am not referring to the Doctor Who/ fez cupcakes I made last month even though “fezzes are cool.“)

Today, I went and made a whole assortment of roses. And then I made cupcakes to put them on.

yellow rose

Embrace your inner child’s love of playdough and sugar, and you will be in the right mindset to make these roses.

So, you want to make the roses

All of the steps are written out below the image, but I wanted to give you a good overview of what was happening at each stage. You don’t need any fancy tools – you could just use your fingers, a rolling pin and a round cookie cutter, but using some of the sculpting tools mentioned will make this process a lot easier. They can also be made with fondant or gum paste, but I used the Wilton dough for these.

How to make edible roses using Shape-N-Amaze or Fondant

  1. Warm up the Shape-N-Amaze (or fondant) by working it with your hands until it is pliable.
  2. Take a small amount of the dough (a #2 in the measuring tray), and roll it into a teardrop shape.
  3. Use a #11 size ball (about 2″) and roll it very thin – 1/16″.
  4. Cut out at least 5 (and up to 13) circles that are slightly larger than the teardrop you made in step one. The number of petals changes the size of the rose.
  5. Thin the top edges of the circles using the large, round sculpting tool.
  6. Start attaching the petals using a little water to help them stick. The bottom might get a little big, so roll it to be thinner and then pinch off the extra at the end.
  7. You can curl the edges of the petals on the outer round to open up the flower and give it a more realistic look.
  8. These will last for several months – so it is perfectly ok to make them up ahead of time.

See? They are pretty easy to make – unlike 90% of the projects you find on Pinterest.

A giveaway

[box type=”info”]While Wilton provided the giveaway for this post, they did not sponsor the post or provide additional compensation. I asked them for product to giveaway after trying it out myself. [/box]

I first got to try the Shape-N-Amaze at BlogHer this summer when Wilton invited me to a fun event at their headquarters. When I was there, they double checked the gluten-free status of the dough. (They track 27 different allergens at Wilton and their customer service is always happy to answer questions about their products).

shape-n-amaze owl

a Rafflecopter giveaway


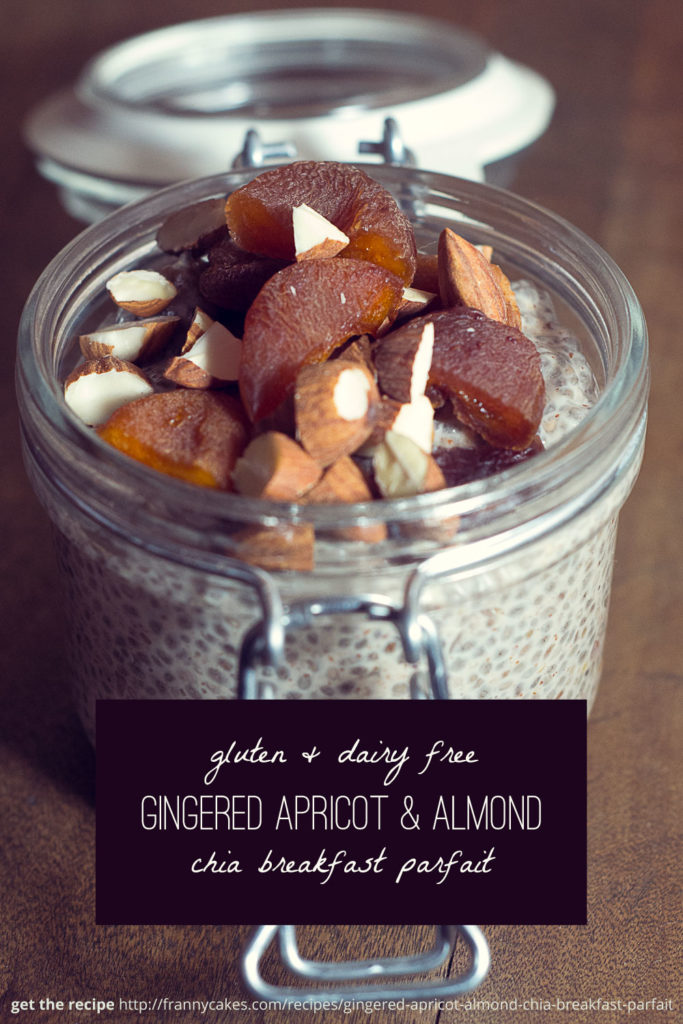
gingered apricot almond chia pudding | gluten free, dairy free, vegan | from frannycakes

Gingered Apricot & Almond Chia Breakfast Parfait

gingered apricot almond chia pudding | gluten free, dairy free, vegan | from frannycakes
I am the opposite of a morning person and I have the Starbucks habit to prove it. They say breakfast is the most important meal of the day. That you should eat breakfast like a king, lunch like a prince and dinner like a pauper.

And we all know my penchant for fruity pebbles. And gluten-free doughnuts. And Iced Dirty Soy Chais (my favorite barista calls it a dirty hippie). And, while I don’t suffer from sad desk lunches, I definitely eat sad desk breakfast. A bowl of cereal or granola at my desk while I try to get through my second (or third) cup of coffee.

Those might be some terrible morning habits. Talk about a double crash at 10am. You can do better than that. I can do better than that. Let’s make a pact. Real breakfast.

But we can pretend that it is something else. Like a parfait. A superfood power parfait. I think I could definitely live like this. Plus, the chia seeds give me omega-3s. The ginger is anti-inflammatory. Healthy fats in the almonds help fuel your brain.

Here’s to (almost) desert for breakfast. And for getting the morning started right.

Gingered Apricot & Almond Chia Breakfast Parfait
Recipe Type: Breakfast
Author: Mary Fran Wiley
Prep time: 5 mins
Cook time: 2 hours
Total time: 2 hours 5 mins
Serves: 2
I might be hooked on this chia pudding business.
Ingredients
  • 1 cup unsweetened almond milk
  • 2 tablespoons almond butter
  • 1 1/2 tablespoons agave nectar
  • 1/8 teaspoon fresh ground ginger
  • pinch of salt
  • 3 tablespoons chia seeds
  • 35 grams (1/4 cup) chopped, dried apricots
  • A handful of dried apricots and roughly chopped or slivered almonds to garnish
Instructions
  1. Whisk together the almond milk, almond butter, agave, ginger and salt so that it is smooth.
  2. Stir in the chia seeds and dried apricots. Chill for about 2 hours, shaking every half hour or so to make sure the chia seeds don’t clump together.
  3. Top with dried apricots and almonds to serve.
3.2.2124


a recipe for mini gluten-free boston cream pies by frannycakes

Mini Gluten-Free Boston Cream Pies

I really think that my coworkers are trying to stump me when it comes to making them birthday treats. Pulling whatever kind of flavor they can out of their heads to see if I really can do it. I mean, we had gluten-free peanut butter & jelly cupcakes and gluten-free double chocolate peanut butter cupcakes this summer.

learn to make gluten free boston cream pie on frannycakes.com

This time the request was for Boston Cream Pie Cupcakes – something that was actually a bit more traditional and a little less out there.

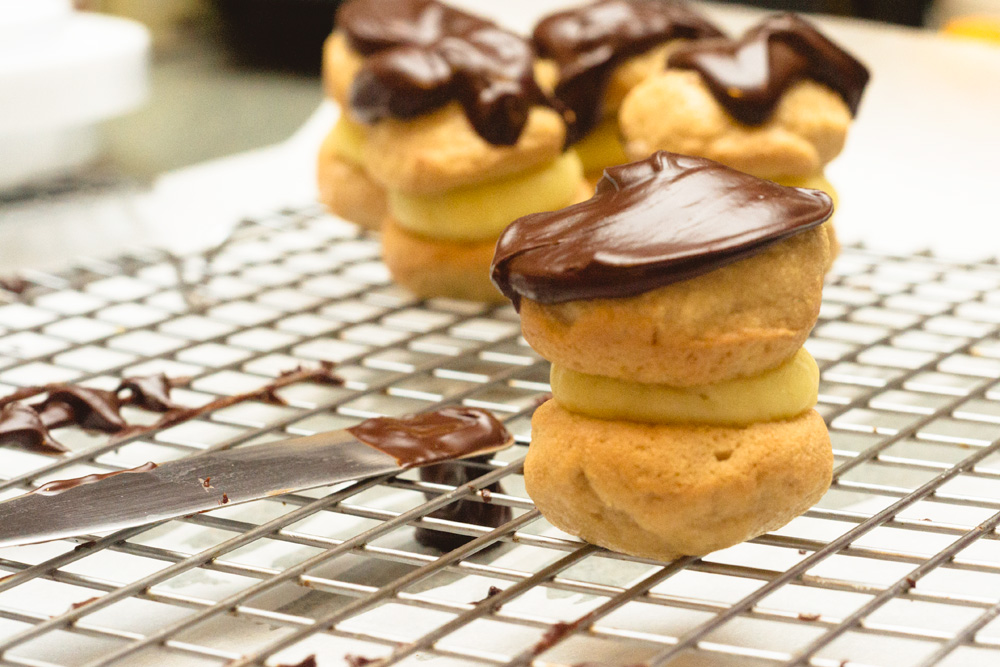
I decided that I was bored with the core & fill kind of cupcake, so I went a different route with these – I used a mini whoopie pie pan to make the cake pieces and then piped in some filling and poured on a thick glaze. And ended up with two-bite treats that were all gone before lunch.

chopped chocolate for chocolate glaze

The only caveat is that these do not transport well. If you try to take them on your 2-train 2-hour commute, they might just get a little banged up before you get them in to the office. (It won’t effect the flavor, but it might bruise your ego a wee bit). If these need to make a trip, I would bring all the components and assemble on-site. It takes about 10 minutes to combine all the parts into lovely little gluten-free boston cream (whoopie) pies.

a recipe for mini gluten-free boston cream pies by frannycakes

Mini Gluten-Free Boston Cream Pies
Recipe Type: Dessert
Cuisine: American
Author: Mary Fran Wiley
Prep time: 45 mins
Cook time: 25 mins
Total time: 1 hour 10 mins
Serves: 24
These are fun, but don’t travel well, so assemble shortly before serving.
Ingredients
  • For the Cakes
  • 175g (1¼ cups) gluten-free cake flour (143g high-quality all-purpose gluten-free flour + 4 tablespoons (32g) cornstarch)*
  • ½ teaspoon xanthan gum (omit if your blend already contains it)
  • ½ teaspoon baking powder
  • ¼ teaspoon baking soda
  • ¼ teaspoon kosher salt
  • 109 grams (½ cup) packed light brown sugar
  • 28 grams (2 tablespoons) unsalted butter, melted and cooled
  • 24 grams (2 tablespoons) vegetable shortening, melted and cooled
  • 1 extra-large egg at room temperature, beaten
  • 1 teaspoon vanilla bean paste (or replace with equal volume pure vanilla extract)
  • ½ cup + 2 tablespoons buttermilk
  • For the pastry cream
  • 30 grams (1/4 cup) cornstarch
  • 150 grams (3/4 cup) sugar, divided
  • 2 cups milk (I don’t drink milk, so I almost always use almond milk) , divided
  • 4 egg yolks
  • 1 teaspoon vanilla bean paste
  • 2 tablespoons butter
  • pinch of salt
  • Chocolate Glaze
  • 130 grams (4.5 ounces) bittersweet chocolate, roughly chopped
  • 60 grams (4 tablespoons) butter
  • 1 tablespoon corn syrup
Instructions
  1. Preheat your oven to 325 degrees F and grease a mini whoopie pie pan.
  2. In a large bowl, place the flour, xanthan gum, baking powder, baking soda and salt and whisk to combine well.
  3. Whisk in the brown sugar, making sure you remove any lumps.
  4. Next, mix in the butter, shortening, egg and vanilla and make sure everything is well combined.
  5. Now, add the milk and vinegar, and mix again to combine well. You will have a batter that is somewhere between cake batter and cookie dough in consistency.
  6. Using a small scoop or you can pipe about as much as a large marble to each well of your whoopie pie pan.
  7. Bake on a center rack for 8-10 minutes, or until the cakes bounce back when pressed gently in the center. Remove from the oven and allow to cool in the pan for 10 minutes before transferring to a wire rack to cool completely. Repeat with the remaining batter.
Make the pastry cream
  1. Prepare an ice bath.
  2. In a small mixing bowl, combine ¼ cup sugar, egg yolks and the creamer (or ½ cup milk).
  3. In a medium sauce pan over medium heat, bring the remaining 1½ cups milk to a boil, stirring constantly.
  4. Remove from heat and add the hot milk to the egg mixture about a third at a time to temper the eggs. If you do this too fast you will end up with scrambled egg yolks and not a smooth cream.
  5. Return the pot to the stove and add the egg mixture. Over medium heat, keep whisking until the cream thickens and when you scrape the bottom of a pot, the cream does not close the gap immediately. Stir in the vanilla, salt and butter.
  6. Put the pot over your ice bath and stir every 5-10 mintues for about half an hour, or until the cream has cooled.
Make the glaze
  1. When you are ready to assemble the mini boston cream pies, melt together the chocolate, butter and corn syrup over low heat. If the mixture is not pourable, add an extra tablespoon of butter.
Assemble the cakes
  1. Pipe the pastry cream onto half of the cake pieces. Take one of the other cake pieces and top each one. Pour or spread chocolate glaze on each mini Boston cream pie.
Notes
*I use Cup4Cup Gluten-Free All-Purpose flour, and if you don’t have cornstarch, you can use it for the full amount called for here, the cakes will just be a little denser. This recipe will work with almost any GF AP Blend but it will not work with bean-flour based blends or baking mixes that contain baking powder or baking soda.
3.2.2124


gluten-free petits (fours) fleurs

*sponsored post* Cake Boss Baking Gluten-Free Petits-Fleurs

gluten-free petits (fours) fleurs[box type=”info”]This post is made possible by Cake Boss Baking. Sponsors like them help me offset the costs of maintaining the site. I only work with brands who I trust and would use in my kitchen with or without sponsorship.[/box]

Let’s take a break from our gluten-free cupcakes for a hot second. We all know they are pretty awesome. But we can do better. Or at least different. And you can still win any office food event without them. (Because we all know that office food events are a contest and contests are made for winning).

gluten-free almond genoise cakes with apricot glaze and poured fondant

I really love almond paste. I will eat almond paste straight from the can. Sugar and almonds. I mean, it is almost just an unbaked macaron, right? And marzipan. Candy made from almond paste and either rolled over a cake like fondant or shaped into little fruits. Macarons. Dacquoise. Almonds and fancy, high-fallutin’ pastry go hand in hand.

Like in petits fours.

Often a genoise with jelly filling and a marzipan or jelly glaze and poured fondant. Fussy little mini layer cakes. (Ok, a petit four can be any individual size treat, but the most common is the mini layer cake kind).

But we don’t want to be too fussy. So we’re going to use flower cakelette pans from Cake Boss Baking to make flowers. We’re going to call them fleurs because we want people to think we are fancy pants.

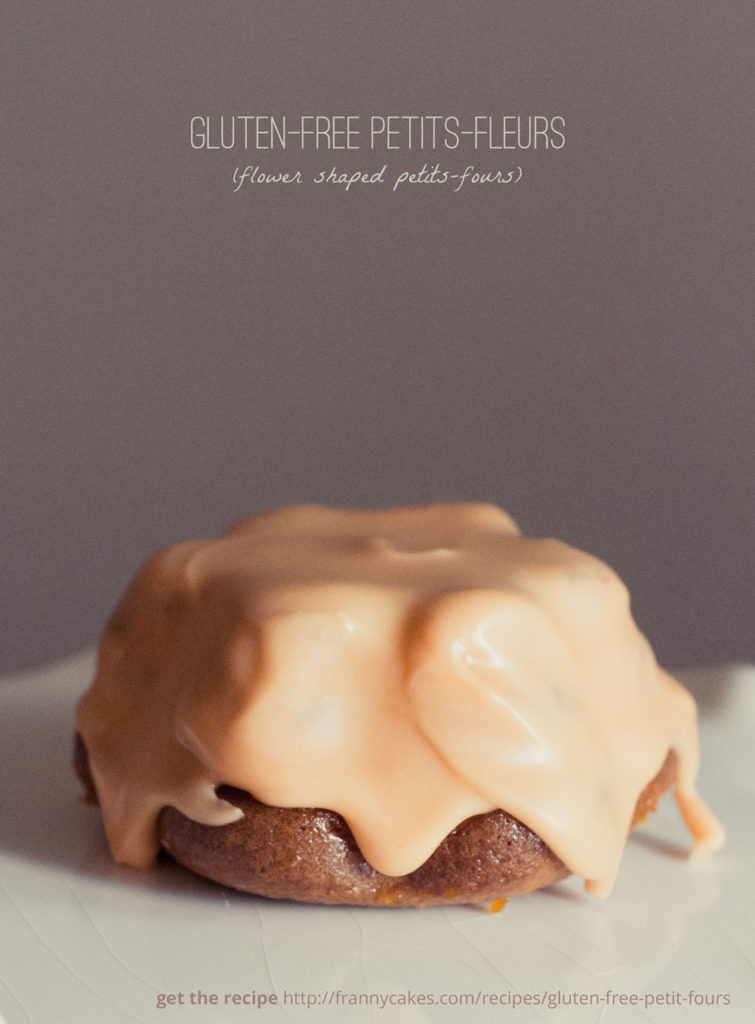
gluten-free petits (fours) fleurs: almond genoise, apricot glaze and poured fondant

We’re going to make a poured fondant. If you have a food processor, it is easy peasy. And there is none of the precision that piping buttercream rosettes required. It is dump & done.

You’ll end up with a lovely little set of cakelettes. The delicate flavor of almonds dances with the apricot and fondant. And they are light little cakes of delight.

And if you use this lovely little pan, your cakelettes will be little flowers, or petit-fleurs. The pan is non-stick and heavy duty – perfect for any kind of cake you can throw at it. (But this is clearly the best cake you can…)

win a cakelette pan from cake boss


A giveaway you say?

Fo sho! The folks over at Cake Boss Baking are giving away one of their Flower Cakelette Pans so you can make your own Gluten-Free Petits Fleurs.

Make sure you check out Cake Roulette this Saturday, Spetember 28, 2013 at your local Michael‘s store from 10-12 noon for a chance to win more prizes and get recipes from their team.
a Rafflecopter giveaway

It must be a Throwback Thursday!

Remember when I met Buddy? (aka the Cake Boss) I got a special sneak peek back at the Home & Housewares Show in Chicago. He was super gracious to stop for a photo.

I loved all the different items in the line, from the pans to the bowls and accoutrements (including some pretty clever spatulas that say things like “addicted to dessert”).

Gluten-Free Petits Fleurs
Recipe Type: Dessert
Cuisine: American
Author: Mary Fran Wiley
Prep time: 2 hours
Cook time: 25 mins
Total time: 2 hours 25 mins
Serves: 9
These are a play on a traditional petit four. Almonds, apricots and poured fondant make these gluten-free cakelettes cake both simple and elegant.
Ingredients
  • For the gluten-free cakelettes
  • 85 grams (6 tablespoons) unsalted butter, softened
  • 175 grams (1¼ cups) gluten-free cake flour (143g high-quality all-purpose gluten-free flour + 4 tablespoons (32g) cornstarch)
  • 4 grams (3/4 teaspoon) baking powder
  • 1 gram (1/4 teaspoon) baking soda
  • 1/4 teaspoon salt
  • 200 grams (1 cup) sugar
  • 130 grams (1/2 cup) almond paste**
  • 4 large eggs, separated
  • 1/2 teaspoon vanilla extract
  • 1/2 cup whole milk
  • Glaze
  • 1/2 cup apricot jam, melted
  • For the poured fondant
  • 500 grams (2 1/2 cups) sugar
  • 115 grams (1/3 cup) corn syrup
  • 1/2 cup (120 ml) water
  • 1/2 – 3/4 cup simple syrup (if you don’t have any, make your own with 1 cup sugar and 1/2 cup water brought to a boil and cooled.)
  • 1/2 teaspoon vanilla extract
  • Food coloring (optional)
Instructions
Start the fondant
  1. In a mall sauce pan, boil together the sugar, corn syrup and water until they hit 238 degrees Fahrenheit.
  2. Pour into the bowl of a food processor and let cool until the temperature drops to 140 degrees.
  3. Turn on the processor and blend until the mixture turns to a smooth, creamy white (about 2 minutes).
  4. Transfer to the bowl of a double boiler.
Bake the cakelettes
  1. Preheat oven to 350 degrees. Grease & flour your cakelette pan Sift flour, cornstarch, baking powder, baking soda, and salt into a large bowl; set aside.
  2. Put 3/4 cup sugar and the almond paste into the bowl of an electric mixer fitted with the paddle attachment. Mix on medium-low speed until mixture resembles coarse meal, about 2 minutes. Raise speed to medium-high. Add butter; mix until pale and fluffy, about 2 minutes. Mix in egg yolks and vanilla. Add flour mixture in 2 batches, alternating with the milk. Transfer to a large bowl; set aside.
  3. Put egg whites into the clean bowl of an electric mixer fitted with whisk attachment; beat on medium-high speed until foamy. Gradually add remaining 1/4 cup sugar, beating until soft peaks form. Fold one-third of egg-white mixture into batter with a rubber spatula. Gently fold in remaining egg-white mixture.
  4. Fill the cake wells 2/3 full (I used 2 scoops with a standard cupcake scoop). Bake for 20-25 minutes. Cakes should be a light golden brown and should spring back when tapped lightly or a cake tester should come out clean when inserted. Invert over a wire rack immediately. Re-grease the wells and fill with the remaining batter and bake as before.
Decorate the cakelettes
  1. When cakes are cool, heat the apricot jam and strain. Discard the chunks and brush the cakes with the sticky syrup. Place on wire racks over rimmed baking sheets and set in the freezer while you warm the fondant.
  2. Add 1/2 cup simple syrup to the fondant and heat over gentle heat. (You don’t want the temperature to get over 110 degrees Fahrenheit). Heat and add syrup extra simple syrup until the fondant becomes just pourable. It needs to be thin enough pour and drip down the sides. If it is too thick, it won’t look delicate and will instead be a gloopy mess.
  3. Add your vanilla and food coloring (if using).
  4. Remove your cakes from the freezer and pour the fondant over the cakes. If it does not pour easily, add a little more simple syrup and re-warm. You can use a spatula to nudge the fondant over the edges of the cakes.
  5. If desired, top with sprinkles or other decorations while the fondant is still warm. Let cakes cool before serving.
  6. Cakes will keep for about 3 days once covered.
Notes
*I use Cup4Cup gluten-free all-purpose flour, and you can just use it for the full amount, but the result with the added cornstarch will be a slightly lighter cake.[br]**Make sure your Almond Paste is gluten-free. Some brands are not.
3.2.2124


chai spiced chia pudding | gluten & dairy free | frannycakes

Chai Spice Chia Pudding

If there is one thing that I am terrible about it is breakfast. I am that person who keeps a box of Fruity Pebbles or Cinnamon Chex on her desk so that she can eat when she gets to the office because food any earlier than that is just not doable. Unless you call a double dirty soy chai with mocha breakfast. Because that is what I grab when I want something earlier in the day. Espresso + tea + spices = heaven.

This week’s goal is to eat a good, filling breakfast. One packed full of nutrition and vitamins (I am trying to take my doctor’s advice here…) and a little less in the empty calorie department.

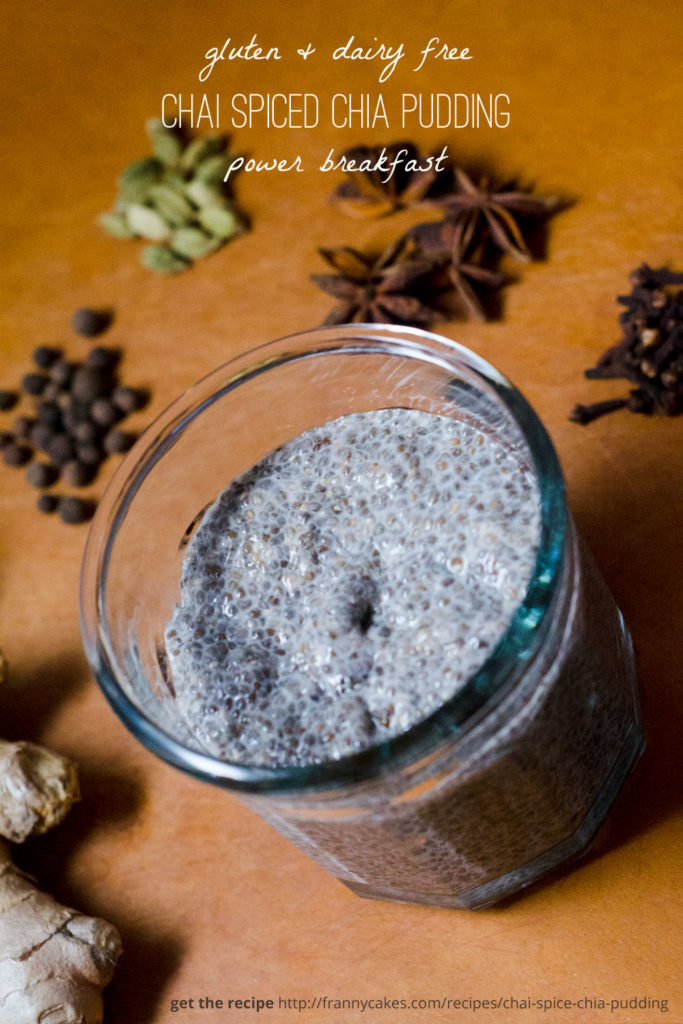
In my breakfast experiments, I think it is best to take baby steps. I already like chai in the morning. And goodness, we know how I love desserts. So, I am meeting myself halfway. Breakfast that sounds like dessert, has the flavors from my favorite Starbuck’s addiction and is full protien, omega-3s and whatever else those little bad boys are full of.

chai spiced chia pudding | gluten & dairy free | frannycakes

Chai Spice Chia Pudding
Recipe Type: Breakfast
Author: Mary Fran Wiley
Prep time: 5 mins
Cook time: 2 hours
Total time: 2 hours 5 mins
Serves: 2
Ingredients
  • 1 cup unsweetened almond milk
  • 2 tablespoons honey
  • 1/4 teaspoon grated fresh ginger
  • 1/4 teaspoon cardamom
  • 1/2 teaspoon cinnamon
  • 1/4 teaspoon allspice
  • 1/8 teaspoon pepper
  • 3 tablespoons chia seeds
Instructions
  1. Whisk together all the ingredients and put in a container with a tight fitting lid and put in the fridge
  2. Shake vigorously every 10-15 minutes for the first half hour. Then let sit for about 2 hours, just until it sets up and has a pudding-like consistency. If you would prefer a smooth pudding, pop it in the blender and blend until smooth.
3.2.2124


Gluten-free, dairy-free mujaddara recipe from FrannyCakes

Gluten-free mujaddara and a gluten-dairy-meat free challenge

You might have seen a few tweets about me radically changing my diet. I decided to participate in Yum Universe’s 30 day plant-based diet challenge.

I know when it happened, and I know how it happened. But it doesn’t mean that I am ok with letting things stay on their current path.

skinnymaryfran

Five years ago, I was in a car accident and they thought I wouldn’t be able to walk. To prove them wrong I worked my way to running four miles a day and lost 125 pounds. Four years ago, I injured my knee while running a 5k. Three years ago, I was diagnosed with CRPS and was down to 3, 45 minute workouts a week. Two years ago, I decided to have a spinal cord stimulator implanted and gave up running, jumping and anything impactful. A year ago, I gave up on my body ever looking the way it did and I worked my way through enough cupcake therapy to satisfy me for 30 years.

In the past year and a half, I have been self-medicating with butter and sugar. Sure, I had good reason. My body doesn’t work right anymore. I couldn’t push it like I used to. At some point, I made the decision to stop caring about what I ate.

fatmaryfran

A month ago, I started seeing a new primary care doctor and for the first time in 2 years I was forced to know how much I weighed. I went and bought jeans last week in a size I hadn’t needed in three years. It was painfully obvious to me that I needed to start paying attention again.

(Don’t worry, this is not the end of cupcakes and cakes with real butter and eggs, this is a pause to reset my system and help break some bad habits).

So, when Yum Universe (a blog I discovered when we were both featured on Refinery29 a couple weeks ago) announced their #YU30 Fall Plant-Based Diet Challenge, I decided to jump in. So, for the next 30 days, I am eating gluten, dairy and meat free. I am hoping this helps address some of the vitamin deficiencies that popped up in my last round of blood work. I am hoping that a diet with significantly less inflammatory foods helps reduce some of the CRPS pain. But most of all, I am hoping it helps break me of my junk food habit. I want cupcakes to be a treat again, not a three day a week habit. It is time for fruity pebbles to not be my breakfast of choice.

So, let’s kick this off with one of my all time favorite naturally gluten-free, vegan dishes.

Gluten-free mujaddara recipe from FrannyCakes

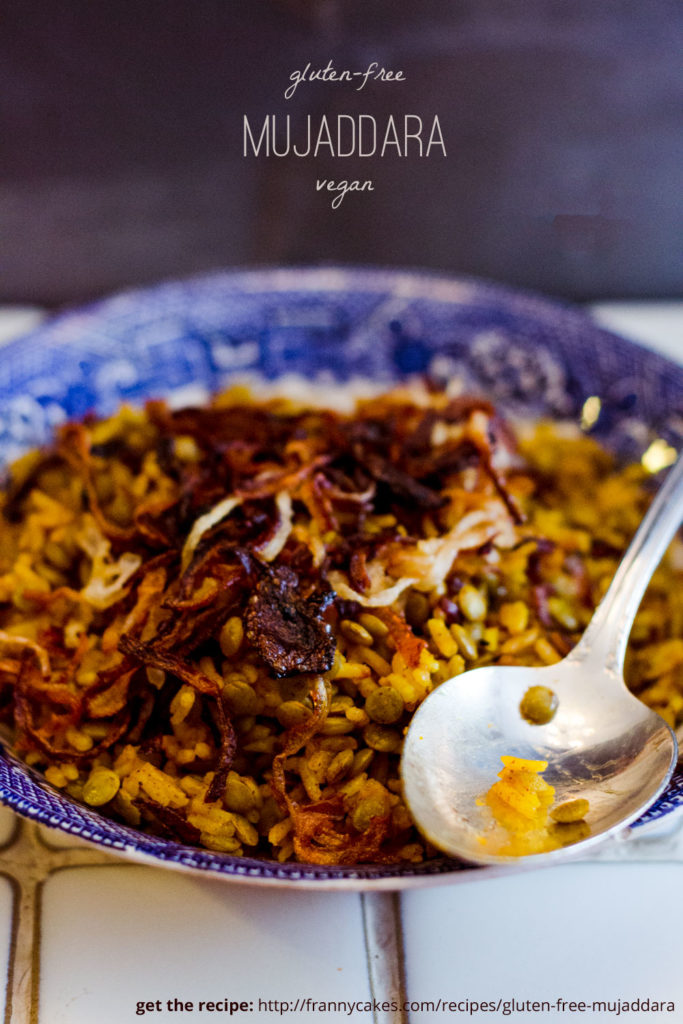
An easy to make weeknight dinner that makes great leftovers for work lunches, Mujaddara is the best kind of comfort food. The spices and flavors warm you up from the inside. Rice and lentils are inexpensive pantry staples. It does’t take a whole lot of babysitting the stove and there is no gluten anywhere to be found.

gluten-free mujaddara from frannycakes

Mujaddara is an Arab dish, and it refers to rice and lentils cooked together and topped with sautéed or fried onions. The spices vary depending on who is cooking for you, but typical spices include cumin and coriander and you will often find it topped with yogurt.

Gluten-free Mujaddara
Recipe Type: Entree
Cuisine: Arabic
Author: Mary Fran Wiley
Prep time: 10 mins
Cook time: 30 mins
Total time: 40 mins
Serves: 4
This recipe is adapted from the first copy of Jamie Magazine that I ever bought, and might very well be a big part of why I love Jamie Oliver and just about every recipe he (and his staff) create. It is simple, inexpensive and delicious (and fairly healthy!).
Ingredients
  • 120 grams (1 cup) green lentils
  • 2 tablespoons olive oil
  • 1/2 tablespoon ground cumin
  • 1/2 teaspoon ground turmeric
  • 1/2 teaspoon ground cinnamon
  • 120 grams (1 cup) basmati rice
  • 1 1/2 cups water
  • Sea Salt
  • Oil, for frying (vegetable, canola, safflower – whatever you have on hand is fine)
  • 1 medium onion, thinly sliced
Instructions
  1. Rinse the lentils in cold water and place in a medium sauce pan and cover with water and add a generous pinch of salt (like you would add for pasta). Bring the water to a boil, and then reduce it to a simmer for about 20 minutes. You want the lentils to be cooked, but still have a little bite.
  2. While the lentils cook, rinse and drain the rice.
  3. Heat the olive oil in a dutch oven or other similar pan and add the spices. Cook them for about 30 seconds or so – you want them to become fragrant. Add the rice and stir to make sure it is coated in the spice mixture. Pour the water over the rice and stir. Turn the heat to low and cook, covered for 8 minutes. Remove the pan from the heat and let sit for 5 minutes – don’t take off the cover until after the 5 minutes are over. Fluff with a fork.
  4. While your rice and lentils are cooking, you are going to start frying your onions. In a small frying pan, add enough oil to fill the pan about 1/2. Get the oil good and hot (stick a bamboo skewer in it and if bubbles form rapidly around the base, you know your oil is hot enough), and fry the onions. You may need to do it in 2-3 batches, but each one only cooks for about 2 minutes. Set them on a plate covered in a paper towel to drain when they are done.
  5. When all of your components are cooked, add the lentils and half the fried onions to the rice. Add salt to taste.
  6. Serve with yogurt or cashew cream and top with the remaining fried onions.
3.2.2124


gluten-free kohlrabi salad from frannycakes

kohlrabi salad

I grew up watching a steady diet of Star Trek: The Next Generation and Star Wars movie marathons. I have seen every Star Trek movie ever made but somehow managed to never watch A Christmas Story. Doctor Who is on any time I can’t find something new and interesting to watch on TV. And although I might be the only nerd who doesn’t think that Firefly was the greatest TV show ever, I am still a pretty huge sci-fi nerd.

Something about all that traveling to new worlds. Meeting new people. Eating new food.

The first time I saw kohlrabi, I was sure I was seeing a vegetable right out of a sci-fi movie. There was this weird spindly vegetable at the farmers market. I had been exploring sweet corn, berries and local chicken when I first noticed it. I saw this globe with green tentacles cut short and people passing right over it reaching for cucumbers that were perfect for dill pickles. I lived on a college campus with research farms – who knew what kind of genetic splicing might have found its way to the locals. Or what sort of alien life they had found…

Image via Gerwin Sturm on Flickr. (Licensed via Creative Commons)

It was cheap, so I bought some. The next week, it was cheap again, so I bought some more. That weird alien vegetable started to be a staple in my kitchen. It was always abundant and affordable at the local farmer’s market, and since the kohlrabi had a flavor similar to jicama or a seedless cucumber, it was easy enough to eat.

Kohlrabi, a member of the same family as cabbage, brussles sprouts and kale, is a vegetable that has become one of my favorites, although I seriously believe that at least part of the reason I love it is its alien appearance. The name is German from words meaning cabbage and radish. A perennial vegetable, it is common at farmers markets because it is easy to grow, but I have had a harder time finding it in traditional grocery stores.

(This is here as proof that I eat vegetables. It might take them looking alien to entice me at first, but I come around eventually…)

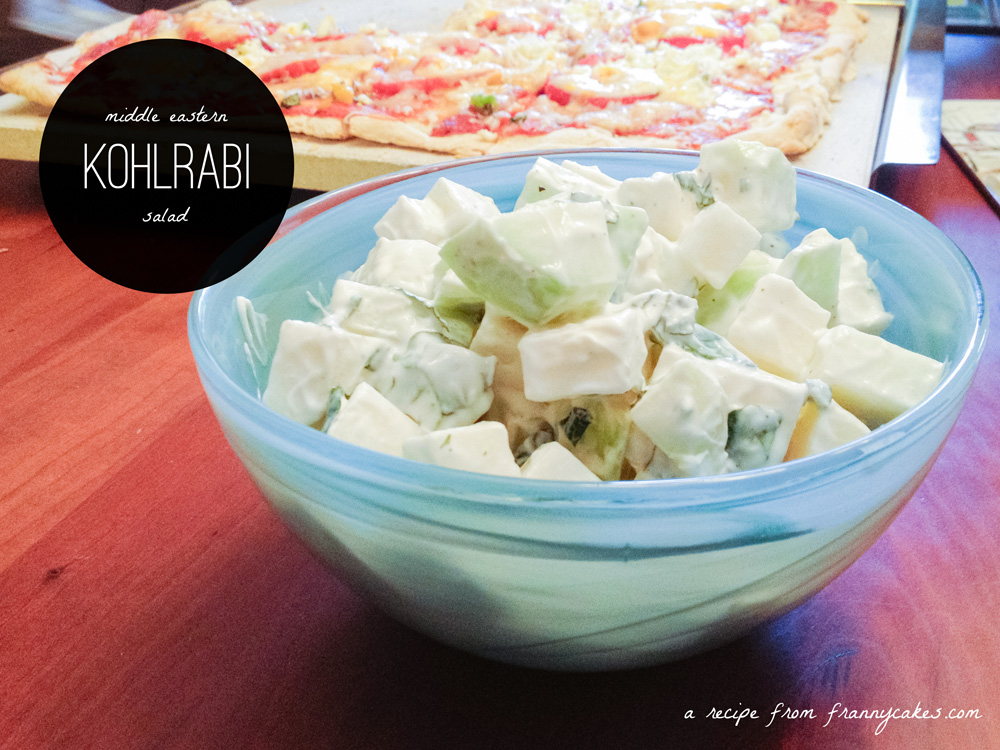
gluten-free kohlrabi salad from frannycakes

Gluten-Free Kohlrabi Salad
Recipe Type: Side
Cuisine: Middle Eastern
Author: Mary Fran Wiley
Prep time: 10 mins
Total time: 10 mins
Serves: 4
This recipe is adapted from Jerusalem by Yotam Ottolenghi and Sami Tamimi and is a way to eat the vegetable I had never tried. It is a great way to try Kohlrabi if you have never eaten it before.
Ingredients
  • 3 medium kohlrabies (1 2/3 pounds or 750 grams in total)
  • 80 grams (1/3 cup) Greek yogurt
  • 70 grams (5 tbsp) sour cream
  • 3 tablespoons mascarpone cheese
  • 1 clove garlic, crushed
  • 1 1/2 teaspoons lemon juice
  • 1 tablespoon olive oil
  • 2 tablespoons finely shredded fresh mint
  • 1 teaspoon dried mint
  • about 12 sprigs baby watercresss
  • salt and white pepper
Instructions
  1. Peel the kohlrabies, cut into 2/3-inch dice and put in a large mixing bowl.
  2. In a medium bowl, combine the yogurt, sour cream, mascarpone, garlic, lemon juice and olive oil.
  3. Add a healthy pinch of salt and a generous grind of pepper and whisk until smooth.
  4. Pour the dressing over the kohlrabi followed by the fresh and dried mint and half the watercress. Taste and add salt & pepper if needed.
  5. Gently stir and place in a serving dish. Garnish with the remaining watercress.
  6. Top with the remaining watercress
3.2.2124