Home » gluten free » Page 4

Tag: gluten free

Relish 02: For the love of…life

Relish is a compendium of things to enjoy greatly and that add a little flavor to your gluten-free life. Because really, life is all about the awesome sauce.

relishcover-feb13

February is the month of love, and even without a gentleman caller in my life, I got to spend it in style. (In case you missed it, I went to San Francisco and ate at The French Laundry and spilled the beans on their gluten-free brioche). Erica, Charissa and Alison also wrote about our visit to the San Fran. (On an unrelated note, the power point that I made for the presentation is available to download)

Speaking of the month of love, Gluten Dude started a series of Gluten-Free Love Stories. There are some truly awesome stories. Read them. Be jealous of how lucky they are.

recipesiheart

This month, the internet was filled with delicious new recipes that I can’t wait to make. Like this incredible (01) Roasted Carrot & Quinoa Salad from A Girl Defloured. Since that is a little healthier than my fruity pebbles filled diet allows for, I think I should make up for it with (02) a Chocolate Raspberry Tart from With Style & Grace. Weekend mornings can be perked up with these (03) single-serving buckwheat waffels from Oh, Ladycakes. And we can wrap it up with another recipe featuring my favorite childhood vegetable (04) Ginger & Tamarind Glazed Carrots from The Tomato Tart.

Erica wrote a post about being human, getting glutened and powering through. I wrote a post in reaction to a comment from a friend that turned into a peptalk that I needed. There was anger over a NickJr. skit. Joy the Baker wrote some sound advice on blogging. This month was pretty epic, a certain Sassy Celiac even made a music video.

February was pretty great. But just you wait – next month I am going to start contributing to a new site, will have a new ebook out and frannycakes will be 2 years old!

Were there any gluten-free highlights that I missed?


gluten free brioche

Lunch at the French Laundry + Gluten-Free Brioche Rolls

gluten-free french laundry lunch

This is a tale of the day I took a bite of butter like it was cheese. I blame Kyra.

I spent some time in San Francisco recently for the Gluten & Allergen Free Expo, and while I was there, I had only one day to do something touristy.

And since I was going to be seeing some of the foodie-est people I know, I knew we had do do something incredible. No one-starred restaurant would do. Not when we could get reservations at one of the best restaurants in the world. And one we knew could handle the way we order food.

Going out to the French Laundry has been something of a dream of mine. It is on my list with Aviary here in Chicago. And about a year ago, I had the opportunity to do a little bit of correspondance with Lena, the chef behind the French Laundry’s incredible gluten-free flour blend, Cup4Cup (and no, I don’t get a discount because I love it so much, although that might be kind of nice…). And it was decided. The French Laundry was on my list.

So, I stalked OpenTable. Reservations open up exactly three months in advance, and I had one day and only one day durring my trip that I could make this work.

glutenfreefrenchlaundry3

I made the drive from San Francisco to Yountville with Brandy Wendler, the gluten-free beauty who is currently Mrs. Northwest 2013, Kyra Bussanich, 2-time cupcake wars winner & owner of one of the best bakeries in the country, Charissa who owns the award winning Zest Bakery in San Carlos with her husband, Patrick and Andrew from Taste Guru. We met up with Alison from A Girl Defloured outside the restaurant.

You can’t get a bunch of food bloggers (or girls for that matter) together without a need to document every moment.

So document, we did. From the first glass of wine until our phone batteries died, we were happily snapping away.

gluten-free french laundry

With our party shoes on (well, mine were on once I got them back from Kyra), we descended on one of the culinary industry’s most famed locales. And, with a whole host of food allergies and intolerances, we challenged the kitchen to feed us.

Feed us they did.

I might have even eaten a piece of beet and not wanted to spit it out for the first time in my life. So, Chef Keller, your team must be magic, because that has never happened before.

And it wasn’t just some special sauce on the beets.

You could see the skill in the artfully presented dishes. Flavors danced. Each course was perfectly portioned, just a few bites each. Enough to fully experience the dish but not so much that you would be weary.

My favorite had to be the cauliflower. It was crunchy. Robust. Not at all what I expected. The courses were all like that. Surprises of flavor.

gluten free french laundry

At some point, they must have figured out who Kyra was. Or they thought if they fed us more we might stop giggling.

They were wrong about that. But the surprise courses might have been some of the best. Mango sorbet and champagne granité. A root beer float that was unexpected. Spicy. Bright.

They couldn’t make us the desserts on the menus for us gluten free, so they asked us if we preferred chocolate or fruit.

Really? You have a doubt in your mind what 5 out of the 6 of us chose?

My phone was all out of juice by then, so you will have to take my word for it being divine. And then they served us chocolates. I might have had a peanut butter & jelly one.

At this point, Brandy & I had to run because we were talking to bloggers that evening back in San Francisco, and we were 5 hours into lunch. Our greedy friends didn’t save us any of the doughnuts that they made for us. Something about fried doughs not keeping well.

I tossed my wallet to Kyra and after some disproving glances from the hostess who looked like she thought we were running out on the bill, our experience of one incredible display of food artistry came to an end.

Except it didn’t.

That meal has been following me all week. Those vegetables have consumed my thoughts.
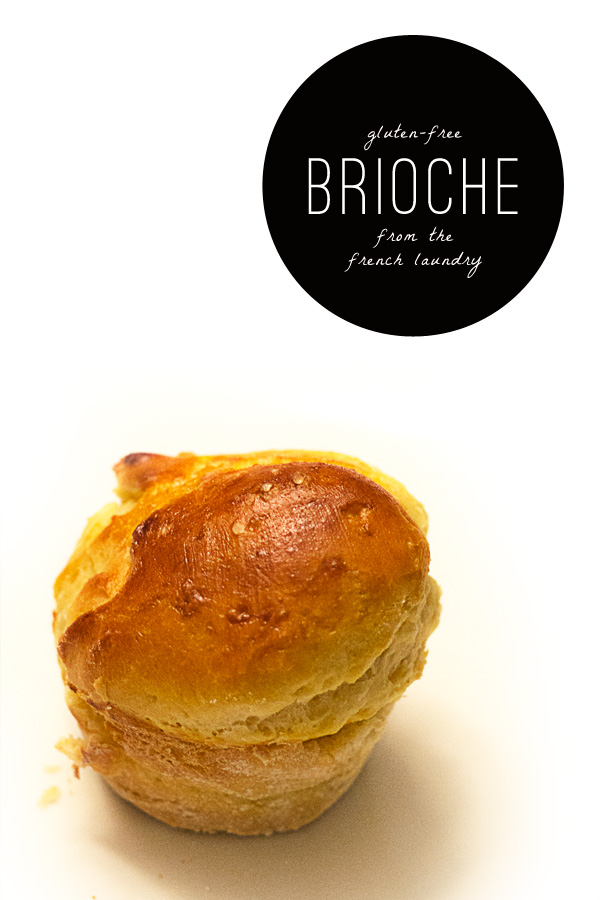
And the brioche.

Oh. the brioche.

They were clouds of yeasty goodness that punctuated an incredible meal. And frankly, I needed more.

glutenfreebrioche

Gluten-Free Brioche

Recipe Type: Bread
Prep time: 3 hours
Cook time: 15 mins
Total time: 3 hours 15 mins
Serves: 12
This recipe is adapted from the Bouchon Bakery Cookbook via penandfork.com
Ingredients
  • 7 grams (2 teaspoons) instant (bread machine) yeast
  • 20 grams (1 tablespoon + 2 teaspoons) granulated sugar
  • 230 grams (3/4 cup + 2 tablespoons + 1 3/4 teaspoons) warm water, at 75°F/23.8°C
  • 535 grams (3 3/4 cups + 1 tablespoon) Cup4Cup gluten-free all purpose flour (see notes)
  • 20 grams (2 tablespoons + 3/4 teaspoon) kosher salt
  • 158 grams (1/2 cup + 2 tablespoons) eggs – this is about 3 eggs
  • 22 grams (1 1/2 tablespoons) egg yolks (about 1 yolk)
  • 80 grams (1/4 cup) honey
  • 100 grams (3.5 ounces – 7 tablespoons) unsalted butter, melted and cooled
  • 1 egg for the egg wash
  • 1 teaspoon (6 grams) Maldon salt for sprinkling
Instructions
  1. Combine the yeast and sugar in a small bowl. Stir in the warm water, and set in a warm place for 10 minutes. The mixture will be foaming and bubbly.
  2. Once the yeast has proofed, combine the Cup4Cup and salt in the bowl of your stand mixer fit with the paddle attachment. In a medium bowl, whisk together the eggs, yolks, honey, butter, and proofed yeast mixture.
  3. Add the egg mixture to the flour in a steady stream with the mixer running on low. Increase the speed to medium and mix the dough for 10 minutes. It will be very silky, almost like a cake batter.
  4. Scrape down the sides of the bowl and cover it with plastic wrap. Allow it to rise in a warm place for an hour, the dough should about double in size.
  5. Using a rubber spatula, deflate the dough, turning it over a few times in the bowl. Scrape down the sides of the bowl, recover the bowl with plastic wrap, and refrigerate for 2 hours.
  6. Make an egg wash by beating an egg lightly.
  7. Spray a muffin pan with nonstick spray. Divide the dough evenly among the wells of the pans. Brush with the egg wash and sprinkle with the maldon (or sea) salt. Set the pan somewhere warm for 40 minutes. You want the dough to raise and spread – but it will not double, so don’t let it sit for longer waiting for that.
  8. When you have about 10 minutes left of raising time, heat up your oven to 350°F. Bake your rolls for 15-17 minutes. You want the tops to be golden and a toothpick to come out clean when it is inserted into the middle.
  9. Transfer to a cooling rack to cool completely. Serve with the best butter you can get your hands on.
Notes
This recipe is designed to work with Cup4Cup gluten-free all purpose flour, but should work well with flours such as Jules Nearly Normal or Better Batter.
3.2.1337


Relish 01: Comfort & Awesome Sauce

Relish is a compendium of things to enjoy greatly and that add a little flavor to your gluten-free life. Because really, life is all about the awesome sauce.

relish-jan2013

Want that cake? Come see my presentation at the San Francisco GFAF Expo next weekend and learn how!

amieanderica

[On the left] My dear friend Amie has a gluten-free column on the Glamour Magazine Vitamin G blog.

[On the right] Erica from Celiac and the Beast has some pretty excellent tshirts that she’ll have with her at the GFAF Expo in San Francisco. (Yes, I have one reserved for me)

thingstomake

And then there are things to make. Like (01) the oatmeal toppings ideas (translated with google translate) from J’veux être bonne. Or, (02) Peanut Butter and Chocolate Pudding from Joy the Baker. Um, yes please. There is no such thing as too much oatmeal, and this version (03) with blackberries and sesame seeds sounds like a winner too. Since it is winter, and comfort food is de rigueur, these pear pizzas on Cup4Cup’s new crust look like my ticket to happiness this weekend.

Ok, and there is this gem about the flu shot and its gluten-free status from The Celiac Diva.Because the flu is icky.


We are all stories in the end, so make it a good one, eh? - Quote from Doctor Who

Hello 2013. I’m glad you made it. I have big plans for you. Now let’s have soup.

It’s a new year. A clean slate.

So, eyes front soldier.

I can tell you what there will not be. In my life or on this site. There will be no checking over my shoulder to see what I should have done. No looking in the mirror and wondering why. No questioning my choices. No, as MammaCakes woud say, should-a, would-a, could-a ‘s. It’s all about the path ahead. It is time to look forward. To think about where I am going.

Read more

gluten free focaccia with sage & brown butter

Ratio Rally: Focaccia

This post is part of the Gluten-Free Ratio Rally, a group of gluten-free bloggers inspired and empowered by Ruhlman‘s Ratio and started by Shauna at Gluten-Free Girl. We get together each month and post many different takes on the same theme. This month that theme is Gluten-Free Tarts and the rally is being hosted by Heather from Discovering the Extraordinary.

gluten free focaccia with sage & brown butter

Yeast breads make me nervous. Very, very nervous.

Most likely because I never made yeasted bread before going gluten-free. I don’t have a lot of experience knowing how the dough or batter should behave.

Cakes, I got. Muffins & pancakes? We are good to go. Gluten-free cookies? Just call me an expert. Bread? Well, I am still learning. But I would qualify today’s recipe as a success.

The ratio: 5:4

Gluten free flours:liquids. Add a splash of oil for flavor. Call it winning.

I am serious. This is the easiest yeast bread I have made, and one that has a great flavor. There is an egg in there as part of the liquid, but it also helps beef up the structure and add a wee bit of lift.

Yes, this dough is wet. And a little sticky. You just have to trust me. It works. And it is darn good.

The flavors

Brown butter in place of the traditional olive oil. Sage on top. A sprinkling of sea salt. The yeasty flavor that you only get from home made or artisan loaves.

This is some seriously delicious bread.

It would make good sandwich bread when sliced in half. (Do I see paninis in my future? I sure hope so…)

Want a different flavor? Use good olive oil in place of the browned butter. Swap out the toppings. Mix something into the dough.

This months participants

Heather | Discovering the Extraordinary made Rosemary and Garlic Focaccia Bread 
Carol / Goodness Gluten Free made Gluten Free Garlic and Parmesean Focaccia 
Morri | Meals with Morri made Sweet Cinnamon Raisin Focaccia Bread
~Aunt Mae (aka ~Mrs. R) made Focaccia Bread 
Silvana / Silvana’s Kitchen made Sun-Dried Tomato and Olive Focaccia
TR | No One Likes Crumbley Cookies made Gluten Free Cheesy Herb Focaccia
Shauna| Gluten-Free Girl and the Chef made  Gluten-Free Cherry and Almond Focaccia

Ratio Rally: Focaccia

Author: Mary Fran Wiley
Prep time: 10 mins
Cook time: 35 mins
Total time: 45 mins
Serves: 8
Ingredients
  • 1 1/2 cups (355 ml) warm water
  • 13 grams (1 1/2 tablespoons) active dry yeast
  • 3 grams (1/2 teaspoon) sugar
  • 45 grams (3 tablespoons) butter
  • 1 egg
  • 1 teaspoon table salt
  • 500 grams (3 1/2 cups) GF All Purpose Flour (I use Cup4Cup)
  • 2 teaspoons xantham gum (omit if your flour blend contains this or a similar ingredient such as guar gum or Expandex)
  • generous sprinkling of chopped fresh or dried sage
  • 1 teaspoon sea salt
Instructions
  1. Preheat your oven to 150 degrees. Turn it off once it is warm.
  2. Line a 9×13 baking dish with parchment paper and grease well with olive oil or butter.
  3. In the bowl of a stand mixer, combine the warm water, yeast and sugar.
  4. Melt butter over medium-low heat and continue to cook until it turns brown and starts to smell slightly nutty. Be careful not to burn the butter. Let cool slightly.
  5. Add the egg and browned butter to the bowl of the stand mixer, and mix until just combined.
  6. Stir in the flour, salt and xantham gum (if using). Mix on a low speed for 3 minutes. You will have a slightly shaggy and tacky dough.
  7. Spread the dough into the baking dish with a spatula, trying to make it even.
  8. Cover the pan with a towel and place in the oven for 45 minutes.
  9. Remove from the oven, and heat the oven to 425 degrees Fahrenheit.
  10. Sprinkle the dough with the sage and sea salt.
  11. Put the pan in the oven, then drop the temperature to 375 degrees. Bake for 35-40 minutes, or until golden brown and hollow sounding when tapped.
3.1.09


Cookmore: Holiday Recipes with a Twist from Eden Grinshpan

kenmore cookmore.com launch

Last Thursday, I had the opportunity to go to a launch for the new Kenmore Cookmore website.

And let me tell you, the launch party was pretty swanky. Mostly because of the Mojitos. (I couldn’t eat any of the appetizers that were passed before the demo or any of the desserts after, so I indulged in a cocktail or two…).

Ok, it wasn’t the mojitos. Kenmore knows a thing or two about the kitchen. And they want to share their passion for what happens in yours, so they are launching a website called CookMore. Users can upload recipes, share adaptations and personal “twists” to existing recipes and create their own digital cookbooks.

Sounds like my kind of website, and I encourage you to go check it out. Especially if you think either of the dishes above look delicious, because they were.

[box type=”info”]As part of the Cookmore launch, Kenmore is donating $1 for each recipe uploaded to their site to Heros at Home[/box]

Eden Grinshpan of Cooking Channel’s Eden’s Eats took the stage and prepared 3 traditional dishes with a twist. As a graduate of Le Cordon Bleu in London (where she studied both cooking and pastry), she brought some serious culinary know how. And she employed my favorite cooking technique – the dump and mix.

She was full of positive energy and inspiration for how to take a classic and make it your own.

But really, it was a pretty awesome evening. Mostly because of the Roasted Sweet Potatoes with Chimmichurri and the Curried Lentil Soup. Two dishes that are gluten free without any changes. That is my kind of savory cooking.

So, go, add recipes & twists. And have fun cooking!

I attended the event as a memeber of the Chicago Blogger Network.

gluten free mini bundt

Ratio Rally: Gluten-Free Mini Vanilla Chai Bundt Cakes

This post is part of the Gluten-Free Ratio Rally, a group of gluten-free bloggers inspired and empowered by Ruhlman‘s Ratio and started by Shauna at Gluten-Free Girl. We get together each month and post many different takes on the same theme. This month that theme is Gluten-Free Tarts and the rally is being hosted by Adina from Gluten Free Travelette.

gluten free mini bundt

This post is brought to you by the number 1.

Since Big Bird isn’t at risk of getting fired, I thought a Sesame Street reference would be OK.

And the ratio is full of them, so there is that.

The ratio

1:1:1:1 ish. Butter:Flour:Sugar:Eggs

And heck, throw in some liquid (up to 1 part) for good measure.

I mean, that is where pound cake got its name. A pound of butter, a pound of eggs, a pound of sugar and a pound of flour. Equal parts. Awesomely delicious.

Now, put that in a bundt and you have a winner.

I don’t want to get too crazy into the science here, but you can vary any of these ingredients by up to 20% and your ratio should still work. I added liquid, cut back a little on the sugar and added a little extra flour so that there was an even cup measurement for those of you who still bake by volume (someday you will see the light, I just know it). I also cut back on the butter and eggs, to make room for the liquid. (How the flavors got into the cake).

Kiss my bundt.

Ok, I just had to.

Mostly because Bundts are awesome. They are usually a dense cake, like a pound cake, baked in a pretty pan and topped with a glaze. Easy peasy.

How about a scene from a romantic comedy about bundts?

(I had to, mostly because I love that movie, even if it wasn’t filmed in Chicago)

Ok, enough sillyness.

Chai is one of my favorite things. I drink double dirty soy chai lattes. My first recipe on this blog was for Gluten Free Chai Latte Cupcakes. In my first Ratio Rally, I shared a recipe for chai gluten-free cream puffs.

And it is back again. Chai spiced vanilla bean bundt cakes. In minature.

Bundts are elegant and un-fussy, and can be whipped up in a jiffy. They are even a breeze to decorate. Excellent for a last minute birthday treat.

This month’s rally is over at GFTravelette – make sure you go check it out!

Gluten-Free Mini Vanilla Chai Bundt Cakes

Recipe Type: Dessert
Author: Mary Fran Wiley
Prep time: 30 mins
Cook time: 40 mins
Total time: 1 hour 10 mins
Serves: 18`
A fun take on a bundt! With milk steeped with spices, the cake combines some of my favorite flavors
Ingredients
  • 1/2 cup (120 mls) milk
  • 5 green cardamom pods
  • 2 star anise
  • 1 teaspoon grated fresh ginger
  • 4 cloves
  • 210 grams (1 1/2 cups) gluten-free all purpose flour
  • 1/2 teaspoon xantham gum (omit if using a blend that includes this)
  • 1 g baking soda (1/4 teaspoon)
  • 2 grams (1/2 teaspoon) baking powder
  • 1/2 teaspoon salt
  • 175 grams (3/4 cup + 2 tablespoons) sugar
  • 125 grams (1 stick + 1 tablespoon) butter, softened
  • 1 tablespoon vanilla bean paste
  • 2 eggs
  • 1 vanilla bean
  • 3 tablespoons milk
  • 1/2-1 cup powdered sugar
  • 1/4 teaspoon salt
Instructions
  1. In a small sauce pan over low heat, simmer the milk, cardamom pods, star anise, cloves and fresh ginger for 20 minutes. Remove from heat and set aside to cool for a few minutes while you prepare your miss en place.
  2. Preheat the oven to 350 degrees and grease your mini bunt pan.
  3. Whisk together the flour, xantham gum (if using), baking soda, baking powder and salt in a medium bowl and set aside.
  4. Cream together the butter and sugar until light and fluffy, using a stand mixer on medium-high and beating for about 5 minutes. Add the vanilla bean paste.
  5. Beat in the eggs one at a time, scraping down the sides after each addition.
  6. Strain the steeped milk, and add 1/3 to the batter.
  7. When it is fully incorporated, add half the flour, and scrape down the sides of the mixer. Repeat until you are out of milk and flour (it should go milk – flour- milk -flour – milk). Mixing on no higher than medium, and scraping down the sides after each addition.
  8. Use a #40 scoop (or fill the wells of the pan no more than half way), and divide the batter into the pan.
  9. Bake for 20 minutes, until the cakes are golden brown and a tooth pick inserted into the center comes out clean. Cool on a wire rack.
  10. Bake the remaining batter.
  11. While the cakes are baking, split the vanilla bean and scrape the seeds into the 3 tablespoons of milk in a liquid measuring cup or a bowl with a spout. You want this to sit for 20-30 mins.
  12. When the cakes are done and cooling, whisk the powdered sugar and salt into the vanilla milk. You want a glaze that is thick and opaque, but not so thick it won’t pour. If it is too thin, it will run off the cakes. My advice? Have a test cake and when you think you are close drizzle a little and see how it works. If the glaze gets too thick, add a half a teaspoon of vanilla extract.
  13. Serve in cupcake papers for a pretty, special treat.
3.1.09


The other recipes this month:
German Cream Cheese Buttercream aka Best-Ever Cream Cheese Frosting

Best-Ever Cream Cheese Frosting

German Cream Cheese Buttercream aka Best-Ever Cream Cheese FrostingThings have been a little heavy here lately.

And we need to have a serious talk about frosting. Because it pains me when people say they don’t like frosting.

We can't be friends if you don't like frosting
via someecards

True story: I feel this way.

You have been fed a lot of bad frosting in your life. Heck, some of you even like it. (If you didn’t Betty Crocker wouldn’t have half an aisle in the grocery store filled with cans of the stuff). But that, and dreadful american buttercream (powdered sugar + butter + vanilla + milk) give frosting a bad rap.

But to just totally eliminate an entire category of pastry toppings because you don’t like the super-sweet, slightly gritty, dries out when left out kind? That would be like saying you don’t like any cake because you don’t like yellow cake.

You have heard of SMB (Swiss Merengue Buttercream) and a pastry chef friend of mine prefers the Italian Merengue Buttercream. Most bakers are familiar with American Buttercream (see above). But there is French Buttercream. And German Buttercream.

What does all that mean?

  • American Buttercream – The powdered sugar frosting we have all had a gazillion times. It is common because it is incredibly easy and fast. It stands up well to the elements (it doesn’t melt, it stiffens a little so it isn’t as delicate)
  • Swiss Merengue Buttercream (SMB) – Made from a cooked egg white & sugar mixture, this frosting is made by whipping the cooked whites and sugar, whipping them into a merengue and then adding butter and flavorings. It is the frosting technique that I use the most and makes a light & fluffy frosting.
  • Italian Merengue Buttercream – Similar to SMB, this is a merengue frosting, but instead of cooking the whites, you beat a hot sugar syrup into the egg whites.
  • French Buttercream – Instead of egg whites, a hot sugar syrup is beat into egg yolks and then combined with butter. This stuff is rich and incredibly decadent.
  • German Buttercream – You start with pastry cream, beat it and add butter. You can thank me later for introducing you to this.

This is German Cream Cheese Buttercream. And it is a dream.

It isn’t the best for piping pretty designs, but it really will rock your socks. (I might have overheard someone in the office compare it to ice cream that wouldn’t melt). That’s the thing with frosting.

Feed the frosting naysayers this. You will rock their socks hard core.

Best-Ever Cream Cheese Frosting

Author: Mary Fran Wiley
Prep time: 15 mins
Cook time: 5 mins
Total time: 20 mins
This recipe was adapted from [url href=”http://bravetart.com/recipes/GermanButtercream”]Brave Tart[/url] & [url href=”http://www.gilttaste.com/stories/2292-the-original-red-wine-velvet-cake-recipe”]Gilt Taste[/url]. It makes enough to frost & fill a 3 layer cake and pipe a decorative border or to decorate 48 cupcakes. This frosting will pipe simple designs like the one in the photo, but intricate piping techniques won’t hold up.
Ingredients
  • 16 ounces whole milk
  • 1 tablespoon vanilla bean paste
  • 10 ounces sugar (1¼ cups, by volume)
  • 1½ ounces cornstarch (6 tablespoons by volume)
  • 2 eggs
  • 2 egg yolks
  • 16 ounces cream cheese, room temperature
  • 16 ounces unsalted butter, room temperature
  • ¼ teaspoon salt, or more to taste
Instructions
  1. In a medium sauce pan, bring the milk to a simmer. Meanwhile, whisk together the sugar, cornstarch, eggs, and yolks in a medium bowl.
  2. Temper the egg mixture by whisking about a half cup of the hot milk into the egg mixture—it will be quite thick but while you whisk, it will loosen as the milk incorporates. Whisk in a little more hot milk until the egg mixture is fluid and warm. Pour the egg mixture back into the pot of hot milk with the heat set to medium and keep whisking.
  3. Once the mixture starts to thicken and bubble sluggishly, continue whisking and cooking for a minute more, then remove from heat and pour into a bowl.
  4. Put the custard in the bowl of a stand mixer fit with the whisk attachment and beat the custard for a few minutes, until it has cooled to room temperature and is creamy.
  5. Whip in the cream cheese, one tablespoon at a time, until it has fully incorporated. Then repeat with the butter. Add the salt and beat for about a minute more.
  6. Chill for about 15 minutes before using, if you want to be able to pipe with it.
Notes

You can make this a regular german buttercream by swapping the cream cheese for an equal amount of butter

3.1.09


gluten free white cupcake recipe

A very happy birthday treat

gluten free white cupcake recipe

Let’s celebrate.

There are always excuses not to. Maybe there is no money. Maybe you are sad. Maybe you are sick. Maybe you are just grumpy & miserly and don’t ever want to have fun (it’s ok, sometimes even I feel that way).

I have as many reasons as the next guy to not want to celebrate. I can’t find the strength to get to the gym. Real pants make me want to cry. An ill-timed night out with friends can ruin my life for a month. But those are the absolute wrong things to focus on. They can give you grey hair before your time. And we all know that would just lead to more fretting.

And you know, girls just wanna have fun.

So really, let’s celebrate.

Have a party. I mean, heck, it was a birthday after all.

We can throw a little party with a few dozen cupcakes.

Cupcakes with chocolate frosting.

And maybe a few sprinkles thrown in the batter for good measure.

And maybe some balloons. Balloons are good for a birthday.

Happy 32nd birthday Kurt!
Balloons are always appropriate

It is good to celebrate.

And don’t forget to smile, it’ll do you good. And maybe eat a cupcake. Because cupcakes are theraputic.


Gluten Free White Cupcakes

Recipe Type: Dessert
Cuisine: American
Author: Mary Fran Wiley
Prep time: 20 mins
Cook time: 50 mins
Total time: 1 hour 10 mins
Serves: 48
My favorite white cake recipe made into cupcakes with a simple chocolate frosting. Add GF sprinkles to the batter for a “funfetti” feel. This is adapted from the Cake Bible’s White Velvet Cake recipe. This recipe makes 48 cupcakes, a 4-layer 8″ cake or a 3 layer 9″ cake.
Ingredients
  • 1 1/2 cups (360 ml) milk at room temperature
  • 7 large (210 grams) egg whites (pasteurized are fine), at room temperature
  • 1 large egg, at room temperature
  • 1 1/2 tablespoons vanilla extract
  • 460 grams ( 3 1/4 cups) gluten free all purpose flour*
  • 2 teaspoons xantham gum**
  • 450 grams (2 1/4 cups) granulated sugar
  • 7 grams (1 teaspoon) salt
  • 1 1/2 sticks (170 grams) butter, at room temperature and cut into cubes
  • 85 grams (6 tablespoons) vegetable shortening
  • 1 cup gluten-free sprinkles (optional)
  • 1 Recipe Easy Chocolate Frosting (below)
Instructions
  1. Preheat oven to 350°F. Line 2 cupcake tins with papers (if you have 4, by all means line them all), grease the tops of the pans and set aside.
  2. In a small bowl, mix together 1/2 cup of the mil, the egg whites, egg and vanilla extract.
  3. In the bowl of a stand mixer fit with the paddle attachment, combine the dry ingredients including the sugar on low speed for 30 seconds.
  4. Add butter & shortening and mix on low speed for 30 seconds. Add the remaining milk and stir untill just moistened. Increase the speed to medium and mix for a minute and a half.
  5. Scrape down the sides of the bowl and add the egg/milk/extract mixture in 3 groups, scraping down the sides before each addition.
  6. Using a large ice cream scoop, divide the batter evenly among the cupcake papers, making sure that none of them are more than 2/3 full (or you could have a little bit of a mess).
  7. Bake 2 trays at a time for 20-25 minutes, until a toothpick inserted into the center comes out clean.
Notes

*I use Cup4Cup gluten free flour in my kitchen, and it is my favorite, but I have also had good experiences with the following: Jules Nearly Normal Flour, Better Batter All-Purpose flour or King Arthur Flour’s Gluten Free All Purpose Blend.

**If your blend has xantham gum or expandex in it, you can omit this.

3.1.09
Easy Chocolate Frosting

Recipe Type: Dessert
Cuisine: American
Author: Mary Fran Wiley
Prep time: 20 mins
Cook time: 10 mins
Total time: 30 mins
An easy chocolate frosting that you can adapt to be as firm or as soft as you like.
Ingredients
  • 340 grams (1 1/2 cups) powdered sugar
  • 150 grams (1 3/4 cups) cocoa (I used Hershey’s Special Dark Cocoa, the dark helps cut the sweetness a little bit)
  • 1 cup milk or cream
  • 225 grams (1 cup or 2 sticks) butter
  • 565 grams (2 1/2 cups) powdered sugar
  • 2 teaspoons vanilla extract
Instructions
  1. In a large bowl, whisk together the first amount of powdered sugar and the cocoa.
  2. Bring the cream to a simmer in a small saucepan. Stirring constantly so the milk does not scald. Whisk this into the powdered sugar mixture. Let cool to room temperature, about 20 mins.
  3. Beat soft butter, vanilla extract and salt until creamy. Add the 2½ cups of powdered sugar and mix slowly until incorporated. With mixer on low, add the chocolate mixture a spoonful at a time.
  4. If the frosting is too loose, add up to an additional half cup of powdered sugar.
  5. This makes enough to frost a layer cake or put a good amount on 48 cupcakes (see photo for how much I used per cupcake)
3.1.09
gluten free olive oil quickbread with figs

Let’s just press pause

gluten free olive oil quickbread with figsLet’s just press pause.

Because life is crazy and funny and difficult and amazing.

And we miss so very much of it while we work our butts off to get where we are going. We let friendships slide so we can spend more time in a relationship. We let relationships slide so that we can get ahead at work. We very often go on autopilot through our days and don’t stop to notice the beauty of the world around us. We forget to say things like “thank-you” or “I love you”.

And we need to stop that.

We need to press pause. We need to stop our crazy, busy lives every now and then so that we can remember the whole point of being alive.

To live.

So, let’s press pause and savor this moment.

Stop and look at the trees as they change from green to a symphony of reds and oranges. Enjoy the fresh apple cider that is plentiful this time of year. Take time to indulge in a favorite hobby. Make time to take a trip and visit friends. Tell people how much you love them.

And hug your mom the next time you see her.

Since it is fall, and figs are one of my favorite indulgences from nature, I thought I would work them into a quick bread while they can still be found at the grocery store fresh.

If you can only find dried figs, soak chopped figs in enough milk (either dairy or non-dairy will work) for about half an hour before making the quick bread. This will rehydrate them just a wee bit so they don’t dry out the bread.

Gluten-Free Fig + Olive Oil Quickbread

Recipe Type: Breakfast
Author: Mary Fran Wiley
Prep time: 10 mins
Cook time: 65 mins
Total time: 1 hour 15 mins
Serves: 8
This is a great breakfast loaf, or simple dessert
Ingredients
  • 350 grams (2 1/2 cups) gluten-free all purpose flour*
  • 1/2 teaspoon xantham gum (omit if using a blend that contains this)
  • 10 grams (2 teaspoons) baking powder
  • 1/4 teaspoon salt
  • 200 grams (1 cup) sugar
  • 2 eggs, lightly beaten
  • 3/4 cup (175 milliliters) unsweetened vanilla almond milk (you can use any unsweetened milk or cows milk if you prefer)
  • 1/2 cup (120 milliliters) olive oil
  • 75 grams (1/2 cup or 4 large) fresh figs cut into eights and roughly chopped
  • 8 large fresh figs cut in fourths (so you have wedges) to place on top of the bread
Instructions
  1. Preheat oven to 350 degrees. Grease a standard loaf pan using olive oil.
  2. In a large mixing bowl, whisk together the flour, xantham gum (if using), baking powder, salt and sugar.
  3. In a separate bowl, whisk together the eggs, almond (or other) milk, and olive oil.
  4. Pour the liquids into the dry ingredients and mix until just combined.
  5. Stir in the chopped figs and pour into a loaf pan.
  6. Bake for 65-75 minutes. The loaf will be golden on the top, and a tooth pick will come out clean when inserted into the center.
  7. Let the quickbread cool for 10 minutes in the pan, then remove it and allow it to cool on a wire rack. This bread tastes even better the next day 🙂
Notes

*I use Cup4Cup gluten-free all purpose flour from Williams-Sonoma, but Jules’ Nearly Normal flour or Better Batter would work without needing the xantham gum. If you use a blend such as the King Arthur Flour gluten-free all purpose blend, you will need to include the xantham gum listed in the recipe.

3.1.09