Home » slider » Page 3

Tag: slider

white chili with turkey

White Chili with Turkey

white chili with turkey
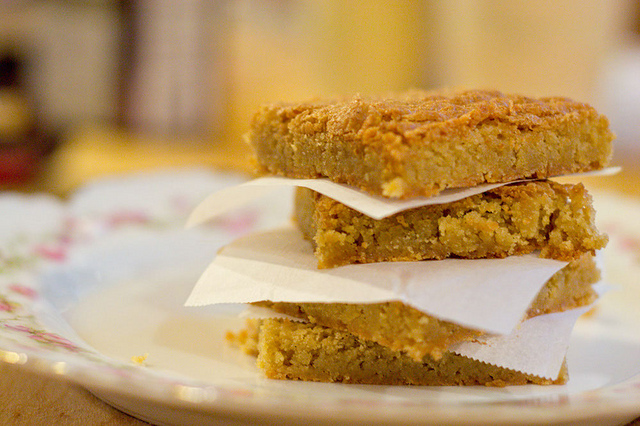
I made this for dinner on Thursday night. I had picked up the peppers because they were on sale. I was going to make a chimichuri sauce for our steak dinner this weekend. But I got greedy & needed a change of pace from the pasta. No chimichuri for Blondie. But, there was leftover chili. Not that I wanted to share.

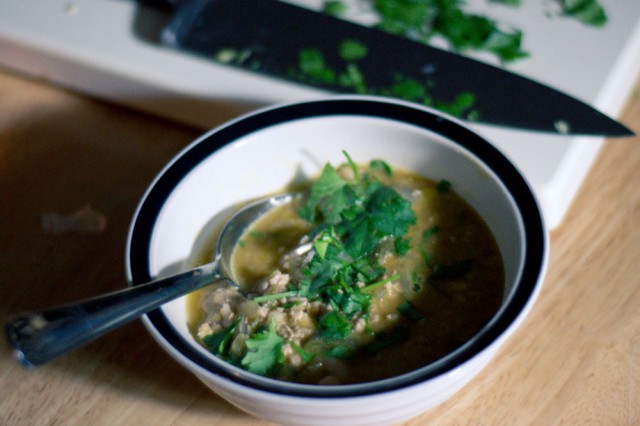
This is not your mom’s spicy tomato-y chili. There are not so many beans in here that you will be suffering, just enough to give it some body. The heat is not a slow cooked one, but a bright, fresh, tangy heat.

There is coriander in this recipe which lends a bright, lemony flavor to the chili. Don’t leave it out, it really makes the peppers sing. Fresh cilantro is also key – if you don’t have any, just leave it out. The dried stuff doesn’t work here. You can swap the turkey for shredded chicken, but don’t use ground chicken. It just isn’t moist enough.


White Turkey Chilli
#ratingval# from #reviews# reviews
Print
Recipe Type: Entree
Author: Mary Fran Wiley
Prep time: 10 mins
Cook time: 40 mins
Total time: 50 mins
Serves: 4
This easy chili comes together in about 30 minutes with minimal effort. It is spicy & light enough for a summer dinner.
Ingredients
  • 1 pound ground turkey, browned
  • 2 tablespoons olive oil
  • 2 serrano peppers, seeded & chopped
  • 2 jalapeno peppers, seeded & chopped
  • 1 anaheim pepper, seeded & chopped
  • 1 medium onion, diced
  • 3 cloves of garlic, peeled & chopped
  • 1 teaspoon coriander
  • 1/2 teaspoon cumin
  • 1/4 teaspoon cayenne pepper
  • 4 cups chicken or vegetable stock
  • 1 can navy beans (or other white beans), drained
  • 1/4 cup chopped cilantro
  • 2 tablespoons lime juice
  • salt & pepper to taste
Instructions
  1. Saute the peppers and onion in the olive oil in a large stock pot over medium heat. Cook until the onions become translucent.
  2. Add the garlic, coriander, cumin and cayenne and cook until fragrant (about 1 minute).
  3. Add chicken stock and beans. Cook for about 30 minutes.
  4. Add cooked turkey & half the cilantro. Cook for about 5 minutes more (the meat should be heated through.
  5. Add half the cilantro and lime juice. Cook for about 1 more minute.
  6. If you like a smoother chili, blend with an immersion belnder for about 30 seconds, or place half the chili into a blender.
  7. Garnish with remaining cilantro and sour cream (or greek yogurt).
Notes

This is so easy, it almost makes itself. It also freezes well and keeps for a few days in the fridge. It is pretty low calorie, and fairly light. If you want a vegetarian version, use 2 cans of beans, omit the chili and use vegetable stock.

Google Recipe View Microformatting by Easy Recipe
1.2.4


gluten free margherita lasagna

Margherita Lasagna

gluten free margherita lasagna
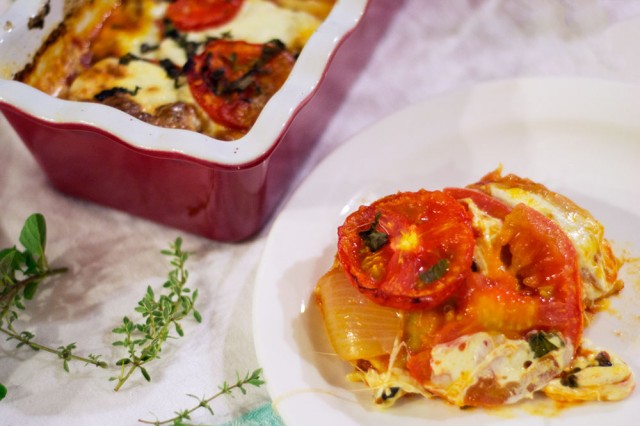
I have been making pasta almost obsessively over the past 2 weeks. But really, I was getting bored with noodles and sauce. Also, it is summer and most lasagna recipes are too hearty and heavy for the warm months.

But I had fresh pasta dough. And I had 6 servings ready to freeze individually for those nights when cooking feels like a mountain I don’t want to climb. What was I going to do with the rest? Lasagna noodles! I hadn’t made lasagna since I made this butternut squash lasagna (just a picture – I wasn’t writing my recipes out last fall). Lasagna is easy & filling.

This one is great with Marcella Hazan’s tomato sauce. It is tomato, onion and butter. If the sauce has too much seasoning, you won’t taste the flavors of the tomato, basil & mozzarella, so a simple sauce is best. You need to make sure that you are either using fresh pasta or boiled boxed noodles, even if they say they are no-boil, for this recipe they need to be cooked.

I made lasagna in a loaf pan, I know, not a traditional route. But it helps control the proportions and bakes up quite nicely. I will also share my fresh pasta recipe with you on Wednesday. And yes, it is worth the wait.

Margherita Lasagna
#ratingval# from #reviews# reviews
Print
Recipe Type: Entree
Author: Mary Fran Wiley
Prep time: 15 mins
Cook time: 40 mins
Total time: 55 mins
Serves: 4
With minimal sauce and juicy, fresh tomatoes, this lasagna is a perfect way to use tomatoes & basil plucked fresh from your garden.
Ingredients
  • 1 1/2 cups tomato sauce
  • 6-8 lasagna noodles (either fresh or halfway cooked)
  • 1 T olive oil
  • 3 small tomatoes, sliced in 1/4″ rounds
  • 1/4 cup fresh basil, chopped
  • 1 package fresh mozzarella
Instructions
  1. Grease a loaf pan with the olive oil.
  2. Put a spoonful of sauce on the bottom of the pan and spread it.
  3. Place a noodle, another spoonful or two of sauce, then add a thin layer of cheese, a sprinkling fresh basil and then a row of tomato slices.
  4. Repeat until the pan is full.
Notes

The goal is to avoid an overly saucy lasagna. The tomatoes will have plenty of moisture, the sauce is just to enhance the tomato flavor. I make large batches of Marcella Hazan’s tomato sauce and keep it around.

Google Recipe View Microformatting by Easy Recipe
1.2.4

I am also on this kick to not buy anything that comes with a label, rather, nothing that comes prepared and ready to eat. I know there will be nights where

gluten free raspberry crisp

Raspberry Crisp

gluten free raspberry crisp

Fruit crisps are one of the easiest desserts to whip up.

You know, when you find raspberries at the farmer’s market (or you find a bag of frozen raspberries in your freezer that you didn’t know you had). Or someone drops by for sangria on the porch and you want to serve something yummy.

This is a dessert that I learned from my mother, and is more of a guideline than a recipe. It can be thrown together in a couple of minutes, popped into the oven and left alone. It uses ingredients that we always have on hand, and can be adapted and changed to use what ever is in your kitchen. Just don’t melt the butter, or you will end up with a mushy crust.

Boys, if you need to do something sweet for a girl, this dessert, topped with a wee bit of vanilla ice cream is a winner. (You hear that Blondie? Even you could make this).

Raspberry Crisp
#ratingval# from #reviews# reviews
Print
Recipe Type: Dessert
Author: Mary Fran Wiley
Prep time: 10 mins
Cook time: 35 mins
Total time: 45 mins
Serves: 4
Really, this could be breakfast.
Ingredients
  • 2 cups fresh or frozen raspberries*
  • 1/8 cup sugar (if a sweeter dessert is desired)
  • 1 cup gluten free oats*
  • 1/4 cup butter, softened
  • 1/4 cup brown sugar
  • 1 teaspoon vanilla
  • 1 teaspoon cinnamon
  • salt to taste
Instructions
  1. Preheat oven to 425 degrees.
  2. Grease a small baking dish (8in square-ish).
  3. Pour in berries and sprinkle with sugar. (I didn’t use it, but if your berries are extra tart, you can add it in).
  4. In a mixing bowl add softened butter, oats, brown sugar, cinnamon and vanilla.
  5. Mix with your hands until combined.
  6. If the mixture is too crumbly, add a little butter. Too loose? Add some oats. Not sweet enough? Add a little more brown sugar.
Notes

If you can’t eat oats, quinoa flakes will work here. Also, make sure they are gluten free.
You can swap out the berries for any fresh or frozen fruit.

Google Recipe View Microformatting by Easy Recipe
1.2.4

Oats, sugar, butter, vanilla, fruit and complimentary spices. Mix the crust with your hands. Not enough? Mix some more.

a stack of gluten free bourbon blondies

Bourbon Blondies

a stack of gluten free bourbon blondies
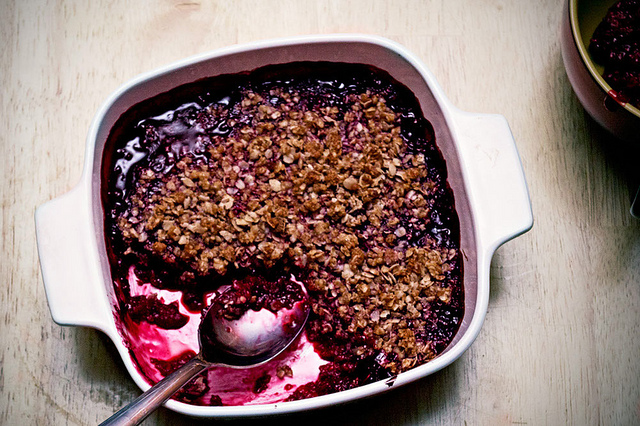
I have an old friend who, while we were in fashion school (what were we thinking?), would tell me “Button down, hang up!” whenever she saw my closet, which was really just a pile of clothes that didn’t fit on the maybe 2 feet of closet rod space.

She was probably the first person from outside of my family to know just how much I hate folding laundry. (I should have realized that it takes less energy to hang everything up, but I was young and stupid). I don’t mind the washing, but the folding. Ugh.

These blondies were born from my hatred of laundry. Really. I was going to mix myself a whiskey sour and watch Amelie for the gazillionth time while I folded laundry. I was. I swear.

But, when I opened the bottle, I was inspired to bake. I tried to talk myself out of it.

It didn’t happen. I didn’t even make that whiskey sour. I rounded up some ingredients and started mixing.

These babies are potent. I wouldn’t recommend eating the batter with a spoon. Well, maybe I would. Depends on the day you are having. And just how badly you want to avoid doing laundry.

Bourbon Blondies
#ratingval# from #reviews# reviews
Print
Recipe Type: Dessert
Author: Mary Fran Wiley
Prep time: 15 mins
Cook time: 30 mins
Total time: 45 mins
Serves: 12
The alcohol does cook out leaving behind a strong whiskey flavor. DO NOT use cheap booze, or your blondies will taste like college. You will get a hangover thinking about it.
Ingredients
  • 80 grams sweet white sorghum flour
  • 75 grams brown rice flour
  • 50 grams sweet rice flour
  • 50 grams tapioca starch
  • 15 grams ground flax
  • 2 sticks (226 grams) butter, melted
  • 435 grams (2 cups) brown sugar
  • 2 large eggs
  • 2 teaspoons vanilla bean paste (or vanilla extract)
  • 1/2 cup bourbon (Or dark rum)
  • Pinch salt
Instructions
  1. Preheat oven to 350 degrees. Line a 9×13 pan with parchment paper and grease the paper.
  2. Whisk together flours & salt, set aside.
  3. Mix melted butter with brown sugar – beat until smooth. Beat in eggs and then vanilla.
  4. Add bourbon.
  5. Stir in the flour.
  6. Pour into prepared pan. Bake at 350°F 30-35 minutes. The center should be set, but you do not want to over bake them.
Notes

Want to use an all purpose blend? Use 270 grams flour (2 1/4 cups) (I like Jules’ Nearly Normal flour. If you can’t find that, use the King Arthur GF all purpose flour and 1 teaspoon of xantham gum). Let these cool before you cut them. When they are hot, they will just fall apart. Your patience will be rewarded.

Google Recipe View Microformatting by Easy Recipe
1.2.4


Socca Gluten Free Chickpea Crepe

Socca with sage brown butter

Socca Gluten Free Chickpea Crepe
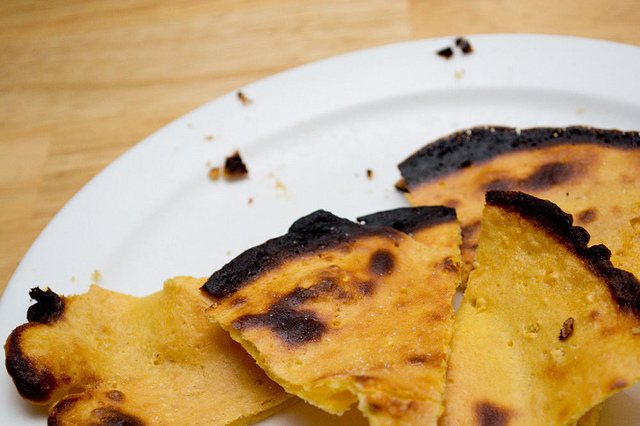
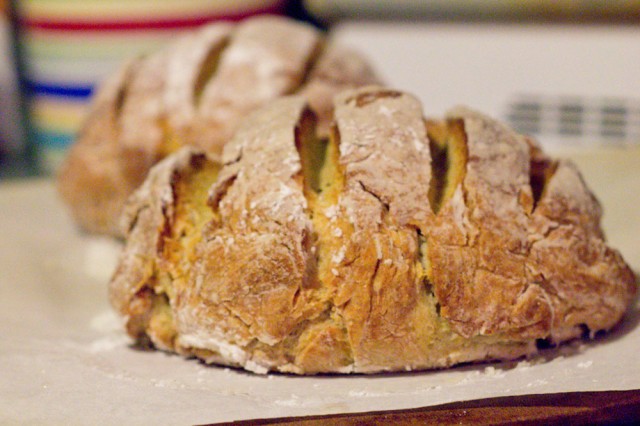
This is winning. Crunchy & creamy. Smoky & herby. A giant plate of yum. And it is fairly healthy, naturally gluten free and French. Maybe it is good because it is French (call it Farinata or Popodum and it just isn’t going to be as delicious). And, it is healthy. The whole recipe has about 1200 calories (until you add the butter) and makes about 6 servings.

Somehow when I was in Nice I didn’t eat this. I didn’t learn what this was until last summer and I didn’t make it for the first time until February. And then I let the chickpea flour hide in the back of my cabinet until I found it during my spring cleaning.

Socca cut in squaresNow, I know some purists will tell you to eat it plain. And that is all fair and good. The flavor of the chickpeas stands out. Have a glass of white wine and munch on this on your porch while chatting away with an old friend. The next time you make it, have it for dinner with sage brown butter. Or hummus. Or feta and roasted peppers. If you can’t have beans (I’m looking at you, Dad), make it with quinoa or millet flour. Maybe even buckwheat. Skillet crepes. From the oven. Smoky. Crispy. Simple.

Oh, and make sure you use the French name, Socca. You will sound sophisticated that way.

Socca with sage brown butter
#ratingval# from #reviews# reviews
Print
Recipe Type: Side
Author: Mary Fran Wiley
Prep time: 5 mins
Cook time: 40 mins
Total time: 45 mins
Serves: 6
This is a traditional Provencal (or Italian) dish. This is the result of experimenting with various methods and seasoning. I took a cue from David Lebovitz and added cumin.
Ingredients
  • 250g (2 cups) Chickpea (garbanzo/gram/besan) flour.
  • 2 – 2 1/2 cups water
  • 1/4 teaspoon cumin
  • 1/4 teaspoon salt
  • 1 tablespoon + 4 tablespoons olive oil
  • Sea salt for topping
  • 4 tablespoons butter
  • 2 tablespoons chopped fresh sage
Instructions
  1. Whisk together chickpea flour, 2 cups of water, salt, cumin and 1 tablespoon of the olive oil until smooth. If the batter is too thick, add more water.
  2. Heat oven to 500 degrees farenheit with rack as high as it will go.
  3. Put 1 tablespoon olive oil in a seasoned cast iron skillet and heat in the oven for 5 minutes.
  4. Once skillet is hot, remove it from the oven and pour in about 1 cup of the batter.
  5. Put it in the oven and turn the temperature to broil (high broil if your oven has it). After about 5 minutes, the socca will be dry around the edges and will have started to blister and get dark in places. Remove it from the oven, it should come right out. If it still stuck, give it a few more minutes.
  6. Repeat this step until each socca is cooked. Sprinkle cooked socca with sea salt.
  7. Once socca are cooked, melt butter in a heavy bottomed skillet. Add sage once melted. Cook until the butter is turning brown and smells fragrant and nutty.
  8. Drizzle over socca when served.
Notes

Your batter should be pretty thin, if it is too thick, add more water. You want it to be about the consistency of crepe batter, maybe a little thinner.

Be creative here, the gluten isn’t what holds these together, so any strongly flavored, whole grain flour should work. Also, you can add herbs directly to the batter if you would like.

Google Recipe View Microformatting by Easy Recipe
1.2.4


Stove top mozzarella mac

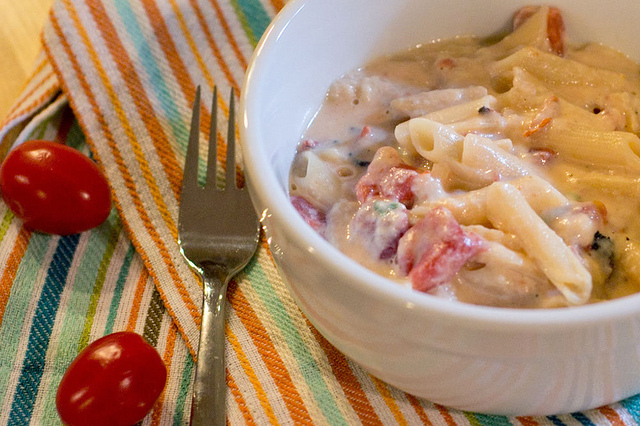
This is not my best photo. I was in a hurry. I was hungry.

That said, I found myself in a bit of a pickle. In fact, it was worse of a pickle than normal. I had a fridge full of nothing to eat and a dad who had driven me from Chicago to Champaign for the bajillionth time this year and he was in the garden pulling weeds (and scolding me for planting cilantro where he told me he had planted the beans, oops).  I had to make dinner. I couldn’t let my dad go hungry.

My fridge had: caramel sauce, 3 bottles of beer, mustard, jelly, half a bag of shredded mozzarella, eggs, milk, yogurt and cilantro. This is not the stuff of great recipes. It is the stuff of a single girl who had not been home all weekend. I couldn’t let my dad go hungry. I found myself wishing that I had cheddar cheese and evaporated milk to make Alton Brown’s stove-top mac and cheese. I couldn’t get mac and cheese out of my head, no matter how many things I pulled out of the cabinets, nothing else sounded good. Or wouldn’t kill my dad.

So, out of desperation was born a new favorite around here.

Stove-top Mozzarella Mac
#ratingval# from #reviews# reviews
Print
Recipe Type: Entree
Author: Mary Fran Wiley
Prep time: 5 mins
Cook time: 20 mins
Total time: 25 mins
Serves: 4
Inspired by/ adapted from Alton Brown’s Stove-top mac & cheese.
Ingredients
  • 8 ounces gluten free pasta
  • 1 egg
  • 1/4 cup plain greek yogurt
  • 1/8 cup whole milk
  • 2 T butter
  • 1 cup shredded mozzarella
  • 1 can fire-roasted tomatoes, drained
  • 1 1/2 t granulated garlic
  • Salt & Pepper
  • Fresh basil (optional)
Instructions
  1. Boil pasta & drain. Return to pot.
  2. Whisk together egg, milk, yogurt & granulated garlic.
  3. Put pot on low burner and add the butter. Stir until butter is melted.
  4. Stir in egg mixture & shredded cheese until a uniform sauce is made. It will be stringy & thick.
  5. Stir in tomatoes & season with salt and pepper to taste.
Google Recipe View Microformatting by Easy Recipe
1.2.4


Strawberry Chocolate Brownies

Strawberry Brownies

Strawberry Chocolate Brownies
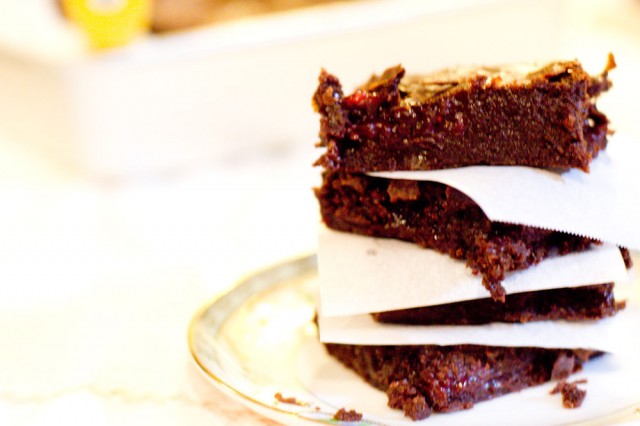
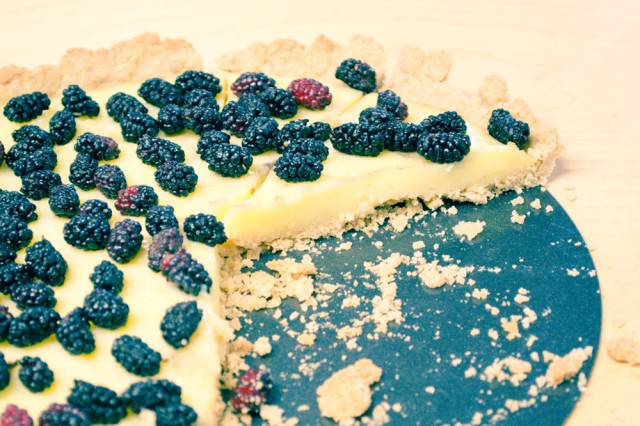
I have been dreaming of this recipe all day. My birthday was Sunday and 2 coworkers had birthdays (and days off) today. And I promised a treat.  This morning, I had a thought: chocolate and strawberries. Ooey, gooey, melt-in-your-mouth deliciousness. These are some darn good brownies. The are one bite and you are sold on being my friend forever in hopes of getting these brownies again good.

I found out that brownies were invented in Chicago in 1893 for the Columbian Exposition. They had apricot glaze and walnuts. The grocery store had strawberries on sale. Strawberries + chocolate = bliss. (You think I like those together?)

I couldn’t just chop up strawberries and toss them in my mom’s brownie recipe. She would probably be pretty mad at me if she knew that I even had that thought. Her recipe is top secret, and I like to share.

I had to come up with something different. I had to come up with something better. Sorry mom. I win this one.

Let this be the end to brownies from a box. The strawberry jam that you make melts into the chocolate and creates an intense chocolate and strawberry flavor. It is like warm, baked fudge. You can’t get this kind of flavor from a box. I know gluten free baking is scary, but you can do it. And, brownies are forgiving – chocolate, butter and sugar make anything delicious.

Strawberry Brownies
#ratingval# from #reviews# reviews
Print
Recipe Type: Dessert
Author: Mary Fran Wiley
Prep time: 30 mins
Cook time: 40 mins
Total time: 1 hour 10 mins
Serves: 16
This brownie recipe is based on a recipe that appeared in Baked Explorations for Salted Caramel Brownies, but these are gluten free and strawberry filled. And thus, they are better.
Ingredients
  • 250 grams (1 quart) strawberries, finely chopped
  • 1/4 cup strawberry liquor (or 1 t vanilla plus a scant 1/4 cup water)
  • 100 grams (1/2 cup) sugar
  • 1 cup water
  • 310 grams (11 ounces) dark chocolate, chopped
  • 230 grams (8 ounces/ 2 sticks) butter, chopped in 1 inch cubes
  • 1 teaspoon salt
  • 10 grams ground flax meal
  • 40 grams sorghum flour
  • 20 grams brown rice flour
  • 20 grams white rice flour
  • 30 grams tapioca starch
  • 30 grams sweet white rice flour
  • 10 grams (2 tablespoons) cocoa powder
  • 300 grams (1 1/2 cups) granulated sugar
  • 110 grams (1/2 cup) firmly packed brown sugar
  • 5 eggs
Instructions
  1. Combine strawberries, sugar, water & strawberry liquor in a medium size sauce pan. Heat over meadium – high heat, stirring frequently until the jam starts to thicken, about 15 minutes. Remove from heat and set aside.
  2. Preheat oven to 350 degrees. Prepare a 9×13 pan with parchment paper, and then grease the parchment paper. On a low burner, melt together chocolate & butter. While chocolate is melting, whisk together flours, cocoa and salt.
  3. Once chocolate & butter have melted, turn off the burner but leave the pot in place. Stir in both the granulated sugar and the brown sugar. Remove pot from burner and stir in 3 eggs. DO NOT BEAT. Once eggs are combined, add in remaining eggs, stirring until just combined. Sprinkle flour over the bowl and stir in slowly. Make sure most lumps are out – but it is ok if there are still a few, they should disappear when baking.
  4. Pour half of batter into prepared pan & smooth with a spatula. Spread in the warm jam, being careful to keep it away from the edges so that it does not burn. Pour the remaining batter on top to cover the jam.
  5. Bake for 35 minutes.
Notes

If you prefer to bake by volume, use 1 1/4 cups all-purpose gluten free flour (such as Jules Nearly Normal Flour).

If you don’t want to make your own strawberry jam, warm up 1 cup of good quality strawberry jam or jelly so that it has the consistency of thick syrup after the batter is ready.

Google Recipe View Microformatting by Easy Recipe
1.2.4


Artisan French loaf from GF Boulangerie

Adopt a Gluten Free Blogger : Bread

Artisan French loaf from GF BoulangerieArtisan bread is one of the things I miss most of all. In fact, I find gluten free bread to taste so terrible, that I hardly ever eat it (although my dad’s English Muffin Bread is quite alright). I think it tastes funny. I am not sure how to say it, but it just tastes off. The texture is dense and chewy. The bread frequently only tastes good warm. And, for the most part, I am really OK with not eating it.

But, I really do miss biting into a slice of bread with the right mouthfeel. You know the one – the insides are tender and moist but there is air in there to lighten things up. The outside is crusty and takes a good bite. I lost all those things when I lost wheat. And I stopped trying to find it.

Imagine my surprise when I saw that a twitter follower had a blog with the most amazing looking loaves of bread. I was hooked and had to bake one. I tried GF Boulangerie’s Artisan French Loaf. oh em gee. I made 2 loaves. I will be baking more. This girl is a gluten free bread savant. She explains why you do certain things, and how her bread differs from the gluten-y type.

Now, I couldn’t find expandex (which the recipe calls for) and my dad has a severe bean allergy, so I had to avoid the bean flour. But, since the recipe was by weight and not my volume, I used regular tapioca starch in place of the expandex and brown rice (because that is what was here) in place of the bean flour. If you need a guide, see my flour substitution chart.

I made this bread and thankfully made 2 batches at once. The first loaf was gone as soon as it was cool enough to eat. My parents (both gluten free) adored it. I couldn’t eat enough and it was 10pm. Now, go bake some bread and take back the dinner roll!

Mulberry tart

Mulberries

mulberry tree! This recipe tastes like childhood. It brings back the days of coming home when the sun went down and playing across every back yard on the block. It tastes like sitting on my dad’s shoulders and grabbing berries from trees as we walked to and from the ice cream shop or a movie. There were a couple of mulberry trees that every summer would be heavy from juicy, sweet berries. It was my favorite part of the walk. My hands would be stained purple from berries when they burst. My shoes would have gooey purple messes on the bottoms. It was summer. At it tasted good.

Imagine how excited I was to discover that there is a mulberry tree in my backyard. Right there, shading my tomato plants. A tree heavy with the flavor of childhood summers.

mulberries

I couldn’t pass it up. Plus, I recieved a tart pan (along with a dutch oven & a gym membership) from Blondie for my birthday. It was fate.

Now, mulberries have a tart & sour flavor if they are not yet ripe, and even at their juicy best, they are not as sweet as a black berry. But they are darn tasty. If you don’t have access to a mulberry tree in your back yard, front yard or down the street, you can always use raspberries, blackberries or strawberries.

Mulberry tart

The tart recipe has been de-glutened from a recipe and technique shared by David Lebovitz. Visit his site for more in-depth directions and photos of the process. There are no gums, just some flax, and you can use my substitution chart if you are working by weight and want to swap out some flours.

Vanilla Bean Tart with Mulberries
#ratingval# from #reviews# reviews
Print
Recipe Type: Dessert
Author: Mary Fran Wiley
Prep time: 15 mins
Cook time: 45 mins
Total time: 1 hour
Serves: 8-10
Thanks to an incredible method shared by David Lebovitz, the tart has an incredibly tender, melt-in-your-mouth crust
Ingredients

For the crust

  • 6 tablespoons (3oz/90 grams) unsalted butter, cubed
  • 1 tablespoon vegetable oil
  • 2 tablespoons water
  • 1 tablespoon vanilla bean paste
  • 1 tablespoon sugar
  • 1/8 teaspoon salt
  • 10 g ground flax seeds
  • 50 g sorghum flour
  • 30 grams brown rice flour
  • 30 grams white rice flour
  • 30 grams tapioca starch

For the pastry cream

  • 1/4 cup cornstarch
  • 1/4 cup + 1/2 cup sugar
  • 1/2 cup plus 1 1/2 cups milk
  • 4 large egg yolks, lightly beaten
  • 1 pinch salt
  • 2 tsp vanilla extract or vanilla bean paste
  • 2 T unsalted butter
  • 1 pint fresh berries, picked over with stems removed
Instructions
  1. For the crust: Preheat the oven to 410º. In a medium-sized ovenproof bowl, add the butter, oil, water, sugar, vanilla and salt. Place the bowl in your hot oven for 15 minutes. The butter should be bubbling and the mixture should be slightly brown around the edges. While it is baking, whisk together your flours. Carefully remove the bowl from the oven. (Don’t be like me and forget a pot holder, it will be HOT!) and dump in the flour and stir it in quickly, until it comes together and forms a ball which pulls away from the sides of the bowl. Put the dough in a 9in tart pan, and when it is cool enough to touch, press it into the tart pan with your hands, pinching dough up the edges. Prick the bottom with a fork and then bake for about 15 mins. The crust should be a light golden brown.
  2. For the pastry cream: While the crust is cooling whisk together cornstarch and 1/4 cup sugar in a mixing bowl. Stir in 1/2 cup of the milk. Blend yolks into the mixture, stirring until smooth. Prepare an ice bath (a very large bowl filled with ice & water – it should be a bowl that the sauce pan you are using does not quite fit in). Combine remaining milk (1 1/2 cups), salt and sugar (1/2 cup) in a medium sized sauce pan (non-reactive is ideal). Bring to a boil over medium heat while stirring constantly. Temper the egg mixture with about 1/3 of the hot milk (you have to whisk constantly – you do not want to cook the eggs unevenly) Add egg mixture to remaining milk mixture and return the pan to the heat. Continue to cook over medium heat, vigorously stirring with a whisk until the mixture boils and a trail forms after the whisk, about 5-7 minutes. Transfer pan to the ice bath and stir occasionally until the pastry cream is cool.
  3. Assemble the tart: Pour pastry cream (or vanilla pudding) into the crust and top with your fresh berries and enjoy the taste of summer.
Notes

If making pastry cream is too fussy, you could try a vanilla pudding.

If you wish to see the original crust recipe, visit David Lebovitz’s site.

Want to make the crust by volume? Use 1 slightly rounded cup of gluten free all purpose flour (I like Jules’ Nearly Normal Flour), if you use a flour without xantham gum or flax, add 1/2 teaspoon xantham gum.

Google Recipe View Microformatting by Easy Recipe
1.2.4
gluten free birthday cake

Classic Birthday Cake

gluten free birthday cakeI spent the afternoon baking today. I made 2 loaves of bread and a birthday cake for my little sister. I made yellow cake from a closely guarded secret family recipe (it is at the end of this post). I have made this cake before with lots of success. It is everything a yellow cake should be – rich and moist with a delicate crumb.

I tried it with a new AP flour blend that my parents had at their house, where I was this weekend for a wedding, my sister’s birthday and a trip to the annual Wilton tent sale. This blend is not one I will buy or use again, because it does not actually work cup for cup. And I know that for most people, a cup for cup blend is the least scary approach to baking. So, here is a recipe that my family has been making for quite a while, copied from the sheet where my mom has it written down.

At least now that it is frosted it looks good. And, the frosting makes it super delicious. (Ok, so I eat cake for the frosting).

Yellow Birthday Cake with Chocolate Frosting
#ratingval# from #reviews# reviews
Print
Recipe Type: Dessert
Author: Mary Fran Wiley
Prep time: 30 mins
Cook time: 25 mins
Total time: 55 mins
Serves: 12
A classic yellow cake with delicious chocolate frosting.
Ingredients
  • 3 cups Gluten-Free Multi-Purpose Flour or 13 1/2 ounces of your own blend
  • 1 teaspoon xanthan gum (omit if using Jules’ Nearly Normal Flour)
  • 1 1/2 cups sugar
  • 1 1/2 sticks unsalted butter, softened
  • 1 teaspoon salt
  • 1 tablespoon baking powder
  • 2 teaspoons vanilla extract
  • 4 large eggs
  • 1 cup room-temperature milk
  • 1 3/4 cups unsweetened natural cocoa
  • 1 1/2 cups confectioners’ sugar
  • 1 cup heavy whipping cream
  • 1 cup unsalted butter, very soft
  • 1/8 teaspoon salt
  • 2 1/2 cups confectioners’ sugar
  • 2 teaspoons vanilla extract (or use chocolate extract if you have it)
Instructions
  1. Preheat the oven to 350°F. Lightly grease 2 8″ round cake pans.
  2. Whisk together the flour or flour blend and xanthan gum.
  3. In the bowl of a stand mixer beat together the sugar, soft butter, salt, baking powder, and vanilla until smooth. Add 2 eggs, and beat for about a minute at a high speed, until fluffy.
  4. Scrape the bowl and beat in the other 2 eggs.
  5. Beat in the milk and flour alternately (adding about a third of each at a time).
  6. Separate the batter evenly between the pans. Bake for about 25 minutes. A cake tester inserted into the middle comes out clean.
  7. Remove from the oven, and cool for 5 to 10 minutes before turning out of the pan to cool on a rack.
  8. Once the cake is cool, you can make the frosting.
  9. Sift together the 1 1/2 cups of confectioners sugar with the cocoa.
  10. Bring the cream to a simmer in a small saucepan. Stirring constantly so the milk does not scald. Whisk this into the powdered sugar mixture. Let cool to room temperature, about 20 mins.
  11. Beat soft butter, vanilla extract and salt until creamy. Add the 2 1/2 cups of powdered sugar and mix slowly until incorporated. With mixer on low, add the chocolate mixture a spoonful at a time.
  12. If the frosting is too loose, add up to an additional half cup of powdered sugar.
  13. Frost the cake and enjoy.
Google Recipe View Microformatting by Easy Recipe
1.2.4