Home » slider » Page 4

Tag: slider

gluten free frybread on a plate

Frybread and local sausage

gluten free frybread on a plate
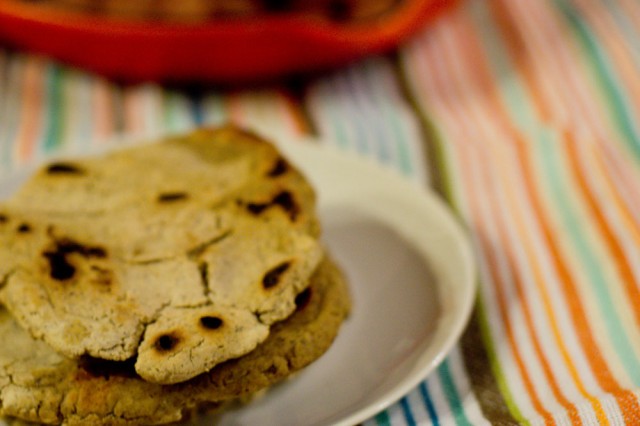
This is one of those times where I make something that I had never eaten a glutinous version of and hope to goodness that it still tastes yummy. I saw a similar recipe on Jamie Oliver’s website and thought that it looked delicious. I made fry bread. And it was good. Not as good cold and left over as it was fresh out of the frying pan. But it was still delicious. It has a smorgasboard of flours. Mainly, because that is what is in my kitchen. 15 kinds of flours and about a half cup of an all purpose blend.

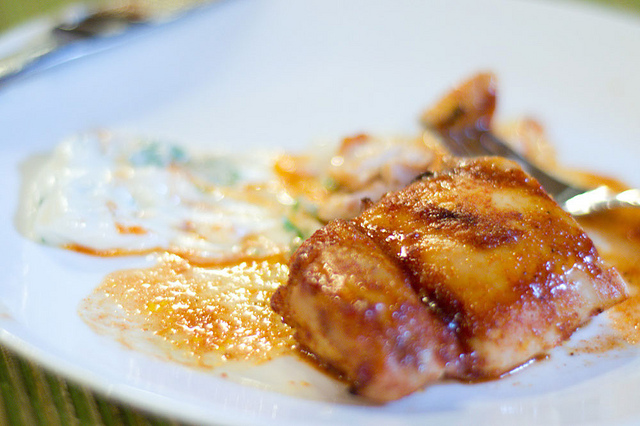
I also needed something to eat with the andouille sausage that I picked up at the University of Illinois’ Meat Sales Room. If you are ever in Champaign on a Tuesday/Thursday afternoon or a Friday morning, I highly reccomend you go grab yourself a bit of what ever it is that they have fresh that day. If you live near a university with an agriculture school, you might be lucky enough to have something like this too. The sausage got rave reviews at our memorial day cookout, and sliced it complimented this fry bread well.

Now, go make this super easy bread to accompany whatever it is that you are eating tonight.

Frybread
#ratingval# from #reviews# reviews
Print
Recipe Type: Entree
Author: Mary Fran Wiley
A whole grain frybread that has a smoky flavor, even if you make it in a skillet.
Ingredients
  • 5 oz ground flax seeds
  • 3 oz sorghum flour
  • 3 oz brown rice flour
  • 2 oz buckwheat flour
  • 1 oz sweet white rice (glutinous rice) flour
  • 5 oz corn starch
  • 5 oz tapioca starch
  • 1 T baking powder
  • 1 T coriander (optional)
  • 1 t cumin (optional)
  • 1 t salt
  • 1 teaspoon honey (optional)
  • 1 cup water (you may not need it all, or you may need more – this is just how much I used)
Instructions
  1. Whisk dry ingredients together to create a uniform powder.
  2. Add the honey, if usuing. Mix in water 1/4 cup at a time just until you have a dough that is similar to a sticky play dough. Knead it to make sure that it is well combined. Let rest so that the water is absorbed by all the grains for about 10 minutes.
  3. Divide the dough into six balls and press into pancake shapes between your palms. They should be 1/4 inch thick.
  4. Cook in a hot skillet that has been lightly oiled, or cook on a grill for about 3 minutes per side.
  5. Keep warm until all are cooked and enjoy promptly.
Notes

Do not substitute the flax, it is the binding agent. It is also very good for you.

If you need to bake by volume, use 2 cups of an all purpose or whole grain flour blend. The absorption rate may differ, so you may require more or less water than I needed.

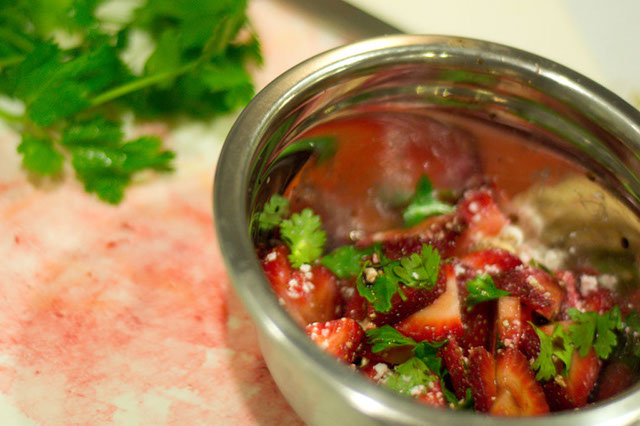
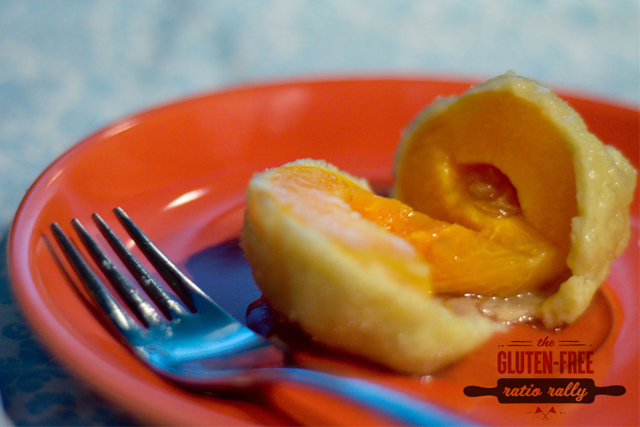
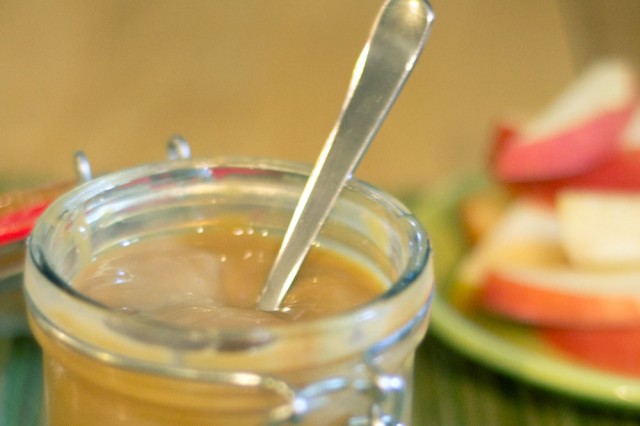
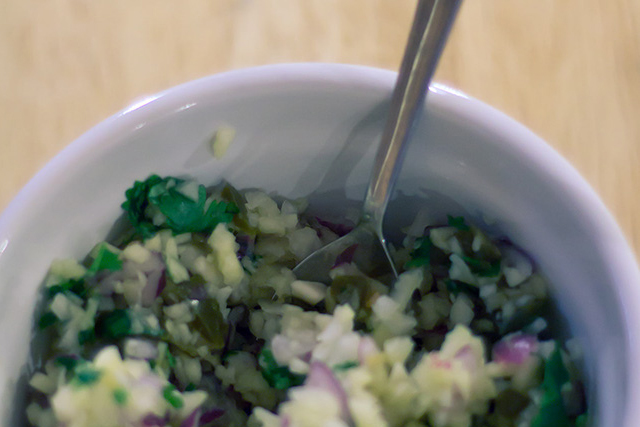
I served mine with grilled andouille, a yogurt sauce, lentils and feta, but any spicy topping will be delicious.

Google Recipe View Microformatting by Easy Recipe
1.2.4


Chai Cream Puffs

Ratio Rally: Pâte à Choux

cream puuffsgluten free ratio rally logoI am a joiner. And this time it was for something really great – the blogging event started by Shauna at GlutenFreeGirl – the Gluten Free Ratio Rally. It is all about the relationship between the ingredients. It gives you freedom to just cook. And bake. We start with a ratio for a well known (& loved) product and go from there.

This month’s rally was Pâte à Choux. A perfect opportunity to indulge in French pastry. I adore french pastries. (Okay, I adore all pastries). This particular technique for pastry dough has many applications – from sweet to savory, I had to stop myself from cooking myself into a sugar coma. After reading up on the dough, I found out that there are so many different things that you can make with this dough. There were the usual: eclairs, gougeres and profiteroles (cream puffs), the extravagant: croquembouche (a large number or profiteroles) and St. Honoré Cake, the surprising: churros and the one I had never heard of and absolutely had to make and make my own: Marillenknödel.

Chai Cream Puffs

I needed to start with the basic Pâte à Choux. The ratio here is 2:1:1:2. 8 ounces liquid, 4 ounces fat, 4 ounces flour, 4 eggs (8 ounces). Simple math and stunning results.  Getting this dough right, once you understand what is happening, is simple (although easy to mess up). This recipe works in traditional baking, not because of gluten, but because of the starches and the eggs. Like all baking (especially pastries) it is important that you pay close attention to what you are doing. There are a very specific chain of chemical reactions taking place.

This mix works because there is a good mix of starches & whole grains. If you need to know what flours to swap for (the brown rice & sorghum are whole grains, the sweet white rice and tapioca are starches), you can reference this chart. Only replace starches with starch and grains with grains for predictable results.

If you want to read about my foray into German apricot dumplings, read part 2 of this post.

A special thanks to Erin at the Sensitive Epicure for hosting this month’s event!

And here is a list of this month’s participants:

[box type=”info”]If you have never baked by weight, I encourage you to try it. Scales can be obtained relatively inexpensively and help you to achieve consistent results in your baking. [/box]

Gluten Free Pate a Choux with Chai Pastry Cream
#ratingval# from #reviews# reviews
Print
Recipe Type: Dessert
Author: Mary Fran Wiley
Prep time: 60 mins
Cook time: 40 mins
Total time: 1 hour 40 mins
Serves: 24
Cream Puffs with a spicy twist
Ingredients
  • 8 oz (by weight) whole milk (a scant cup)
  • 4 oz (1 stick) butter
  • 1.2 oz sorghum flour
  • 1.2 oz brown rice flour
  • 8 oz tapioca flour
  • 8 oz sweet rice flour
  • 4 eggs
  • 1/4 teaspoon xantham gum
  • 1/2 teaspoon salt
  • 1/4 cup cornstarch
  • 1/4 cup + 1/2 cup sugar
  • 21/4 cups milk
  • 2 T loose chai tea
  • 4 large egg yolks, lightly beaten
  • 1 pinch salt
  • 2 tsp vanilla extract
  • 2 T unsalted butter
Instructions
  1. Make the choux: Whisk flours, cardamom & xantham gum together. Boil milk, butter & salt. Reduce heat to medium and add the flour all at once. Stir until ingredients start to pull away from the sides of the pot. Remove from heat & put in the bowl of a stand mixer. Add eggs one at a time, incorporating each one before adding the next one. Chill the dough covered for at least half an hour.
  2. Make the chai milk: Simmer the milk and chai over medium-low heat for 20 mins, stirring occasionally. Strain milk into measuring cup, discarding any extra.
  3. Make your puffs: Preheat oven to 425 degrees.Spoon small mounds of dough onto a parchment lined baking sheet about 2 inches apart. Bake for 20 mins and then reduce temperature and bake for another 20 mins. Remove from oven and let sit for 5 mins. Poke a hole in the bottom (with a skewer and transfer to a cooling rack.
  4. Prepare the pastry cream. While the puffs are cooling. whisk together cornstarch and 1/4 cup sugar in a mixing bowl. Stir in 1/2 cup of the milk. Blend yolks into the mixture, stirring until smooth. Prepare an ice bath (a very large bowl filled with ice & water – it should be a bowl that the sauce pan you are using does not quite fit in). Combine remaining milk (1 1/2 cups), salt and sugar (1/2 cup) in a medium sized sauce pan (non-reactive is ideal). Bring to a boil over medium heat while stirring constantly. Temper the egg mixture with about 1/3 of the hot milk (you have to whisk constantly – you do not want to cook the eggs unevenly) Add egg mixture to remaining milk mixture and return the pan to the heat. Continue to cook over medium heat, vigorously stirring with a whisk until the mixture boils and a trail forms after the whisk, about 5-7 minutes. Transfer pan to the ice bath and stir occasionally until the pastry cream is cool.
  5. Assemble the puffs. Once everything is cool, slice the top third off of your puffs and pipe in the pastry cream. Melt white chocolate in the microwave on medium power, stirring every 30 seconds until melted. Replace tops and drizzle with white chocolate. Share.
Notes

To cook by volume: use 1 cup of sifted flour. No tapping of the measuring cup. You want 4 ounces of flour, which is the average weight of a cup of cake flour. You want 7/8 cups of whole milk.

Google Recipe View Microformatting by Easy Recipe
1.2.4

Ratio Rally: Pâte à Choux pt. 2

gluten free ratio rally logoIf you missed part 1 of my recipes for this month’s ratio rally, you can find it here.

A Marillenknödle is a southern German and Austrian treat made with apricots (Marille) and wrapped in either choux pastry or a potato dough. I wanted to be adventurous, so I added some crystalized ginger chips to the inside and made a cardamom sugar breadcrumb to dust the outside. The sweetness of these depends on the sweetness of your apricots. But they taste like summer should.

I made the regular choux for some chai cream puffs, and they turned out fantastically. My apricot dumplings on the other hand, were a bit more frustrating. I used the same basic choux dough, but all I had was a sticky mess. I did some googling, and although wikipedia and tons of other sites said that choux is used in making Marillenknödle, almost all of the recipes that I could find were ones that used cheese and were not actual choux. Braving it and thinking that maybe wikipedia was right (and all the sites that said that choux was used to make these), I kept looking. Then, I found a blog in French & German where the poster had the same problem: the dough stuck more to her hands than the apricots. Solution: dip your hands in cold water before making each dumpling. It worked like a charm – as long as I didn’t have too much dough.marillenknodel

I made a second batch after figuring out that researching a French pastry term with a German delicacy was going to fail me, I started looking in German, found the correct name for the dough Brandteig. Some German YouTube videos and 20 recipes later, I had it figured out.

Gluten Free Marillenknodel
#ratingval# from #reviews# reviews
Print
Recipe Type: Dessert
Author: Mary Fran Wiley
Prep time: 45 mins
Cook time: 10 mins
Total time: 55 mins
Serves: 8
Ingredients
  • 8 oz (by weight) whole milk
  • 4 oz (1 stick) butter
  • 1.2 oz sorghum flour
  • 1.2 oz brown rice flour
  • 8 oz tapioca flour
  • 8 oz sweet rice flour
  • 4 eggs
  • 4 oz ricotta, strained to remove extra whey
  • 1/4 teaspoon xantham gum
  • 1/2 teaspoon salt
  • 8 sugar cubes
  • chopped crystalized ginger
  • 8 apricots
  • 1 1/2 cups gluten free bread crumbs
  • 1/4 cup sugar
  • 4 T butter
  • 1 teaspoon cardamom
Instructions
  1. Melt the 4 T of butter in a skillet and add the bread crumbs. Toast until golden and fragrant (about 5 mintues). Mix with 1/4 cup sugar and the cardamom. Set aside.
  2. Slice each apricot along the slit (halfway around) and remove the pit.
  3. Fill the holes with a sugar cube & a few bits of crystalized ginger.
  4. Whisk flours, cardamom & xantham gum together.
  5. Boil milk, butter & salt.
  6. Reduce heat to medium and add the flour all at once.
  7. Stir until ingredients start to pull away from the sides of the pot. Remove from heat & put in the bowl of a stand mixer.
  8. Add eggs one at a time, incorporating each one before adding the next one.
  9. Add in the ricotta & mix well.
  10. Chill the dough for at least an hour.
  11. Bring a large pot of water to a boil.
  12. Get a bowl of cold water out.
  13. Dip your hands in cold water and wrap the choux around your apricots. Dipping your hands between each dumpling. This prevents sticking.
  14. Drop the dumplings in boiling water and cook for 5-10 minutes.
  15. Drain the dumplings on a slotted spoon.
  16. Roll them in sugar & toasted bread crumbs once the majority of the water has dripped off.
  17. Serve warm.
Google Recipe View Microformatting by Easy Recipe
1.2.4


Sweet & Hot Chicken Thighs

When I am not baking (which, in preparation for this month’s gluten free ratio rally, I have been doing each night), I am usually cooking something delicious for dinner before I do things like design gluten free flour reference charts and illustrate children’s books.

I saw chicken thighs while out grocery shopping and decided that I had to make something with them. I don’t buy meat often because it is just me eating it, and it just feels like too much hassle. But the chicken was calling to me.

I also had some University of Illinois honey (so famous that it made the Colbert Report) that I got as a Christmas gift and it was beginning to crystallize, so I knew I was going to make a hone chicken thigh.

And really, what good is chicken without sauce? No good. And since eating mayo is not so good for you, I blended it with yogurt & cilantro for a refreshing, tangy dipping sauce.

Sweet & Hot Chicken Thighs
#ratingval# from #reviews# reviews
Print
Recipe Type: Entree
Author: Mary Fran Wiley
Prep time: 5 mins
Cook time: 7 mins
Total time: 12 mins
Serves: 4
Ingredients
  • 1/2 cup honey
  • 2 T cider vinegar
  • 1 1/2 t chili powder
  • 1/2 t cayenne
  • 1 t granulated garlic
  • 8 boneless, skinless chicken thighs
  • 1/4 c plain Greek yogurt
  • 1/4 c canola mayonnaise
  • 1/2 c chopped cilantro
  • salt & pepper
Instructions
  1. Turn on broiler and prepare broiler pan.
  2. Whisk together the honey, vinegar, chili powder, cayenne, garlic and salt & pepper to taste.
  3. Brush chicken thighs with sauce and place under the broiler.
  4. After 5 minutes, turn over and brush with sauce. Return to oven.
  5. During this time, whisk together mayo, yogurt, cilantro and salt & pepper to taste.
  6. Take them out, turn them over and brush with sauce again.
  7. After 1 minute turn and brush the thighs one last time.
  8. Return to oven for 1 minute.
  9. Serve with a dallop of yogurt sauce on the side.
Google Recipe View Microformatting by Easy Recipe
1.2.4


Review: On A Stick

On A Stick Cover
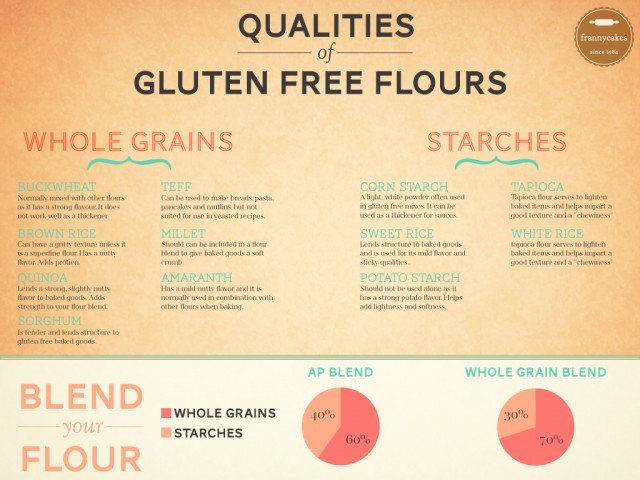
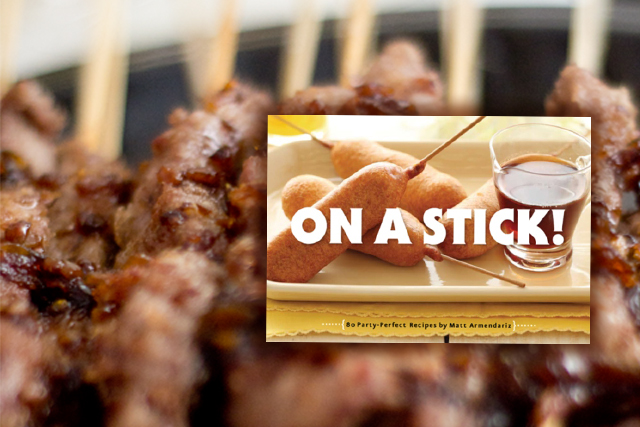
I love cookbooks. I love cookbooks even better when they are filled with amazing photos. I love them the most when there are recipes that are inherently gluten free or require simply choosing one’s ingredients carefully. This is one of those books. Now, if you want to make the fried chicken & waffles on a stick, you are going to have to do some thinking & planning, but for most of the recipes, they were either inherently gluten free or could be made gluten free by using a gluten free equivalent (bread crumbs, soy sauce, etc.).

Orange Beef on a stickIn the introduction of the book, On a Stick, the author (food blogger & photographer Matt Armendariz) states that food just tastes better on a stick. And judging by just how fast the food that I made out of his cookbook for a party this weekend dissappeared, he was right.

For the most part the food in this book is fun and inventive. And the recipes are simple. I made 2 things out of the book for a meat-themed party on Saturday, and as I was frying my orange beef on a stick, people were taking them before I could even get the sauce on them.

I am sure part of the flavor success was the $15/lb flank steak that I used for the meat skewers, but really the sauce made the meat sing. It was orangey & soy-y in the right proportions and made my mouth sing. And it made all the boys drool. I might even make it off the stick (gasp!) as a dinner partner with rice.Grilled fruit salad

I also made the grilled fruit, although that failed and the fruits fell off the stick. But the mint-lime syrup was delightful and I ended up with a grilled fruit salad. Yum!

And yes, there is even a cake pop recipe in this book. Although, I am waiting for an excuse to make the sangria on a stick (maybe it will work in my Zoku….) and the margarita jello shots on a stick. I should stop myself now, because there are so many more recipes that I want to try.

Although I received a free copy of this book to review, I would definitely say that it is a keeper and great addition to my cookbook collection.

Girls eating orange beef on a stick

Jar of dulce de leche

One ingredient caramel sauce

Jar of dulce de lecheI was on TV this morning, and I have to tell you, I sure did feel special. I cooked until 1 am last night and packed everything up and at 6:00 this morning I was on my way to the TV station.

I was going to make my 5 minute sauce, but I didn’t have a hot plate. I also didn’t have a lot of food laying around that I could whip up into something fabulous. But, I was itching to try something I have seen on the internet. And, the possibility of exploding food is always exciting. So this, is mostly a guide and a reference point for when I post me crepe recipe tomorrow, you can know (and maybe already have made) this amazing filling.

This is a great way to experiment using an ingredient that you probably only have around because you were making some retro cake or Alton Brown’s Stovetop Mac & Cheese.

Now, go boil some water and make some of the most delicious caramel sauce you have ever had. And watch the video of me explaining it on TV.

One ingredient caramel sauce
#ratingval# from #reviews# reviews
Print
Recipe Type: Dessert
Prep time: 23 mins
Cook time: 3 hours
Total time: 3 hours 23 mins
Serves: 8
The easiest caramel sauce (Dulche de Leche) that you will ever make.
Ingredients
  • 1 14oz can of sweetened condensed milk (Eagle Brand is gluten free)
Instructions
  1. In a large pot, bring enough water to cover the can to a boil.
  2. Shake the can well.
  3. Carefully submerge it in the water using tongs.
  4. Check back regularly to make sure there is enough water to cover the can. If water level is getting low, just add more water.
  5. Once you have boiled for 3 hours, turn off the heat and leave the can in the water.
  6. Let the can cool in the water.
  7. When you open the can, you will have delicious caramel sauce.
Notes

If you let the water level get lower than the can, you run the risk of the can exploding. So keep an eye on the pot.

Google Recipe View Microformatting by Easy Recipe


Apple Jicama Salsa

Apple Jicama Salsa in a bowlI bought jicama (also known as yam bean) at the grocery store last time I was there. This is an odd looking food – almost looking like a rutabaga on the outside. Once you peel off the brown papery skin, you are left with a crunchy, almost sweet vegetable. It looks like a potato on the inside, but unlike a potato, is delicious raw. Some people cook it in soups and stir-frys. It is originally from Mexico and is the only edible part of the plant (the seeds are used to poison bugs & rats).

I love eating it raw, in salads and as a chip. I forgot that I had bought this and it was at the bottom of my fruit bowl on the counter. When I found it, I felt that I had won the lottery.

I grabbed an apple, some onion and some jalapenos and made a salsa. And then the worst thing happened, I realized that I had no chips or crackers with which to eat my delicious concoction.

Apple Jicama Salsa
#ratingval# from #reviews# reviews
Print
Recipe Type: Dip
Author: Mary Fran Wiley
Prep time: 15 mins
Total time: 15 mins
Serves: 8
A refreshing, not hot salsa
Ingredients
  • 1/2 a jicama
  • 1 large apple (Pink Lady or Honey Crisp if available)
  • 1 small red onion
  • 1 clove garlic
  • 8 pickled jalapeno rounds
  • 2 T juice from jalapenos.
Instructions
  1. Peel & chop all the large vegetables.
  2. Wash & chop the cilantro.
  3. Chop the jalapenos and add them to taste.
  4. Mix all the chopped ingredients together and pour in the jalapeno “juice”.
  5. Refrigerate overnight.
Google Recipe View Microformatting by Easy Recipe
1.2.4


Strawberry Chocolate Chip Loaf

Strawberry Chocolate Chip Loaf

Strawberry Chocolate Chip LoafStrawberries were on sale at the grocery store on Saturday and it was easy to see why – they were so ripe they were about to turn bad. That meant that they were perfect for baking with.

Frankly, I feel that there is almost no combination as perfect as strawberries and chocolate. (Although, next time I have an idea that involves chocolate, I will probably say the same thing). I rummaged around my cabinets and was quite pleased to discover that I did indeed have some chocolate chips laying around. I would have had an entirely different post had there not been any in the cabinet. Most likely about what a good idea I had and how I just had to eat the strawberries plain (or how I made them into this salad).

I was originally going to make muffins, but I have this loaf pan that I got for Christmas that I really wanted to use. So, thanks for the loaf pan mom! I finally made a bread!

Strawberry Chocolate Chip Bread
#ratingval# from #reviews# reviews
Print
Recipe Type: Quick Bread
Author: Mary Fran Wiley
Prep time: 15 mins
Cook time: 80 mins
Total time: 1 hour 35 mins
Serves: 12
An easy, summery quick bread without xantham gum
Ingredients
  • 2 cups GF all-purpose flour blend (I used Cheatin’ Wheat Gluten Free flour)
  • 2 T flax meal
  • 1/2 cup sugar
  • 1/2 teaspoon salt
  • 1 tablespoon baking powder
  • 3/4 cup milk (I only had So Delicious coconut milk on hand…use whatever milk you have)
  • 1/4 cup canola oil
  • 2 large eggs
  • 1/2 cup chopped strawberries
  • 1/2-1 cup chocolate chips
Instructions
  1. Preheat your oven to 500°F.
  2. Whisk the dry ingredients together in a large mixing bowl.
  3. Beat the liquid ingredients together — milk, oil and eggs — until they are light.
  4. Add the wet ingredients to the dry ingredients and whisk together until just blended. It is ok if it is a little lumpy.
  5. Add in the strawberries and chocolate chips and give it a quick stir.
  6. Pour into a standard sized, greased loaf pan and place in the oven.
  7. Lower the temperature to 350 degrees.
  8. Bake for 45 – 60 minutes.
  9. You could also make this into muffins by using a muffin tin and baking at 400 for 15-20 minutes.
Google Recipe View Microformatting by Easy Recipe
1.2.4


Strawberry Salad in a bowl

Strawberry Feta Salad

Strawberry Salad in a bowlI had a craving for fresh fruit this weekend. It was especially strong when I realized that the farmer’s market in town had started and that I had slept through almost all of it on Saturday morning.

Disappointed, I went to Meijer instead. I didn’t need much in the way of food, just a few things (you know cereal fit for a 5 year old and some milk to have it with and that fruit that I was craving).

Today, while putting together recipes to post this week (I am going to be out of town and on local television, so I need to put these posts together in advance), I got hungry.

Faced with more strawberries than I needed for tomorrow’s quick bread, I saved some for myself to eat. I dressed them up with big-girl accompaniments (unlike my love of strangely colored food, shaped pasta and infantile cereal might lead you to believe, I have excellent taste in food).

Without further ado, a summer salad that can be a side, an appetizer or even a dessert.

Strawberry Feta Salad
#ratingval# from #reviews# reviews
Print
Recipe Type: Salad
Author: Mary Fran Wiley
Prep time: 5 mins
Total time: 5 mins
Serves: 2
Ingredients
  • 1 cup sliced strawberries
  • 2 oz crumbled feta
  • 1/4 cup cilantro leaves, chopped
  • 1/8 cup balsamic vinegar
Instructions
  1. Toss salad ingredients and then drizzle with vinegar to taste immediately before serving.
Google Recipe View Microformatting by Easy Recipe
1.2.4